1. Simulation Cloud Platform User Manual
Current latest version: R2023d(Release Date:2024-02-21)
1.1 Platform introduction
The simulation cloud platform mainly gathers various resources such as industrial software, computing power, small and medium-sized enterprise users, professional application talents, characteristic professional consulting institutions, application development communities, knowledge bases, parameter libraries, model libraries, etc. Through cloud services, it provides users with design modeling, simulation analysis, simulation applications for specific scenarios, data storage, expert support, and other services.
Simulation cloud is widely used in simulation database/model base/knowledge base management tools, multidisciplinary simulation solving environments, complex model simulation solving environments, collaborative visualization and analysis evaluation portals, universal portals, and other fields. Simulation cloud high-performance computing is applied to structural analysis, fluid analysis, remote post-processing, electromagnetic field analysis (follow-up support); Currently, the maximum number of open parallels is 64 cores.
Special reminder: The Suochen's pre-processing software and Simulation Solver software versions available on the Simulation Cloud are customized versions and do not include all the functions of our software. We will provide recommended functional modules for online platform users.
2. Basic Operations of the Portal
The simulation cloud adopts a unified single sign on method. After successfully logging in with a username and password, it will jump to the homepage. The homepage includes dashboard, public, forum, help, and personal center functions. The core function of simulation cloud is the dashboard, where you can access the Suochen's pre-processing software and view simulation results.
2.1 Account and login
2.1.1 Log in
The simulation cloud is divided into two versions: private cloud and public cloud. The two login methods are described in detail below.
- Private Cloud:It Adopts unified single sign-on(SSO) method, supporting direct connection to AD domain controllers, using existing enterprise data, and also supporting online registration
- Public Cloud:It supports email registration and login, and will support access to QQ, WeChat, Alipay and other login methods in the future
Both private cloud and public cloud can provide login services for other integrated applications. The simulation cloud login interface is shown below:
2.1.2 System homepage
After successfully logging in to the simulation cloud login interface, it will jump to the system home page, which displays some basic information of the simulation cloud system, such as service display, High-performance computing, example display, and application fields of the platform. Through the homepage, you can jump to six modules: Home, Dashboard, Public, Forum, Help, and user management, as shown in the following figure:
2.1.2.1 Introduction to the main functions of simulation cloud
The main functions of the simulation cloud are divided into six parts: Home, Dashboard, Public, Forum, Help, Course. The 'dashboard' is the core function (detailed in Chapter 2.2). The system menu is shown in the following figure:
2.1.2.2 Introduction to homepage display content
The home page consists of four parts: service presentation, High-performance computing, example presentation and platform support, which are described in detail below.
- Service display :
This section mainly displays existing solvers, which currently include four parts: design modeling, mesh generation, fluid solving, and structural solving (new solvers will be added in the future), as shown in the following figure: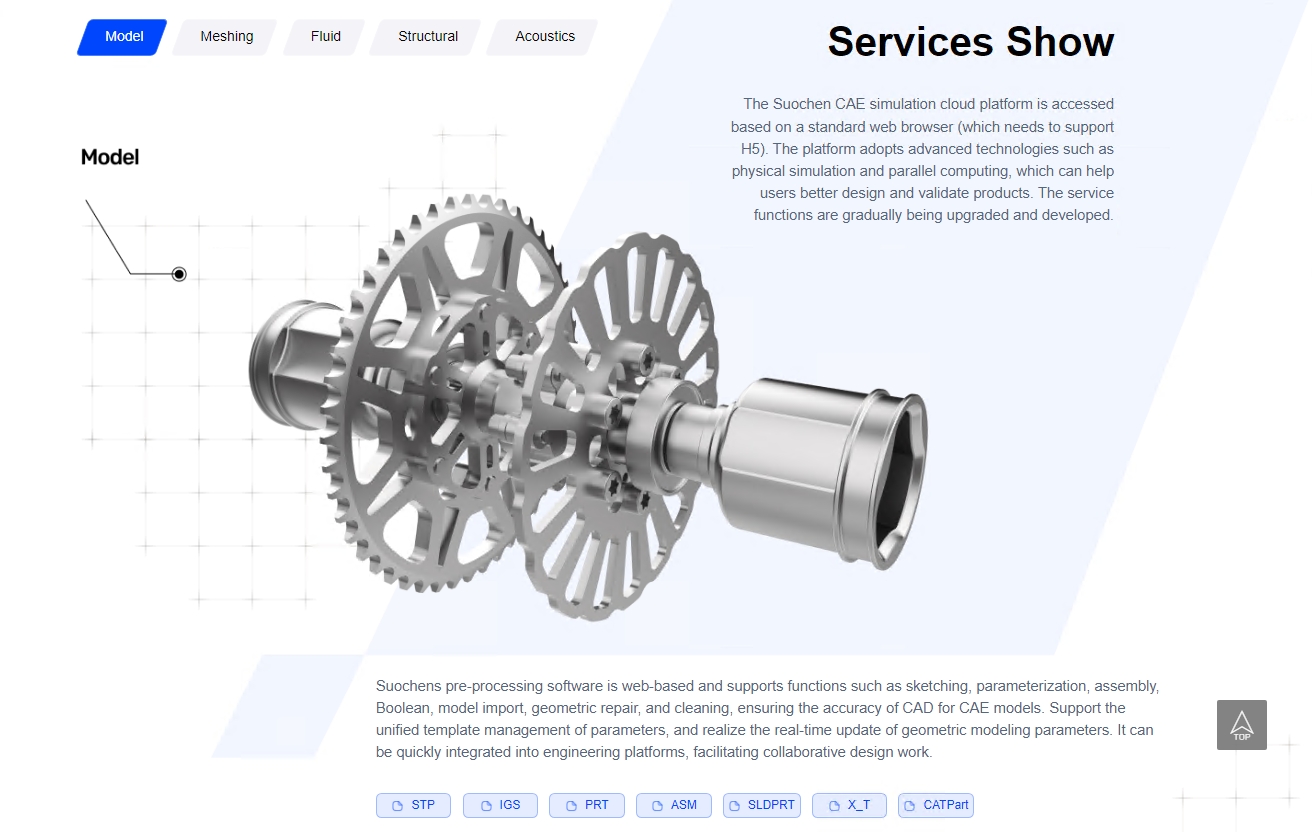
- High performance computing :
The simulation cloud platform is based on the High-performance computing center, providing up to thousands of servers to run parallel computing tasks at the same time, and helping users save simulation time with ultra-low machine hour costs. The application fields include structural analysis, fluid analysis, remote post-processing, and electromagnetic field analysis (subsequent support); Currently, the maximum number of open parallels is 64 cores. - Example display :
This section displays the hot projects recommended by the platform, covering simulation fields such as ships, energy, automobiles, electronics, architecture, machinery, etc. The platform enables design modeling and physical simulation, as shown in the following figures: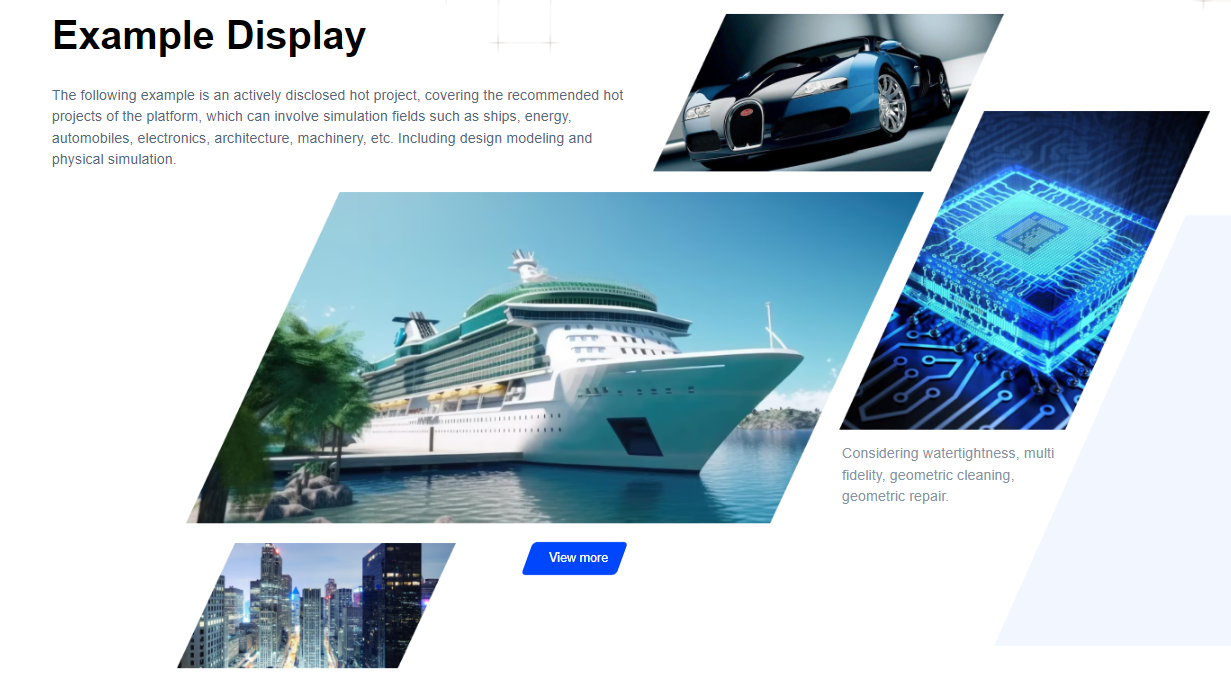
- Platform support :
The simulation cloud platform mainly gathers various resources such as industrial software, computing power, small and medium-sized enterprise users, professional application talents, characteristic professional consulting institutions, application development communities, knowledge bases, parameter libraries, model libraries, etc. Through cloud services, it provides users with design modeling, simulation analysis, simulation applications for specific scenarios, data storage, expert support, and other services, as shown in the following figure:
2.1.3 User Personal Information
After the user successfully logs in, the login information on the right side of the menu bar will change to avatar+username. When the mouse is moved over the login information, select 'Profile' from the pop-up drop-down box to enter the User Personal Center module, as shown in the following figure: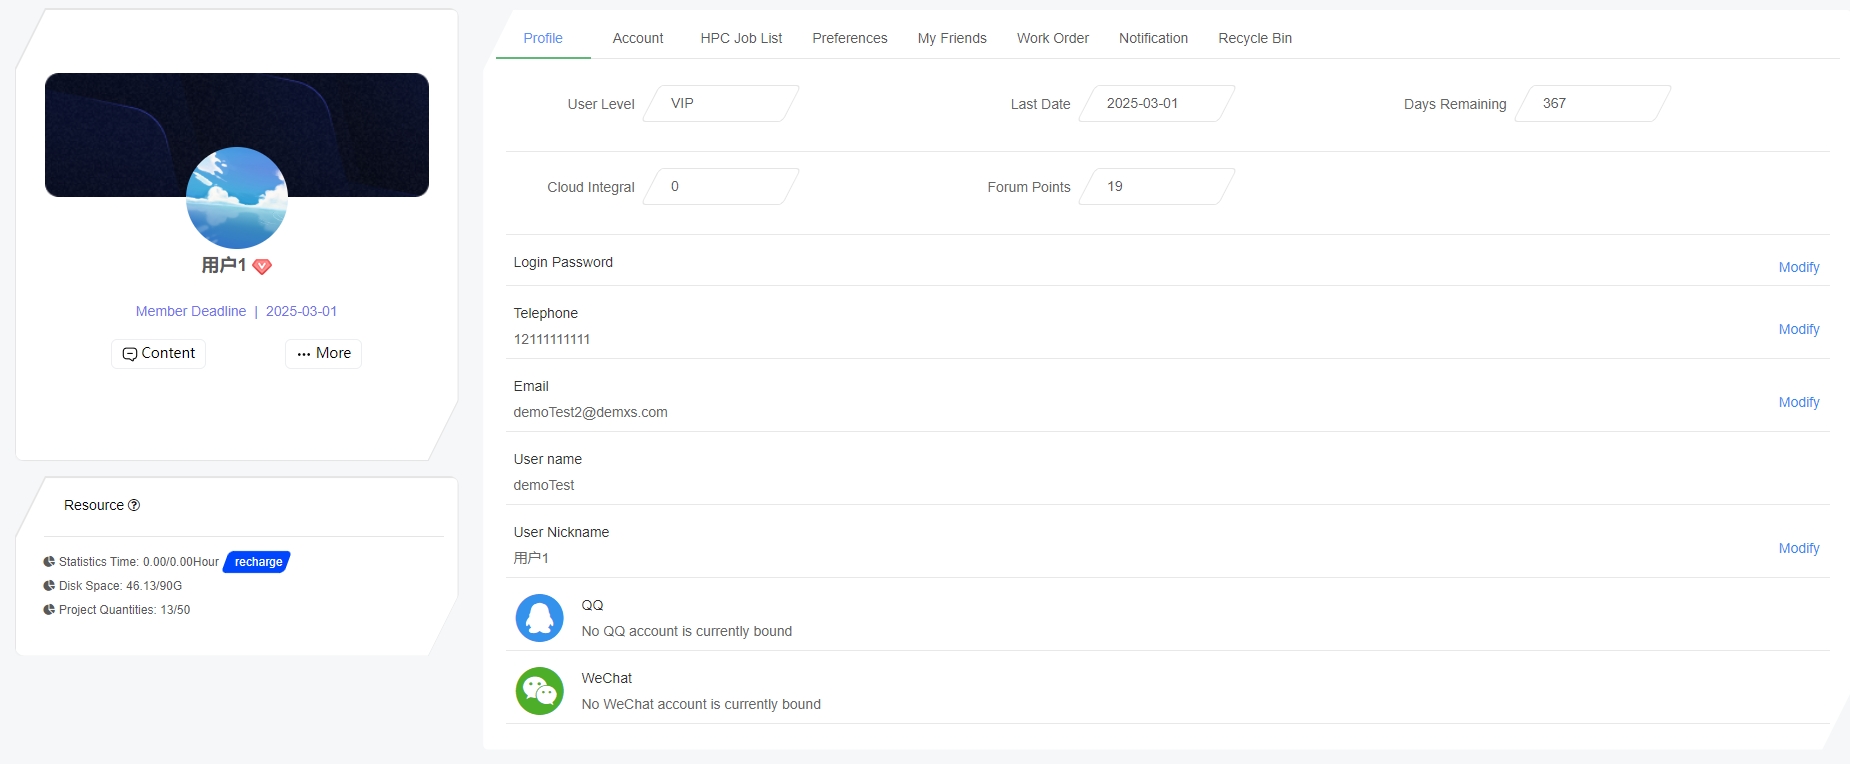
In the personal center module, the information of the current logged in user can be viewed and modified, such as resetting password, modifying phone number, modifying email address, adding nickname function (the nickname function will be displayed in the forum module, and the current username will be displayed by default when there is no nickname for posting) (the binding QQ and WeChat functions are not currently open). The following will provide a detailed explanation of these functions.2.1.3.1 Replace user avatar
Click on the user profile on the left, and the system will pop up an image clipping box. Here, we can upload, zoom in and out, and rotate the cropped image. After adjusting the image, we need to click the "Finish" button to save the user profile. The image clipping box is shown in the following figure: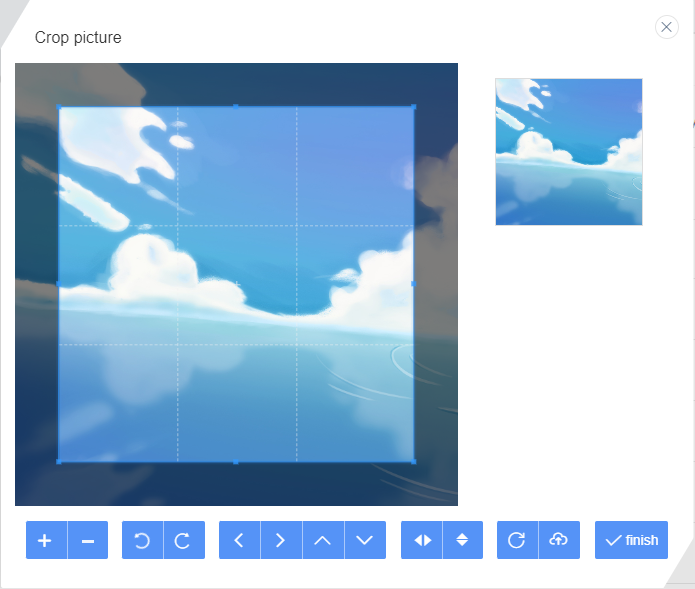
2.1.3.2 Enter the management background (only administrators can see this option)
After logging in to the system with administrator privileges, a button will be displayed under the user profile on the left side of the personal center page. Clicking this button will automatically redirect the system to the simulation cloud background login page. Since we have already logged in, we do not need to enter the account password again. Simply click the login button on the redirect page, and the page will automatically redirect to the simulation cloud background management system. (Detailed introduction of the backend management system in Chapter 5), the simulation cloud background jump page is shown in the following figure:
2.1.3.3 Viewing Resource Information
There is a resource information card under the user profile on the personal center page, where you can view the number of core hours used and all core hours, used disk space, and all disk space, as shown in the following figure: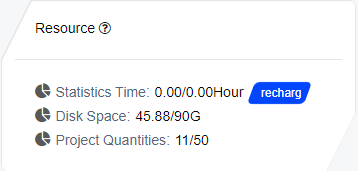
2.1.3.4 Modify basic information
On the basic information page of the user's personal center, we can modify the user's login password, phone number, email address, nickname (which is displayed when posting comments on the forum page). For example, if we want to modify a user's email address, we first need to click the modify button after the email address. The system will display the email modification option, enter a new email address in the text box, and click save to complete the modification. The email modification page is shown below:
The modification of mobile phone numbers and nicknames is similar, which will not be explained here. It should be noted that changing a user password requires verifying the original user password first, and only after successful verification can the modification be made.2.1.3.5 Account management
In the account management interface, you can view the product list and select the appropriate product to place an order based on user needs. After placing a successful order, it will be displayed in the order record list below, allowing for payment, deletion, and cancellation of orders. The account management page is shown in the following figure: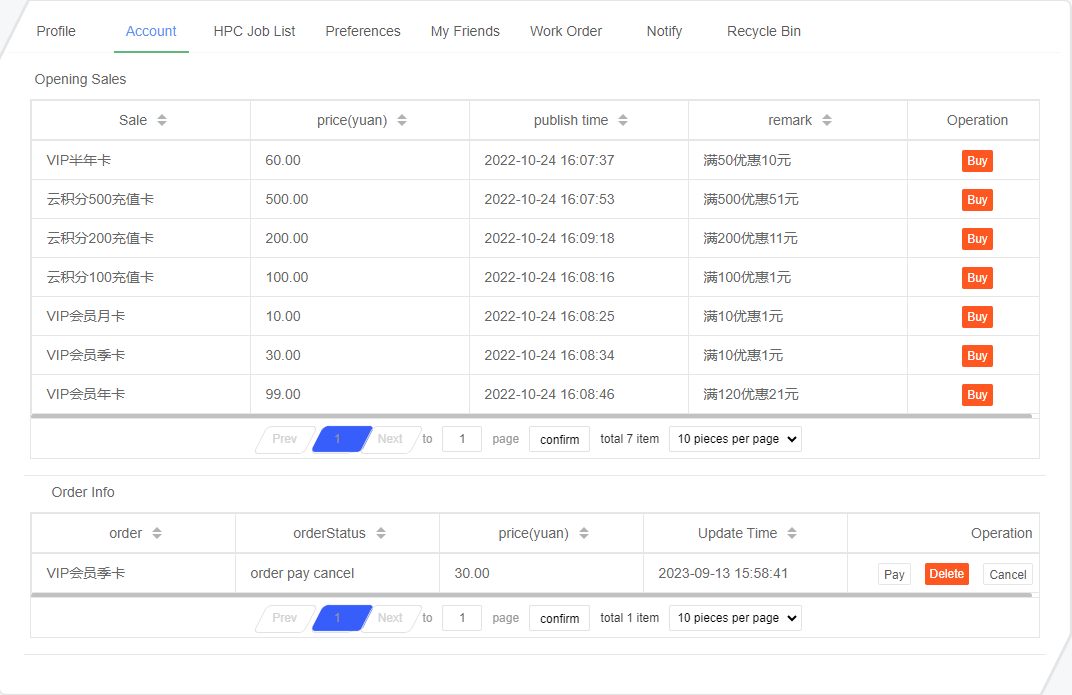
2.1.3.6 High-performance computing List
Since High-performance computing consumes system resources, we can view high-performance execution projects, consumption machine hours, task status, etc. so that we can manage tasks efficiently and avoid unnecessary resource waste. The account management page is shown below: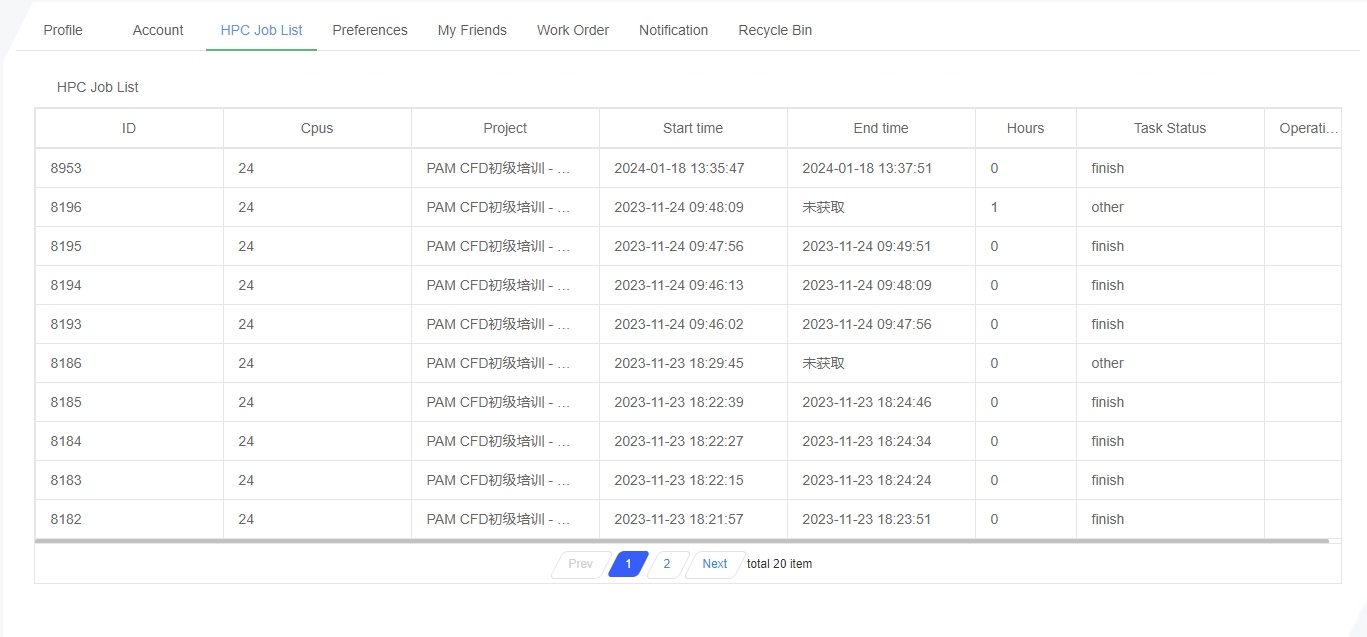
2.1.3.7 Preferences
Here we can manage the version of Suochen's pre-processing software. Click on the dropdown box to view various versions of Suochen's pre-processing software. If you do not make a selection, the system will default to the Suochen's pre-processing software version (the default version is the recommended version). After selecting the version, the Suochen's pre-processing software version we use in the Workbench is the one selected here. Suochen's pre-processing software language settings can be either Chinese or English.The preference setting interface is shown in the following figure: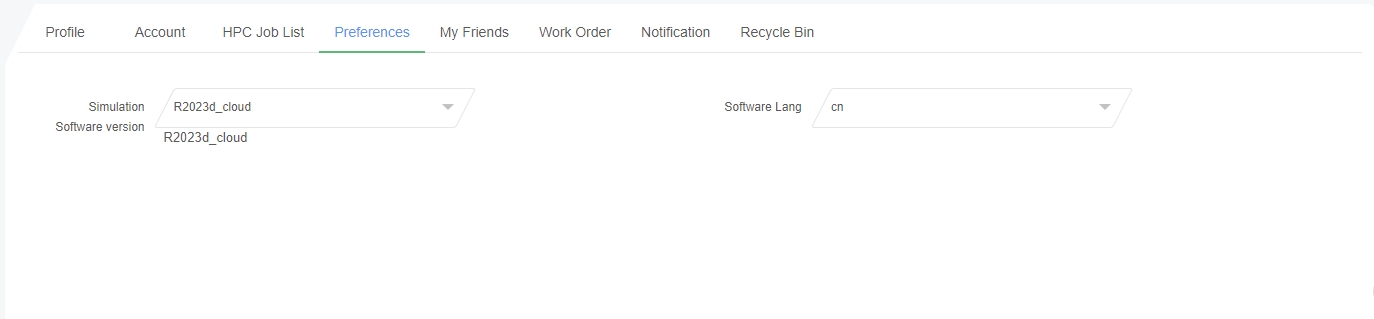
2.1.3.8 My friend
My friend module mainly includes three basic functions: being able to be added as a friend, friend list, and message notifications. It should be noted that there is an option above the friend list that can be added as a friend. Only by selecting this option can others find and add it as a friend. Below, we will provide a detailed explanation of the friend list, adding friends, and message notification form. My friend interface is shown in the following figure: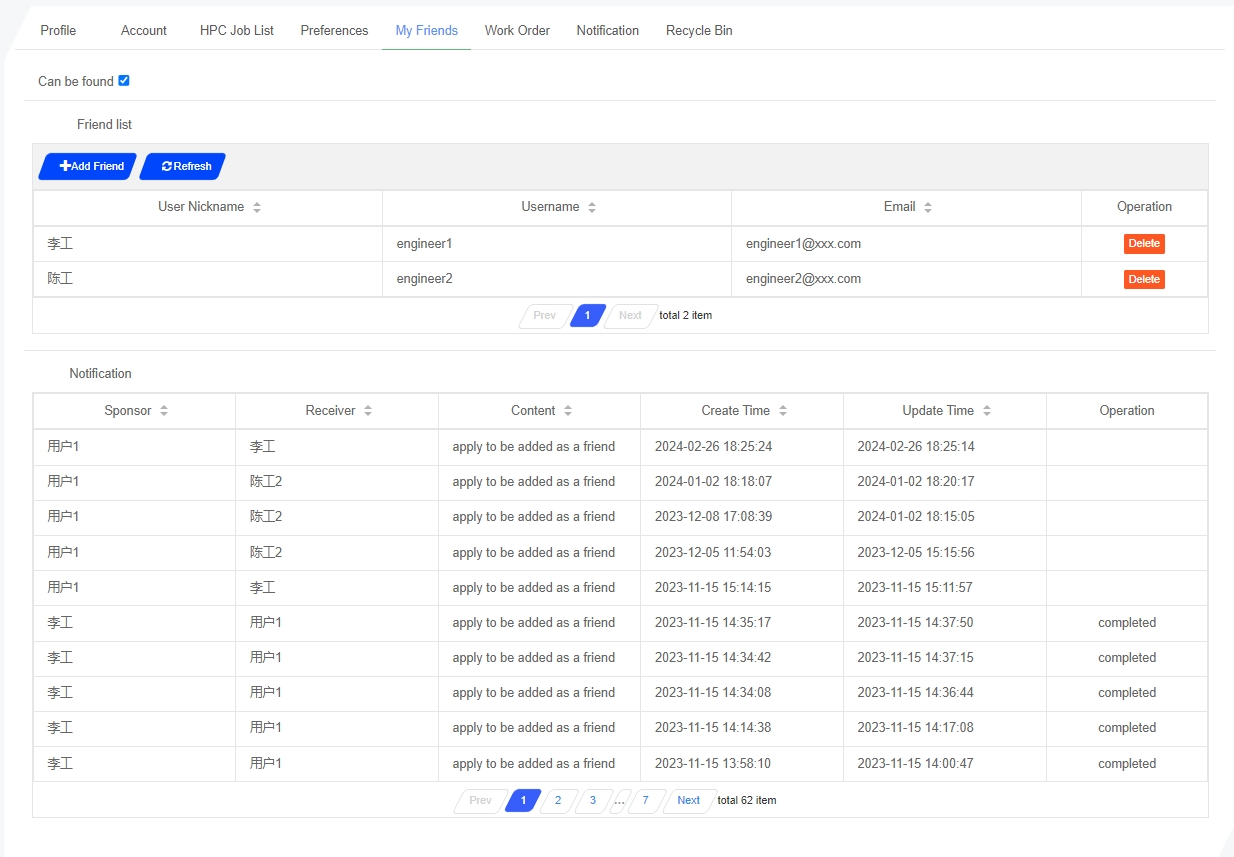
- Friends
The friends list displays the friends added by the user. You can perform delete operations in the operation list. Delete operation will delete the current friend, block operation will block the current friend and the user will not receive the friend's adding request any more. As shown in the following figure:
- Add Friends
Click on the "Add Friend" button to pop up the "Add Friend" pop-up window. We can query the friends that need to be added, select "Add Friend" in the option list, and we can see the information record of applying to add friends in the message notification list, as shown in the following figure: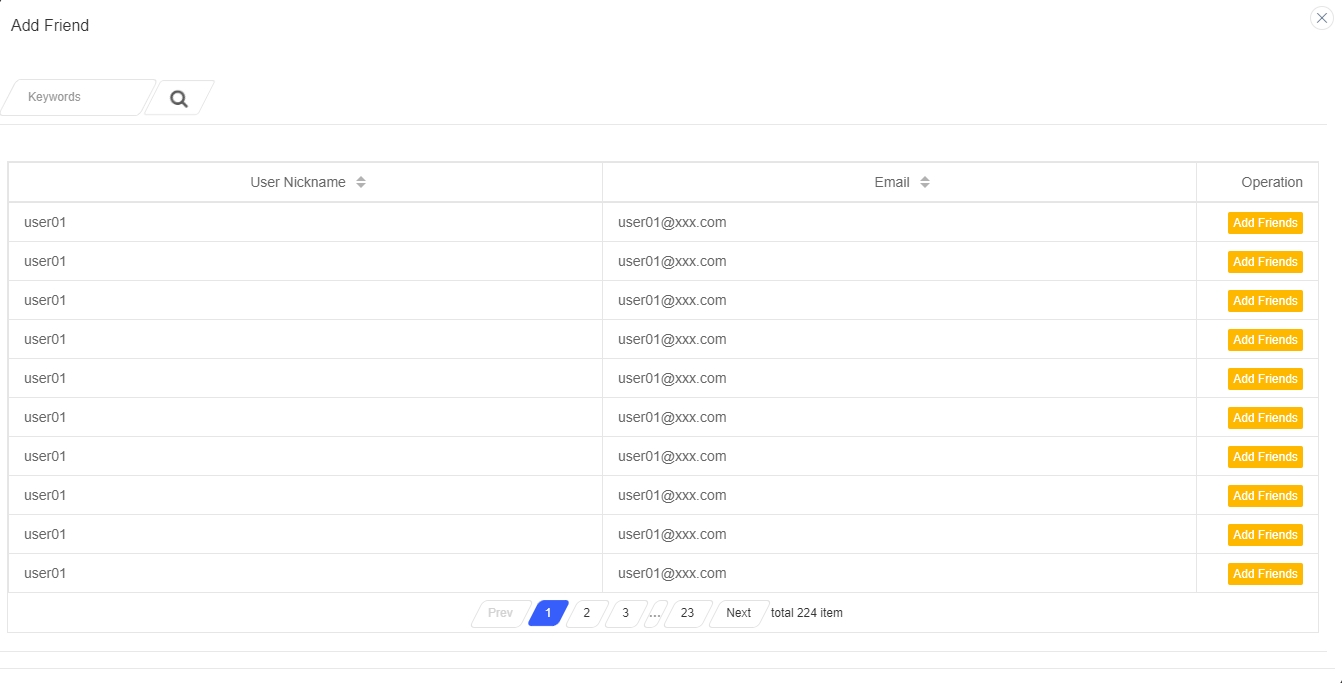
- Notification
Message notification: When the current logged in user is added as a friend by another user, the message notification will display a request to add a friend message. Click the "Agree" button in the operation list to be added as a friend by the other user. Click "Be friends with each other" to be friends with each other, as shown in the following figure: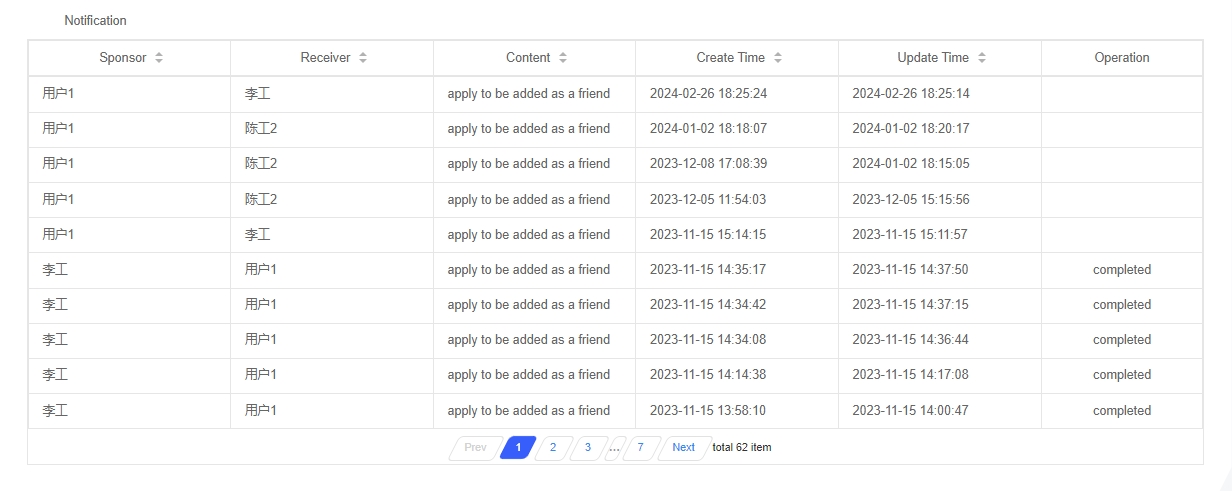
2.1.3.9 Problem Work Order
The work order module can create work orders in real-time. If users encounter unresolved problems during the use of this system, they can create work orders in the "Problem Work Order" module for problem consultation, bug feedback, recommendation optimization, and other operations. As shown in the following figure: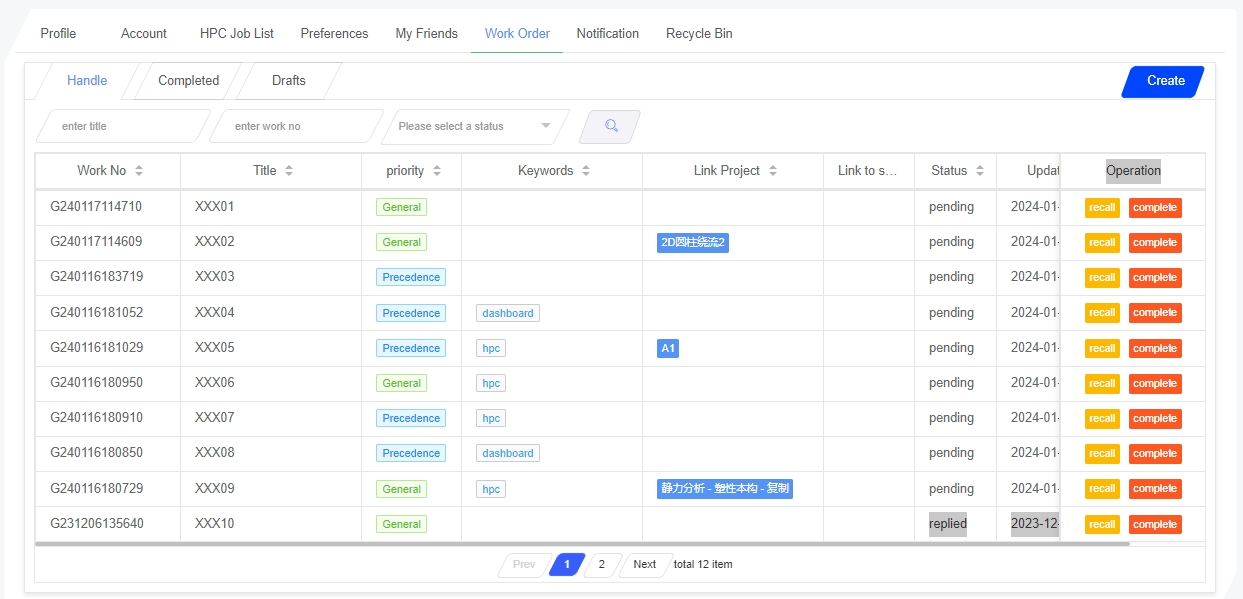
(1) .Create a work order
Enter the "Work Order" module, click the "Create" button to enter the New Work Order page. Enter the Title, Phone number, Priority, Content, etc. The content supports inserting images. Click the "Add Attachment" button to add relevant attachments. After completion, click the "Staging" or "Submit" button. Click the "Staging" button, and the work order will be saved in the draft box, where it can be modified again; Click the "Submit" button, and the work order will be directly saved to the "Handle" module. The technical personnel will reply promptly after seeing the message. The create work order page is shown in the following figure: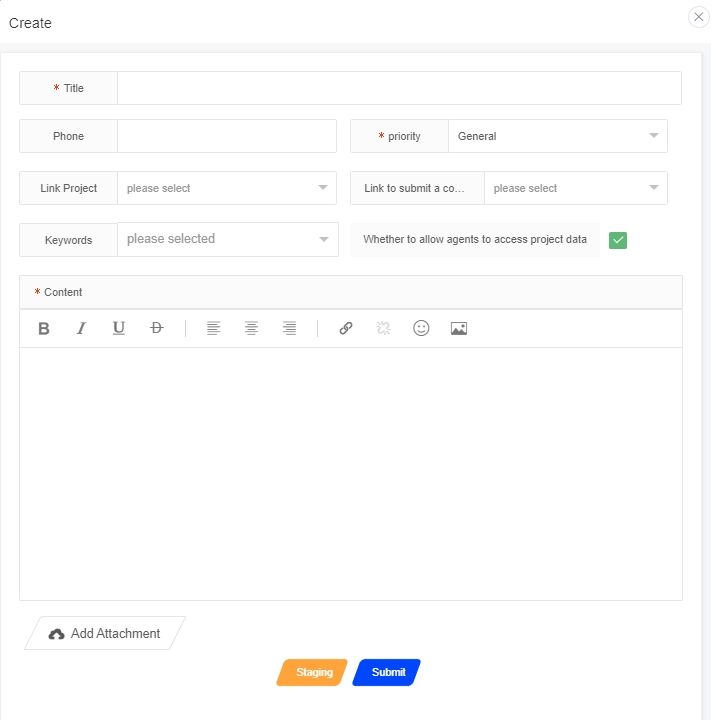
(2) .Handle work order
The submitted work orders of users can be viewed on the "Handle" work order page, where a list of submitted work orders can be viewed. The work order list includes work order number, title, priority, keywords, status, and update time. The Handle module supports the query function and can quickly query work orders through "Title", "Work Order Number", and "Status". As shown in the following figure:
View work order details: Click on the "work order number" or "title" field in the to-do work order list to jump to the view work order details page. On this page, you can view the reply content of the staff member or respond to the reply. The reply content supports inserting images and uploading attachments, and supports attachment download function. Click the "return" button to return to the work order main page, as shown in the following figure: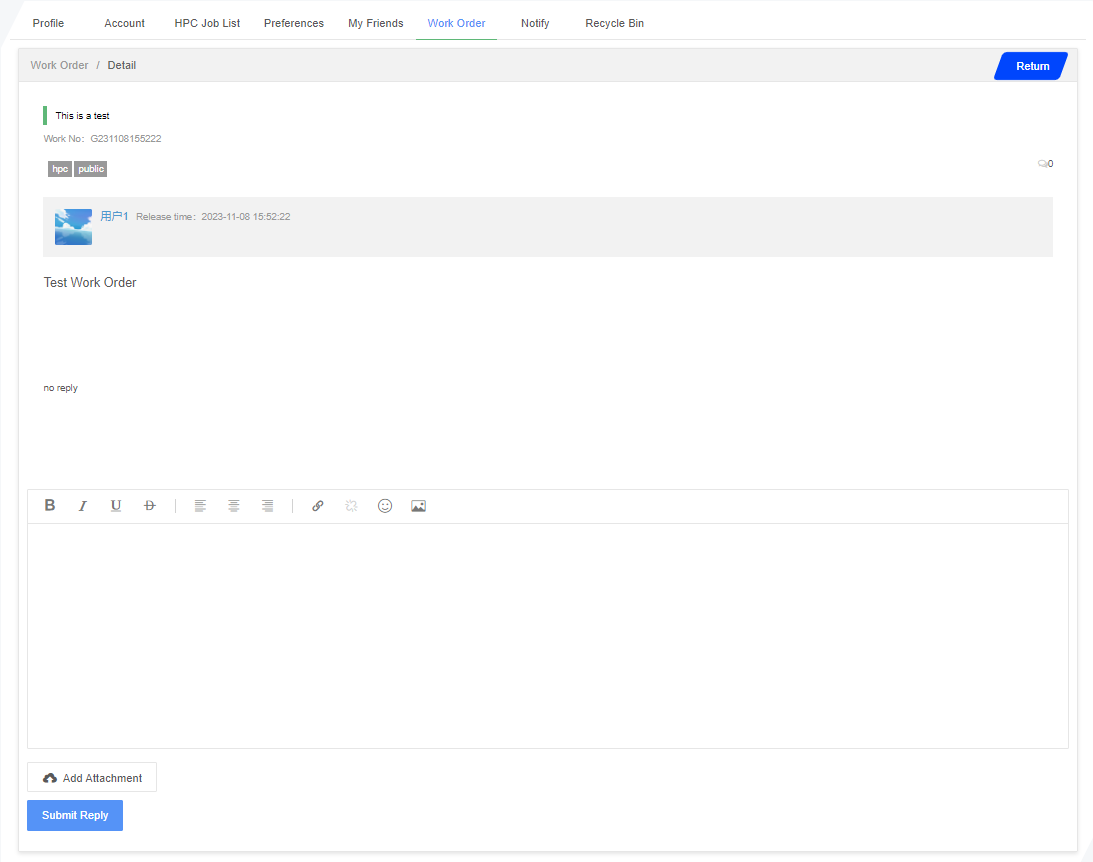
Withdrawal of Work Order:Click the "recall" button in the operation bar of the pending work order list to pop up the recall confirmation Tooltip. Click the "Confirm" button to perform the recall work order operation. The recalled work order can be modified or deleted again in the draft box, as shown below: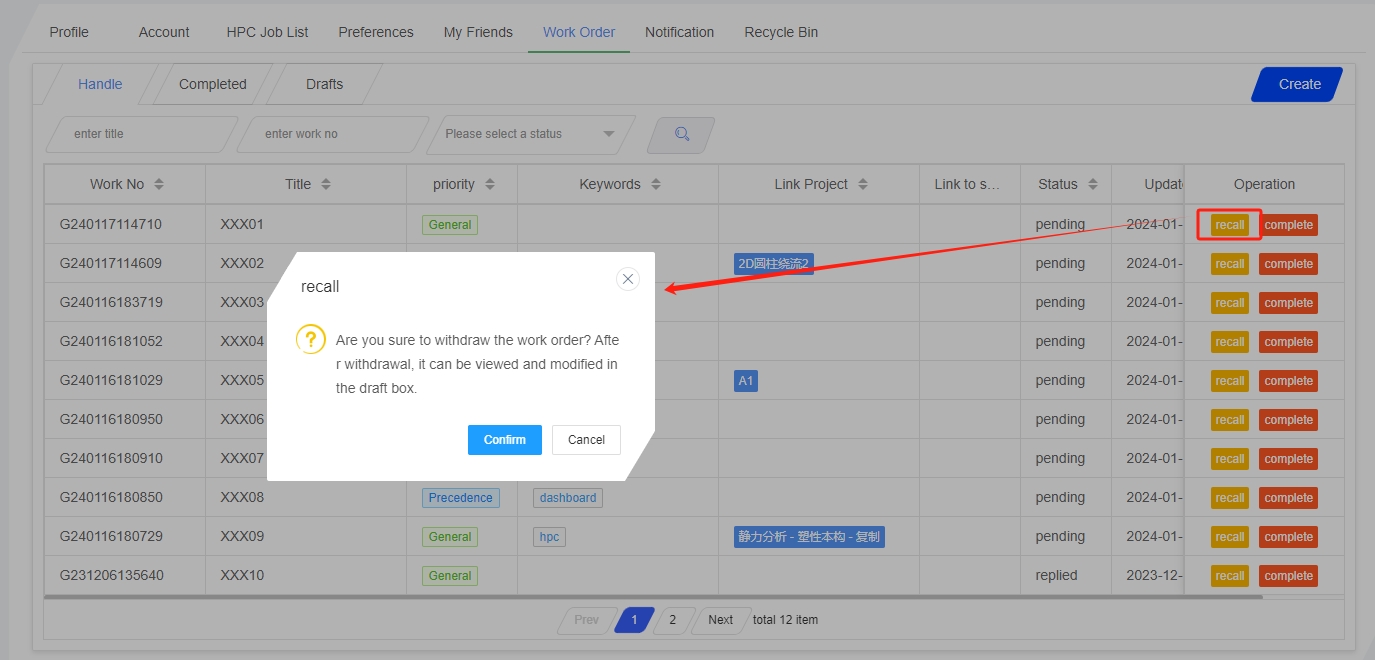
Complete work order:Click the "Complete" button in the operation bar of the Handle work order list, and the satisfaction evaluation Tooltip will pop up on the page. After the user has evaluated the satisfaction, click the "Confirm" button to complete the satisfaction evaluation. Completed work orders can be viewed on the "Completed" work order page, as shown in the following figure: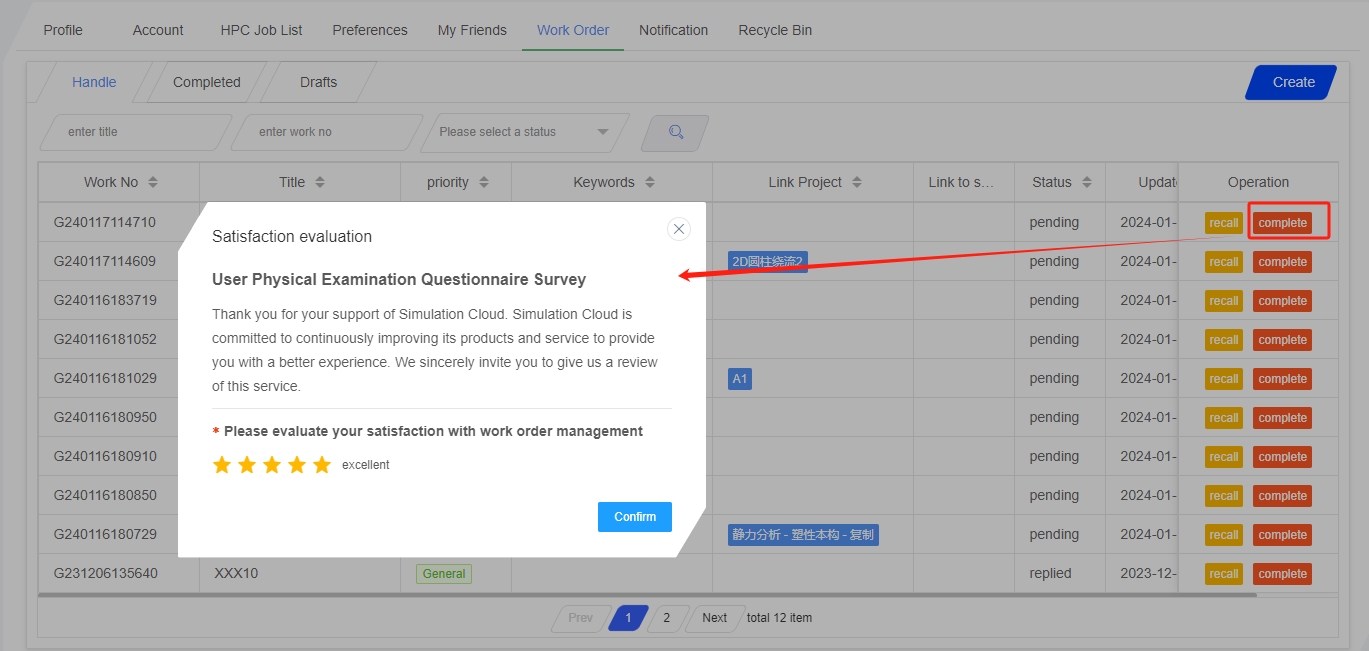
(3) .Completed work order
On the completed work orders page, you can view the completed work orders. The list of completed work orders includes work order number, title, priority, keywords, update time, evaluation attributes, Click on the "work order number" or "title". You can jump to the view of completed work order details page, where you can view specific work order information. Click the "Delete" button in the list operation bar to delete the work order. Completed work orders support query function. By querying the title and work order number, you can quickly find the target data, as shown in the following figure: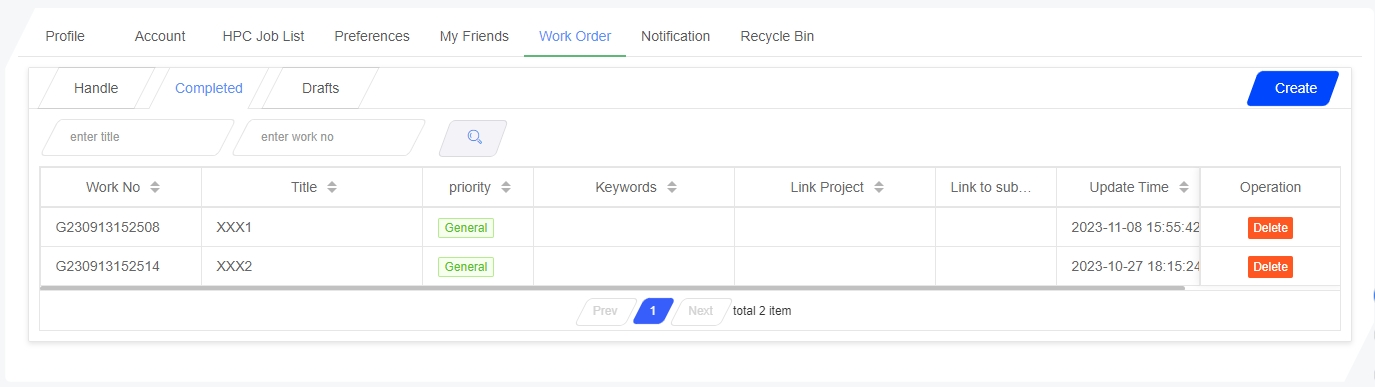
(4) .Drafts
The work order list in the draft box is used to save the temporarily stored work orders of the user. Click on the "work order number" or "title" to modify the work orders in the draft box. After completing the modifications, click the "submit" button, and the work orders will be submitted to the to-do page. Click the "Delete" button in the operation bar to delete the work order record from the draft box. Please note that deletion cannot be restored. The draft box supports user query operations, and by querying the title, the target data can be quickly found, as shown in the following figure: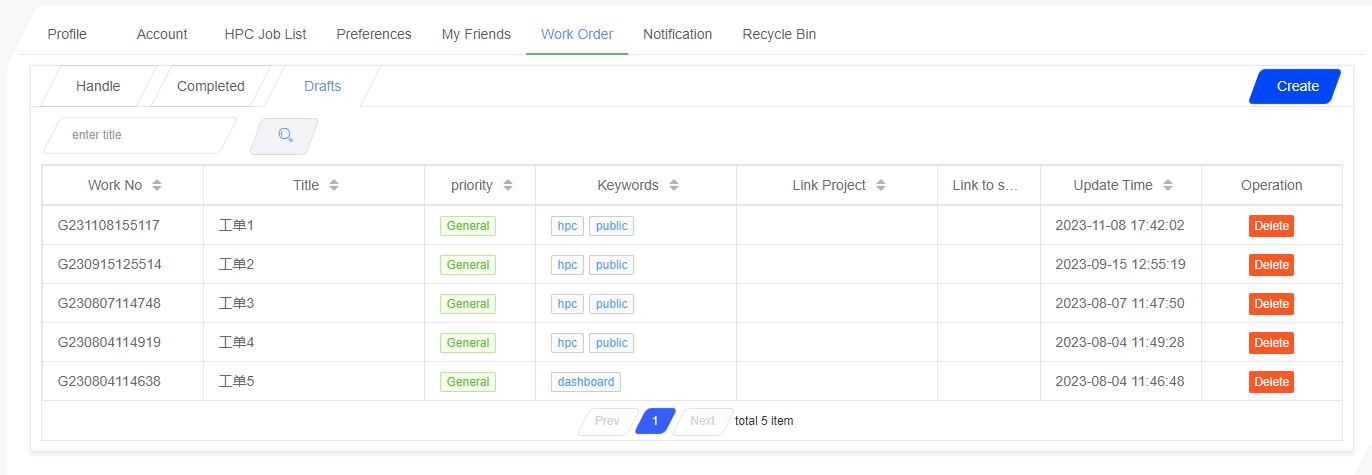
2.1.3.10 Recycle bin
After a user deletes an item in the Dashboard, it will appear in the Recycle Bin. The Recycle Bin mainly provides users with an opportunity to retrieve files. After being emptied from the Recycle Bin, the item will be completely deleted and cannot be restored. For the convenience of users, this module supports delete, batch delete, restore, and batch restore operations. As shown in the following figure: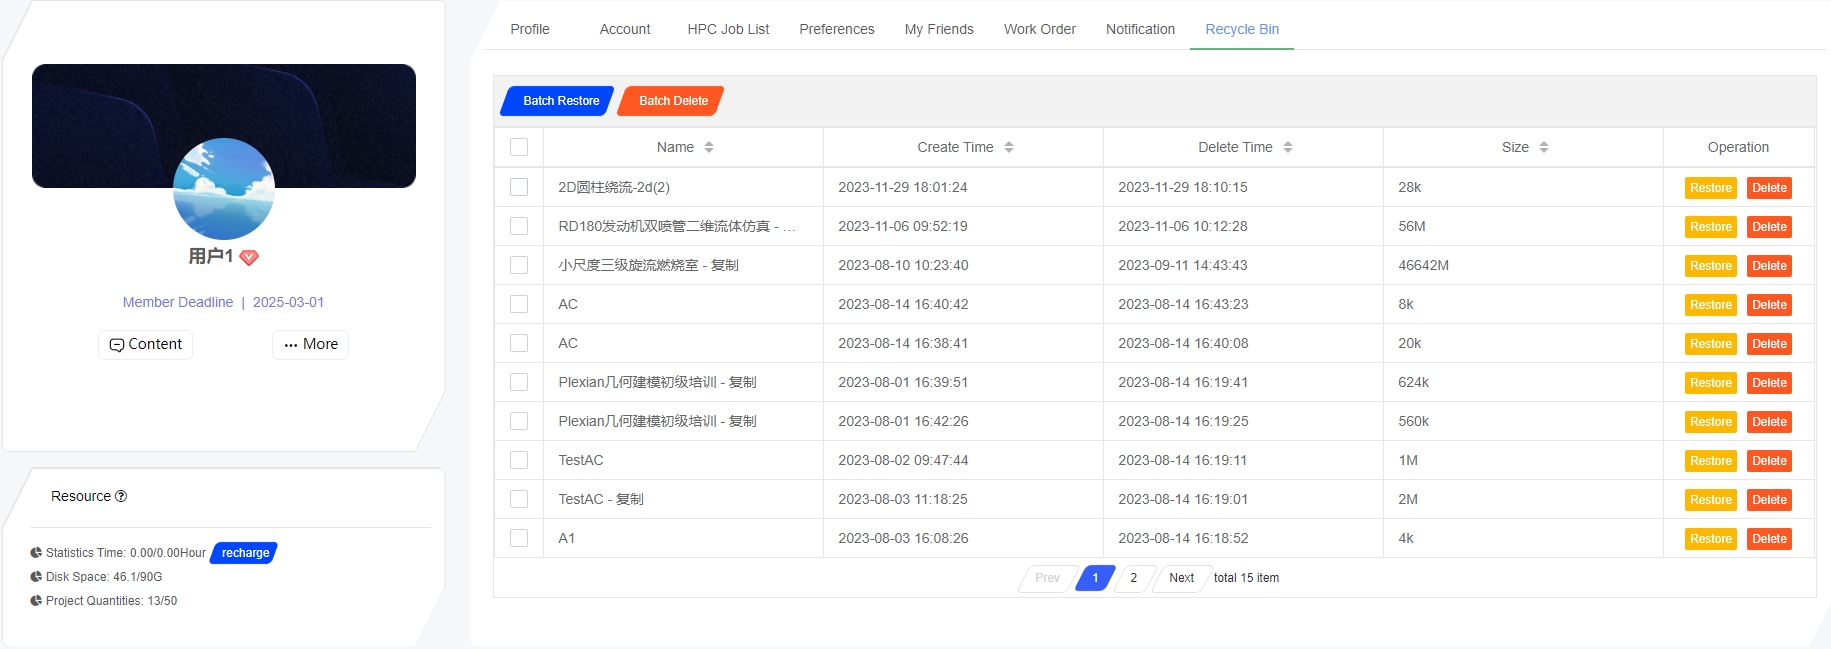
2.1.4 Message Management
After the user logs in, the avatar will display the current number of unread messages. Moving the mouse over the avatar can display system messages and my messages in the drop-down list, as shown in Figure.
System messages are used to push system notifications, version upgrades, and other system related messages. My message is used to receive messages generated by Suochen's pre-processing software calculations, Suochen's structure simulation software calculations, Suochen's general purpose fluid simulation software calculations, etc. You can quickly enter the dashboard through the message interface to work, or you can jump to the results page to view the results. The following is a detailed explanation: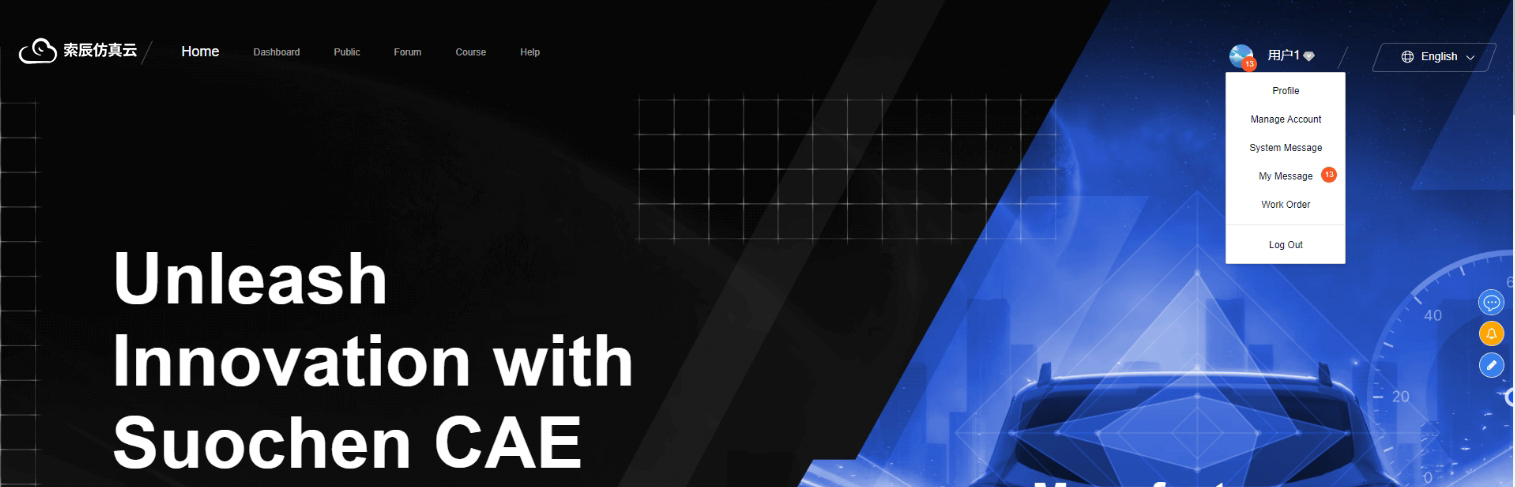
(1)System messages
The system message consists of two parts: content and time. The interface is simple and clear, and users can view the current message content and the release time of the message. When the user clicks' read 'after viewing the message, the message will be marked as' read' and will not appear again in the message list. If the user clicks' Mark all as read ', all current system messages will be marked as read and will not be displayed in the list. When there are too many messages, users can click "See More" to view more messages.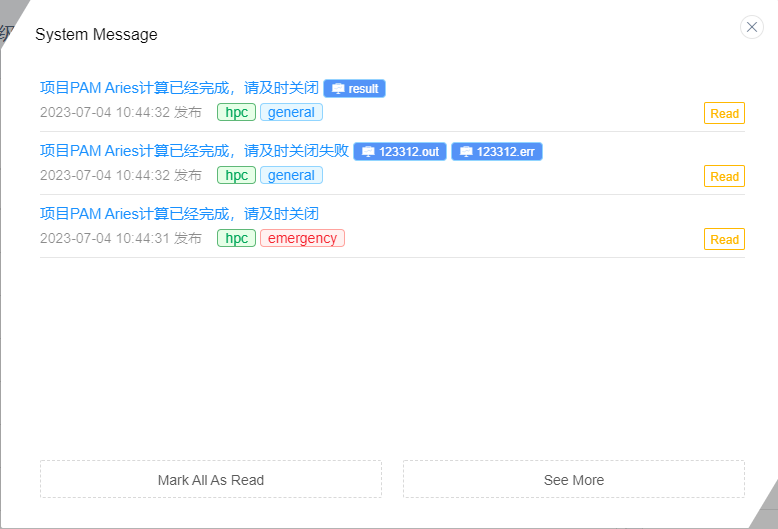
(2)My message
My messages are mainly generated by user computing tasks, such as Grid computing, High-performance computing, Suochen's general purpose fluid simulation software computing, etc. My message consists of three parts: project name, project result, and project label, as shown in the following figure: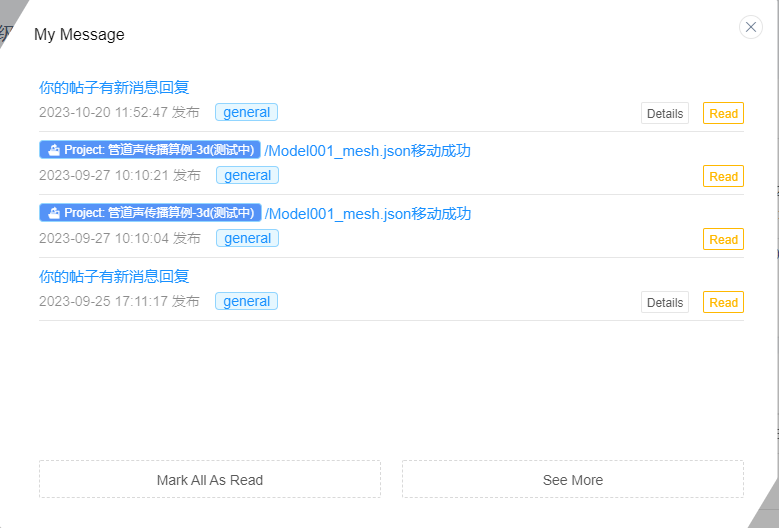
- Project name
Users can click on the project name to jump to the dashboard interface, improving their work efficiency. Please refer to Chapter 4.2 for details. - Project label
The project tag is divided into four tags: general message, important message, emergency message and hpc (High-performance computing). which is convenient for users to manage messages. - View Results
The end of the message is accompanied by a result button, which can be clicked to enter the result page. As shown in the following figure: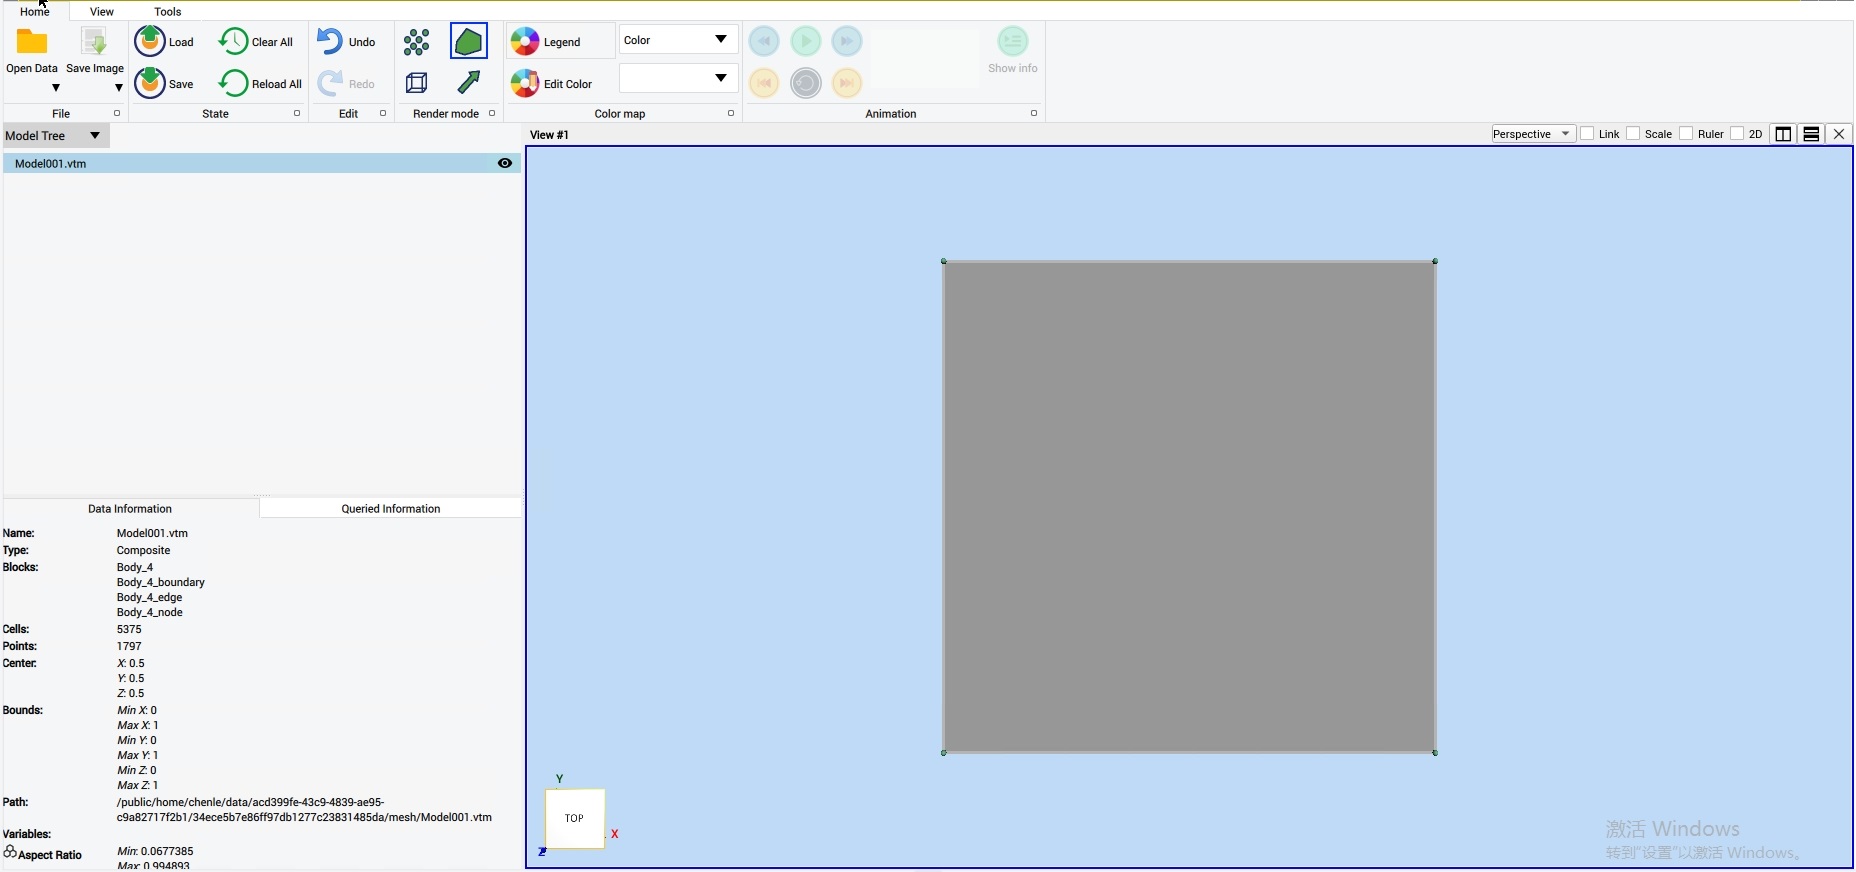
2.2 Project management
Click on the Dashboard at the top of the page to enter the project management module. The entire page is divided into two parts: left and right. The left side displays the current user profile, resource information, activity records, project calculation status, project space usage, and my folder function. The project list displayed on the right can be sorted by time category or queried by project name, as shown in the following figure: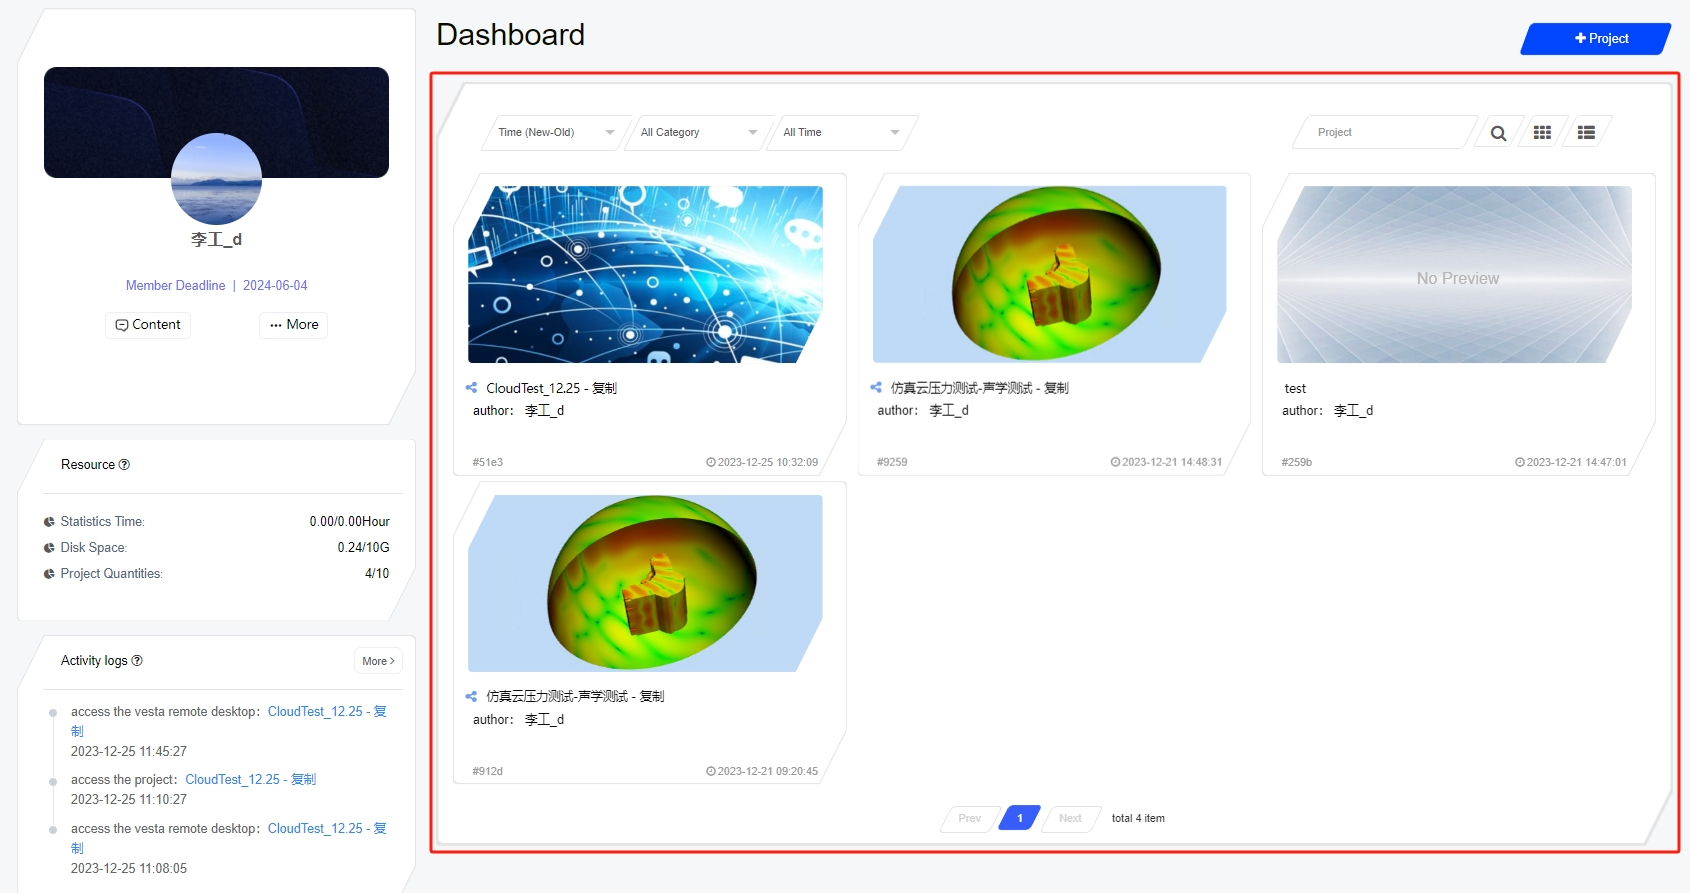
2.2.1 Resource information
The resource information panel displays the current number of kernel hours and disk space used, making it convenient for users to keep track of the current resource usage, as shown in the following figure: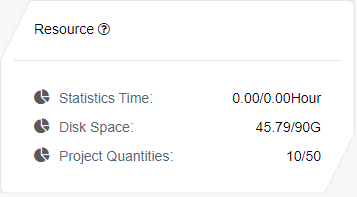
2.2.2 Activities
You can view the user's operation log in the activity record, which includes operation items and time. Click the "More" button in the upper right corner to view more user operation logs, making it easy for users to trace past project operations. As shown in the following figure: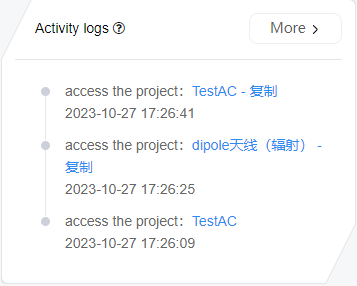
2.2.3 Project Calculation Status
This module can view the computing tasks executed by the current user in real time. The consumption time of each task is displayed clearly in a table form, making it convenient for users to manage the consumption machine and reducing unnecessary resource waste. Click on "More" to view and manage all computing tasks, as shown in the following figure: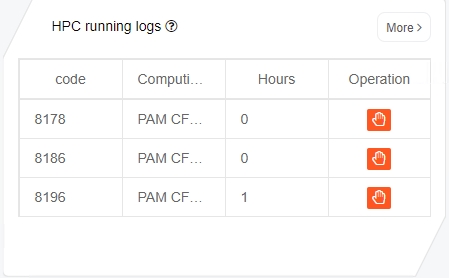
2.2.4 Project Space Usage
This module displays the space usage of each project in the form of a chart. The homepage defaults to displaying the three projects with the highest space usage. Click the "More" button in the upper right corner to view the space usage of all projects. The advantage is that it facilitates users to have a clear and intuitive understanding of the space usage of each project, so that users can manage project space more efficiently, as shown in the following figure: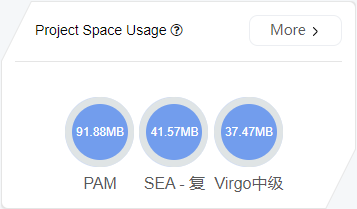
2.2.5 My Folder
My folder stores public resources, and the files stored here can be referenced by various projects. Click Upload File to upload local files to the simulation cloud, which can only be viewed and used by oneself. Click 'More' to view all the files. In the operation list, you can perform download and delete operations. It should be noted that after deletion, you cannot restore, as shown in the following figure: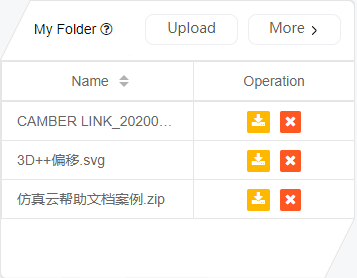
2.2.6 Project List
The project list lists all simulation projects and supports pagination queries. By default, projects are sorted from new to old based on their creation time. Other sorting methods can also be changed, such as querying by name and category, or querying projects from the past week, month, or year. Each project card consists of a project preview image, project name, project description, update time, and basic information of the project code. Click on the project card to enter the simulation workspace (detailed in Chapter 1.3), as shown in the following figure: 2.2.7 New project
Click New Item to pop up the new item page. The item title is the content that must be entered. The tag item can add tags to the item. After each tag is added, press Enter key to finish adding tags. Multiple tags can be added. After clicking Save, the new project will appear at the first position in the project list, as shown in the following figure: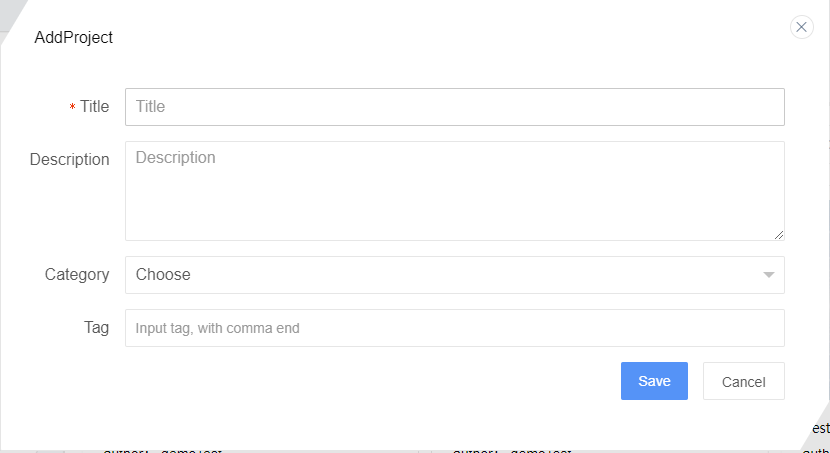
2.3 Simulation workspace
After clicking on the project card in the dashboard, the users can enter the simulation workspace. The simulation workspace page is divided into two sections: the left section contains a list of project files and comments, and the right section contains attributes, project collaboration, High-performance computing, remote post-processing (VNC), and resources available on the platform. The following describes each functional area in detail, as shown in the following figure: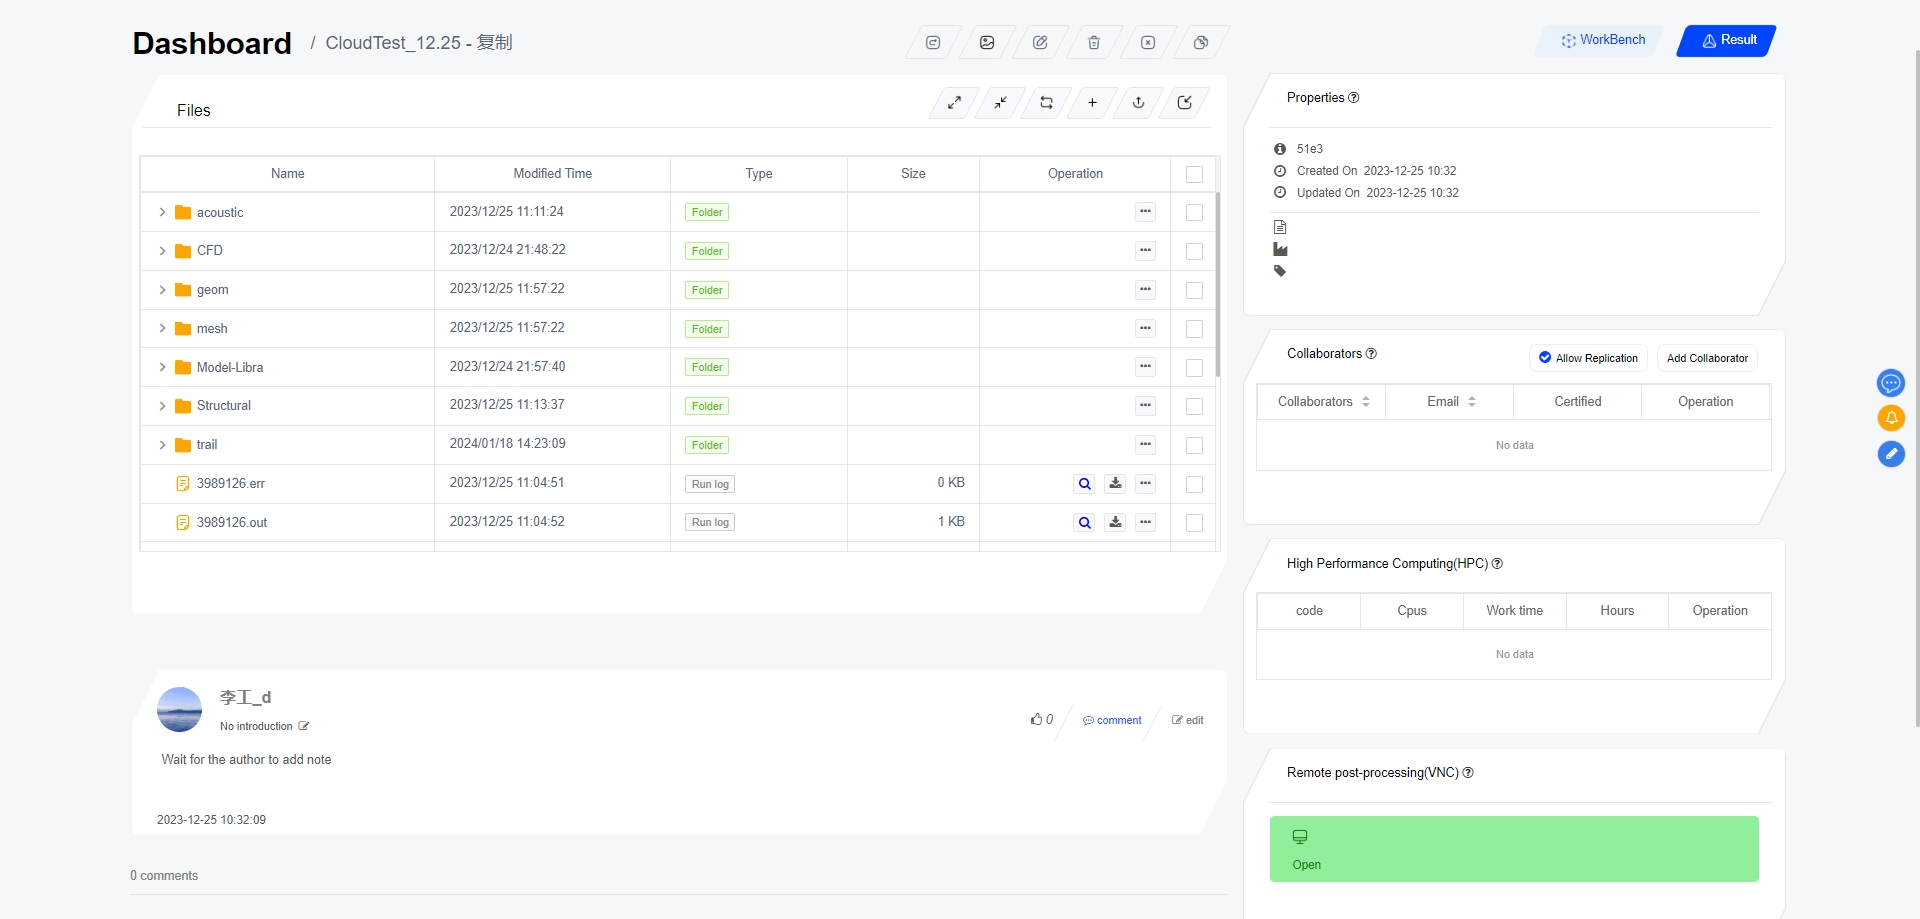
2.3.1 File list
The file list displays all the files of the project in a table format, and the name column displays the names of the files or folders. The folders and files are distinguished by different icons. The type column displays the type of the current file, such as directory and text. It is particularly important to note that the system has made special annotations for the project file, such as "project file" and "v1.72". The former displays the file type, while the latter represents the version of the workspace (the setting version is detailed in Chapter 2.1.3.7), as shown in the following figure: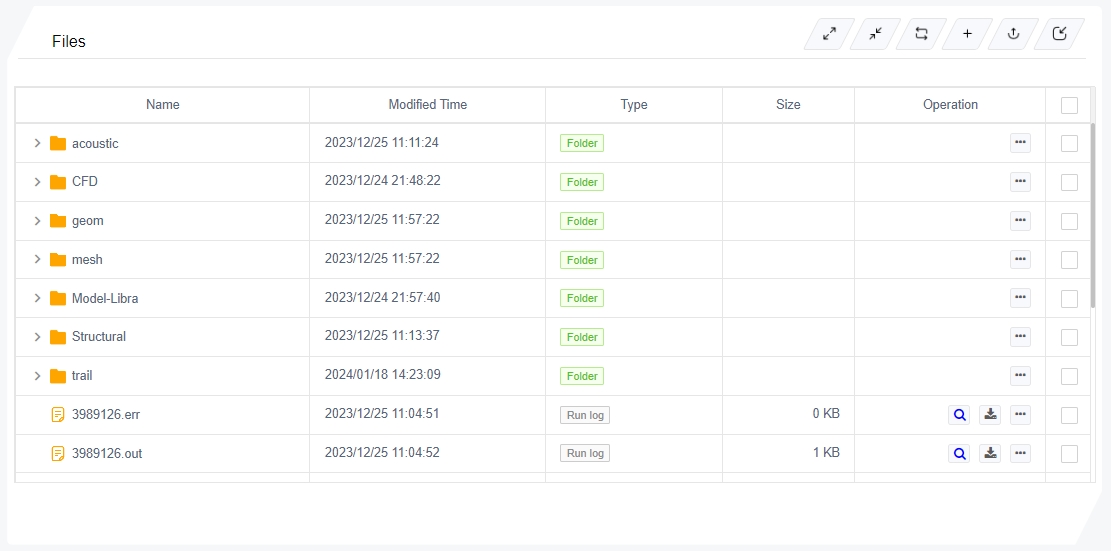
2.3.2 Project Operations
Project operations mainly have three functions: share, edit, and delete. - Share:The projects we create are all private and can only be viewed and used by ourselves. If we want other people to view the project in the public module, we can use the project sharing function. After the project is successfully shared, it will appear in the public module, which is available for all users to view and comment on.
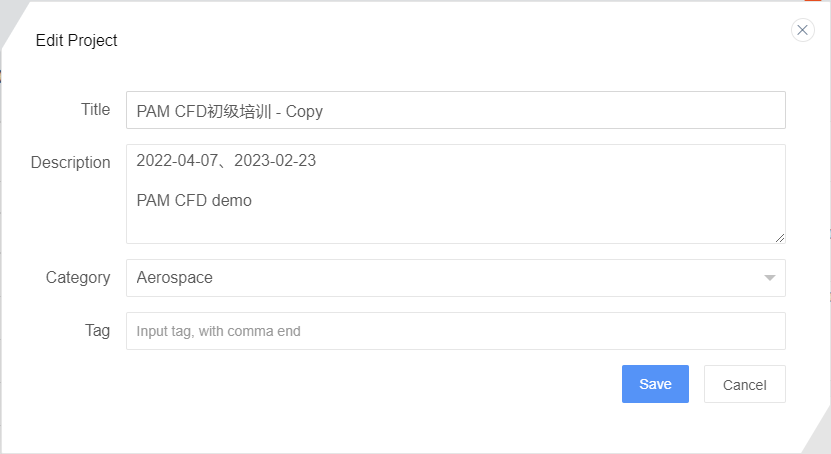
- Edit:Click Edit and an editing window will pop up. You can modify the name, description, type, and label of the project in the editing window. After the modification is completed, click the Save button to complete the project information modification, as shown in the following figure:
- Delete:After clicking delete, the project will be removed from the project list in the work panel and can be viewed and restored in the recycle bin of the personal center (refer to Chapter 2.1.3.10)
2.3.3 File List Operation
The file list mainly includes 11 operation functions, namely: Set Preview, Expand, Fold, Refresh, Add Folder, Upload, Import, Move, Copy To, Compress and Batch Delete, as shown in the following figure:
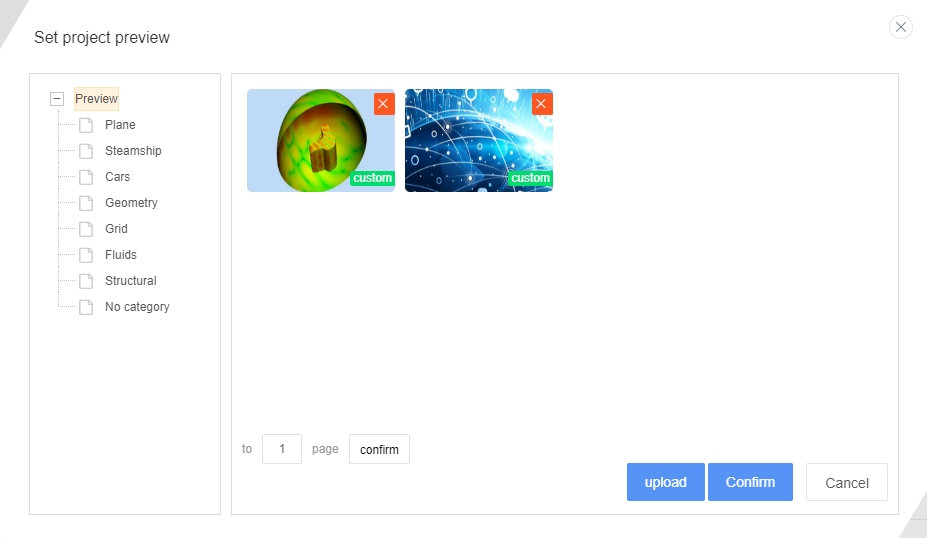
- Set preview image:Click this icon to enter the preview image setting interface. The page is divided into two modules: left and right. The left side displays the preview image classification tree, and the right side displays a list of preview images under this type. Select the desired preview image in the pop-up window, click the "Settings" button to complete the preview image settings, as shown in the following figure:
- Expand:Clicking this button will expand all file directories.
- Fold:Clicking this button will collapse the file list.
- Refresh list view:Clicking this button will refresh the file list and pull the latest project file.
- Add Folder:The directory added here is the top-level directory. To add a subset directory, click on the operation function in the file list and perform the operation inside.
- Upload:Click the upload function to upload local files to the project. The upload location here is the top-level directory of the file list. If you want to upload files in a subset directory, you need to implement it in the file list operation column.
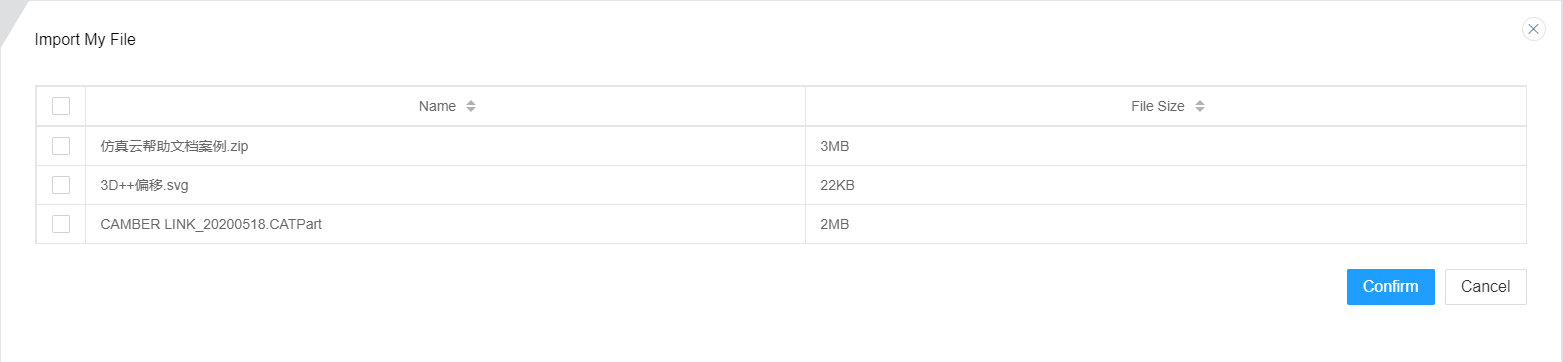
- Import:Click this button to open the "My Files" pop-up window, where the content is the list of public files in the "My Folder" section of the work panel (detailed in section 4.2). Select the required public file and click OK to save it to this project. The default file location is the top-level directory. If a directory is selected in the file list, the file will be automatically saved to that directory, as shown in the following figure:
- Move:Select the target file, click Move and a new file list window will pop up. In the window, select the location where the file will be moved. After selecting, click Move to Here, and the file will be moved to the selected mobile folder. As shown in the following figure:
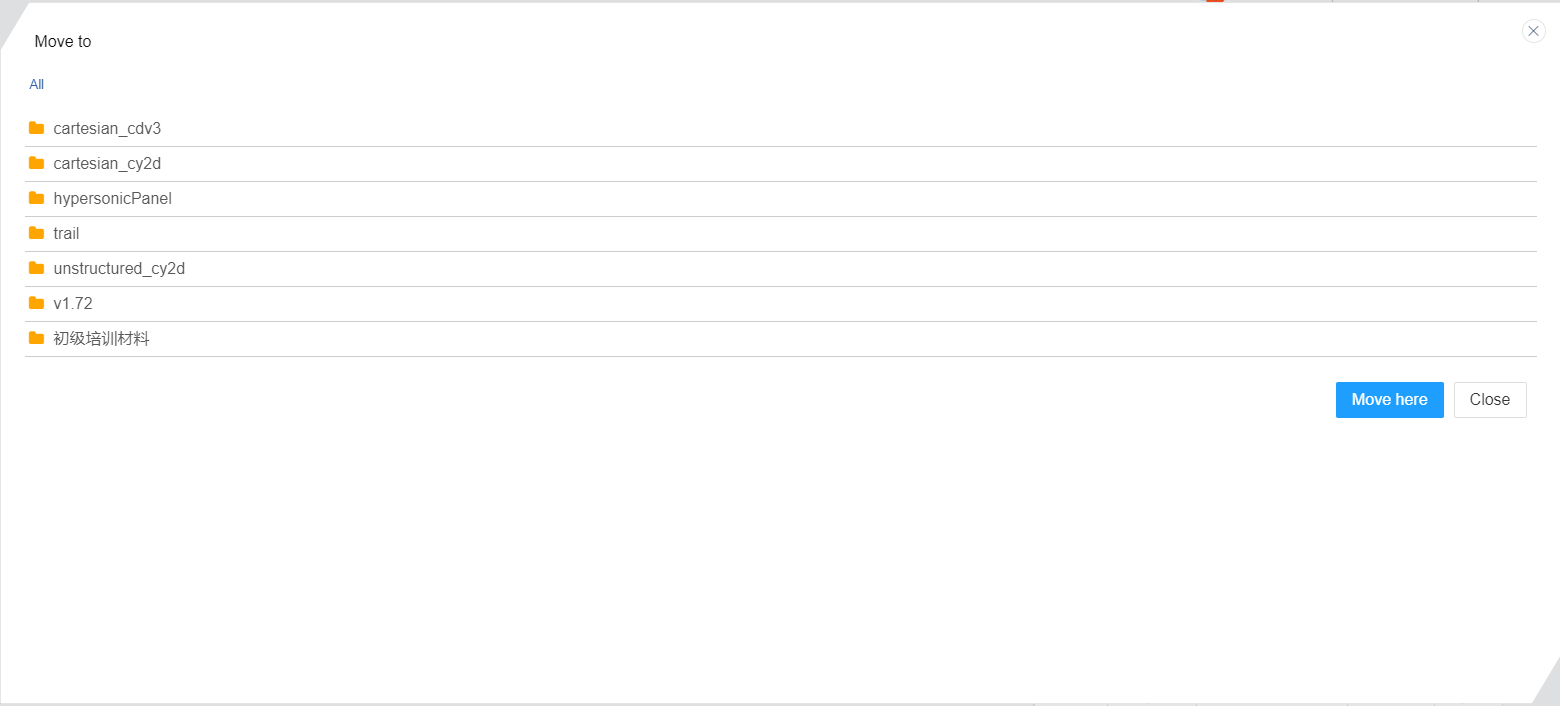
- Copy to:Similar to Move, but the original file will be retained. No more details here.
- Compress: Click Compress to compress the selected directory and generate a .zip compressed file with the same name in the same level directory.
- Batch Delete:Select a folder or folder in the file list to perform batch deletion of files.
2.3.4 Column operations for files
Clicking on the table operation column will display a hidden operation menu, which includes functions such as uploading files, adding directories, renaming, compressing, deleting, moving, and copying, as shown in the following figure: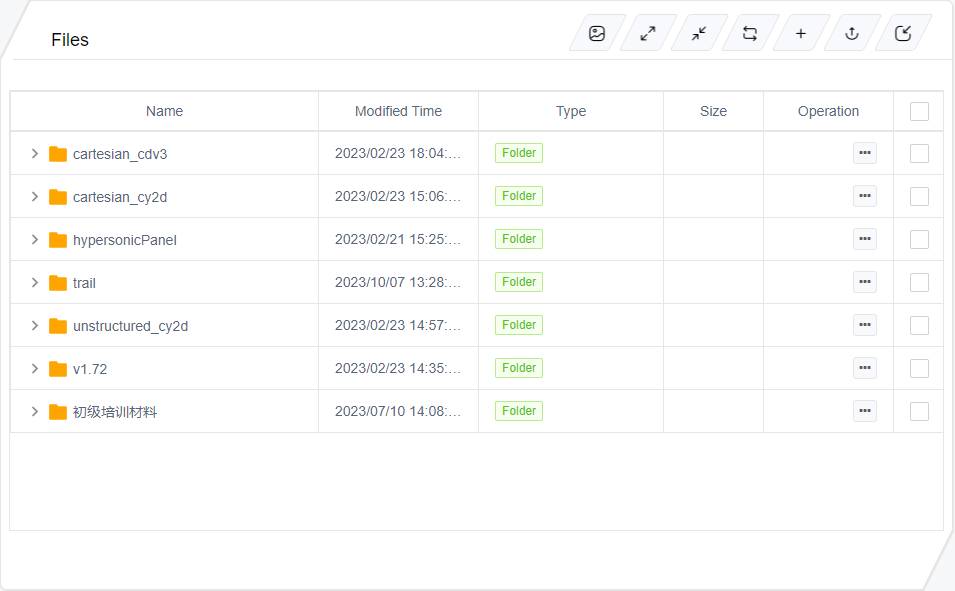
- Upload files:Clicking on Upload File can upload local files to this directory. It should be noted that only the directory type file operation list will display the upload file, add directory, and compression functions.
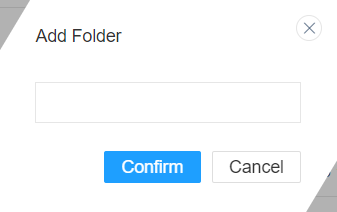
- Add Catalog:Click Add Directory to add a new directory under the selected directory.
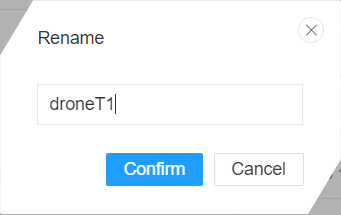
- Rename:Renaming can rename files or directories.
- Compress:Compression will compress the selected directory and generate a. zip compressed file with the same name in the same level directory.
- Delete:Clicking delete will delete the directory or file.
- Move:After clicking Move, a new file list window will pop up. In this window, select the location where the file will be moved. After selecting, click Move Here to move the folder to the selected move folder. As shown in the following figure:
- Copy to:The function of copying is similar to that of moving, and it will not be described in detail here.
2.3.5 Introduction to Comment Function
Simulation cloud users can add comments under the project to facilitate communication between users and handle issues in a timely and efficient manner. The comments section mainly includes the following aspects: - Description
After creating a new project in the Dashboard or copying a project from the public module to the local location, the project author can edit and fill in. After completion, click Submit to update the project description content, as shown in the following figure: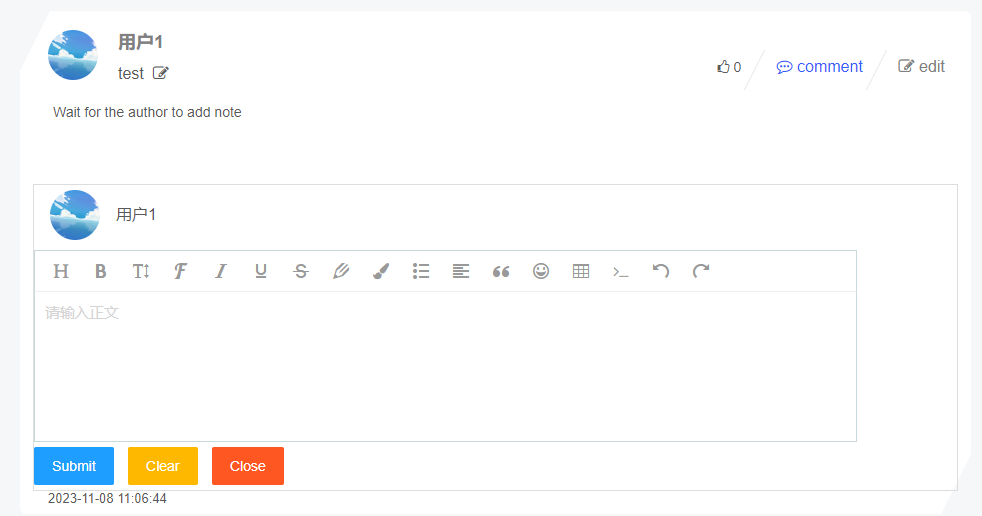
- Like function
After users share their self created project, others can view it in the discovery panel and like it, as well as give likes to comments under the project. - Comment function
After users create or copy a project, they can add comments to the project as a supplement to its description. After sharing the project, others can also add comments, suggestions or questions under the project, which is conducive to communication between users and promotes the healthy development of the project. Users can only delete their own comments, as shown in the following figure: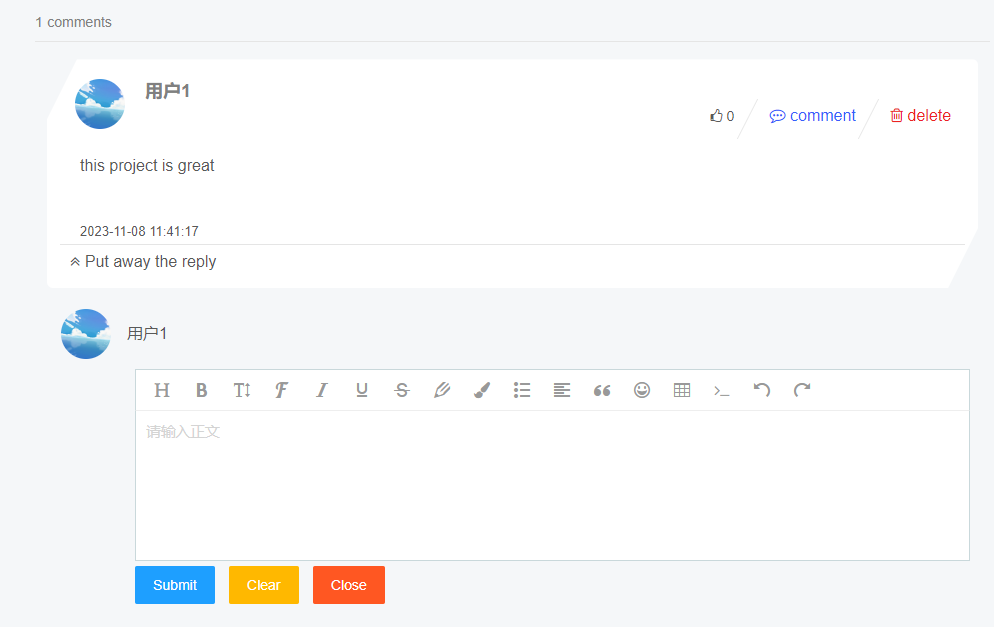
2.3.6 Project Properties
You can view the project number, creation and update time, project type, and project label. The project number is automatically generated by the system to identify the project. It can be seen in the terminal and is taken from the last four digits of the project number, as shown in the following figure: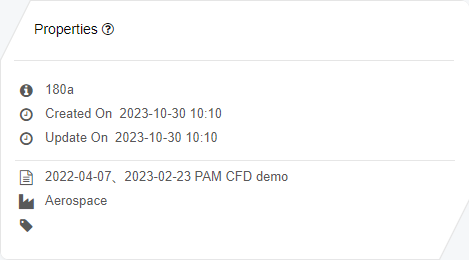
2.3.7 Project Collaboration
Click the "Add Collaborator" button to select a friend to join the collaboration from the friend list. In the "Add Collaborator" pop-up box, you can view the username and user email, as shown in the following figure: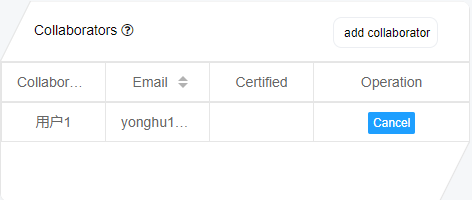
After adding a collaboration, you can view the friend in the list of available project collaborators. The user and project creator in the list of project collaborators have the same operation permissions on the project file (refer to Chapter 1.6 for details)2.3.8 High performance computing
You can view the High-performance computing list of the current project, including the number of CPU cores, start time, and end time. It is convenient for users to intuitively and clearly understand the high-performance resources occupied by the current project and the duration of High-performance computing. Click the icon in the operation bar to stop the high-performance task, as shown below: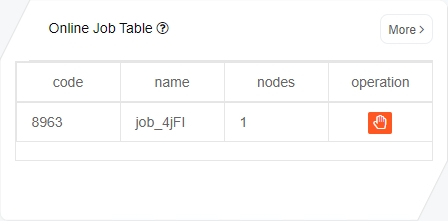
2.3.9 Remote post-processing (VNC)
Remote post-processing VNC facilitates users to view the current VNC status, enabling timely opening and closing of VNC - Open vnc
When a new project is opened, if there are no calculation tasks, the remote post-processing service (VNC) is in a closed state. We can click on the icon to open Suochen's post-processing software remote post-processing workspace (Suochen's post-processing software or VNC). as shown in the following figure: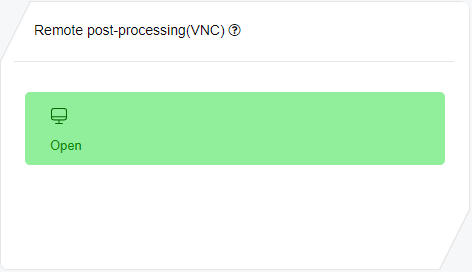
- Close vnc
After opening vnc, the icon of the remote post-processing module will change. Clicking Close will close vnc, and clicking "Restore to visit" will redirect to the vnc operation interface. So that it is convenient for users to operate vnc, as shown in the following figure: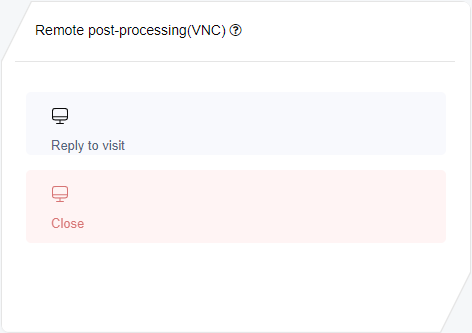
2.3.10 Platform available resources
This module displays the available resources of the platform in the form of a chart, including three modules: Suochen's post-processing software service, Suochen's pre-processing software service and HPC (High-performance computing), so that users can manage the platform resources reasonably and efficiently, as shown below: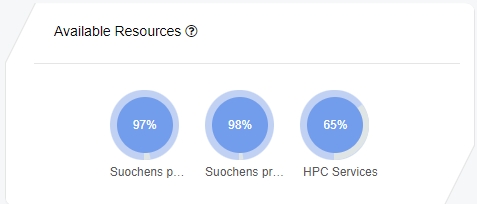
2.4 Suochen's pre-processing software Introduction to the workspace
2.4.1 Entering the workspace
In the project, click the "Enter Workspace" button in the upper right corner to enter the Suochen's pre-processing software. In the upper right corner of this page, you can view the version numbers of Suochen's pre-processing software, Suochen's structure simulation software, and Suochen's general purpose fluid simulation software. Screenshots, Language and Help functions are also provided are also provided in the upper right corner of the version. It can better help users learn to use plexia, as shown in the following figure: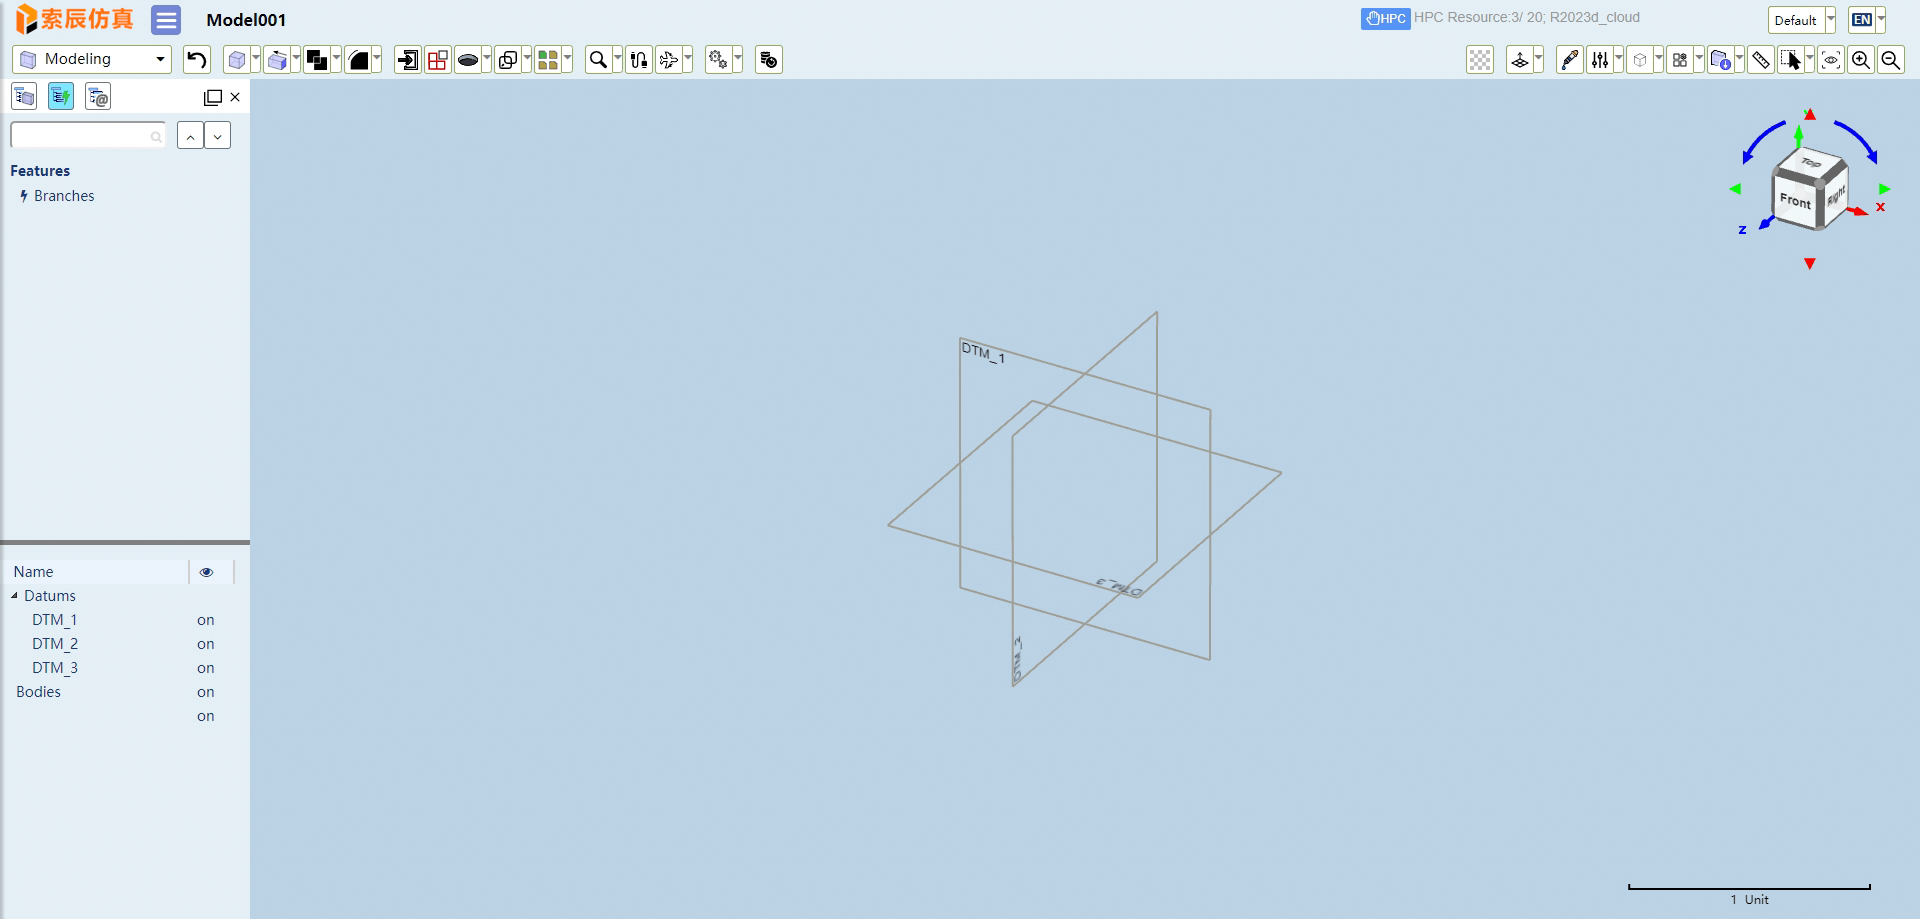
2.4.2 New model
If it is a self created project, we can start with modeling to set it up. This module can create geometry by using predefined "raw" geometry. As shown in the following figure (refer to the user manual for details)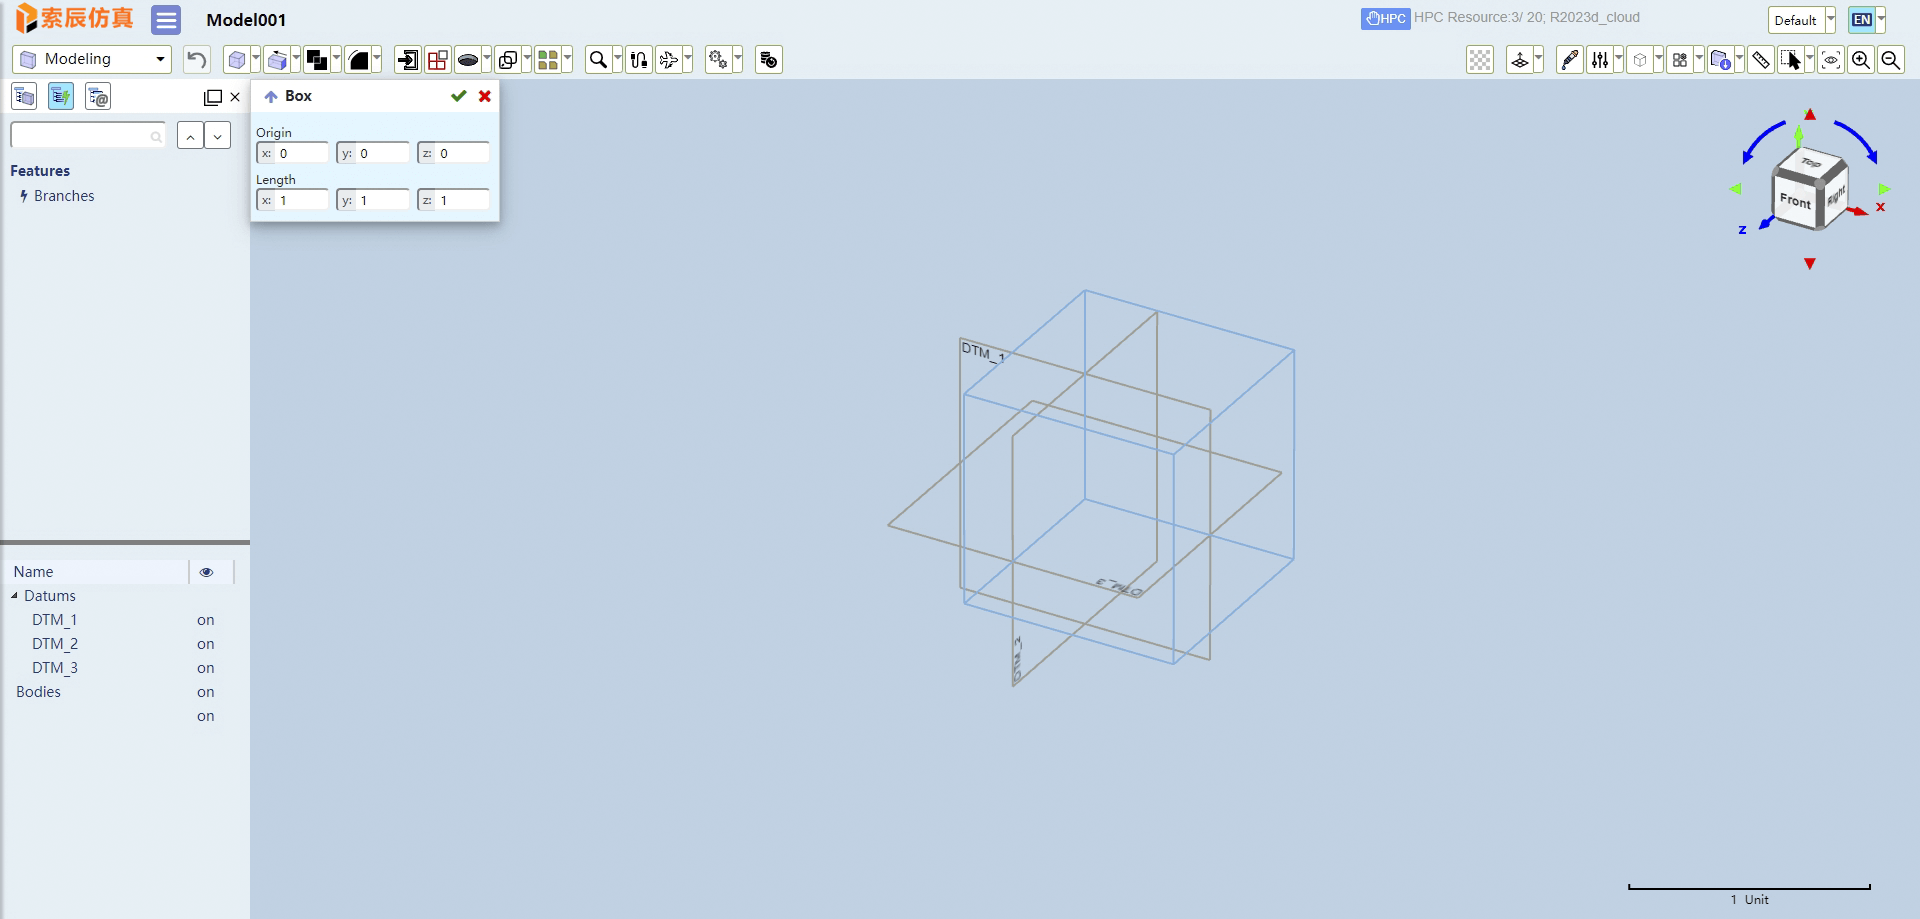
2.4.3 Switch project model
A project has multiple models, and we often need to quickly switch between them in our work. Firstly, we need to right-click to open the system menu, as shown in the following figure. Select the "open" submenu under the "file" menu, and we can open the project list to view the existing models and some attribute settings, as shown in the following figure:
After clicking on the "open" tab, the project list directory will pop up. Select the corresponding project file and click the "open" button, as shown in the following figure: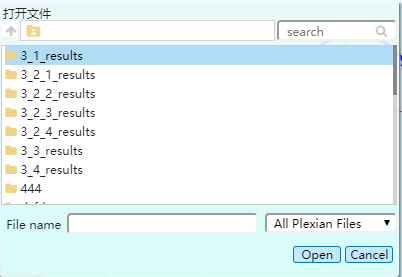
2.5 Post processing workspace
We can open and view the ". pvd" file generated in the workspace for analysis and calculation results in the post-processing workspace. Click the corresponding view button to enter the Suochen's post-processing software. For example, selecting View Cartesian_ CDV_ Fluid.pvd, you can then call Suochen's post-processing software to perform post-processing operations such as slicing and drawing line diagrams on the 3D flow field results, as shown in the following figure: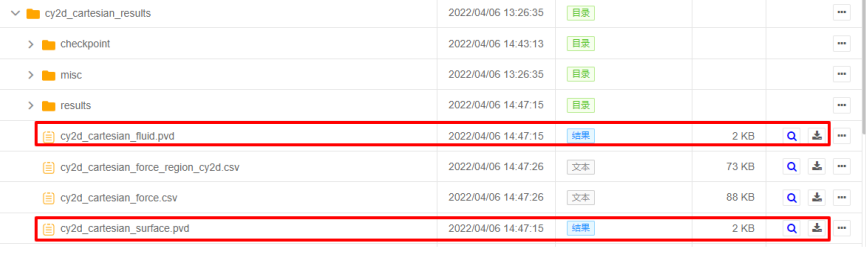
The display results are shown in the following figure: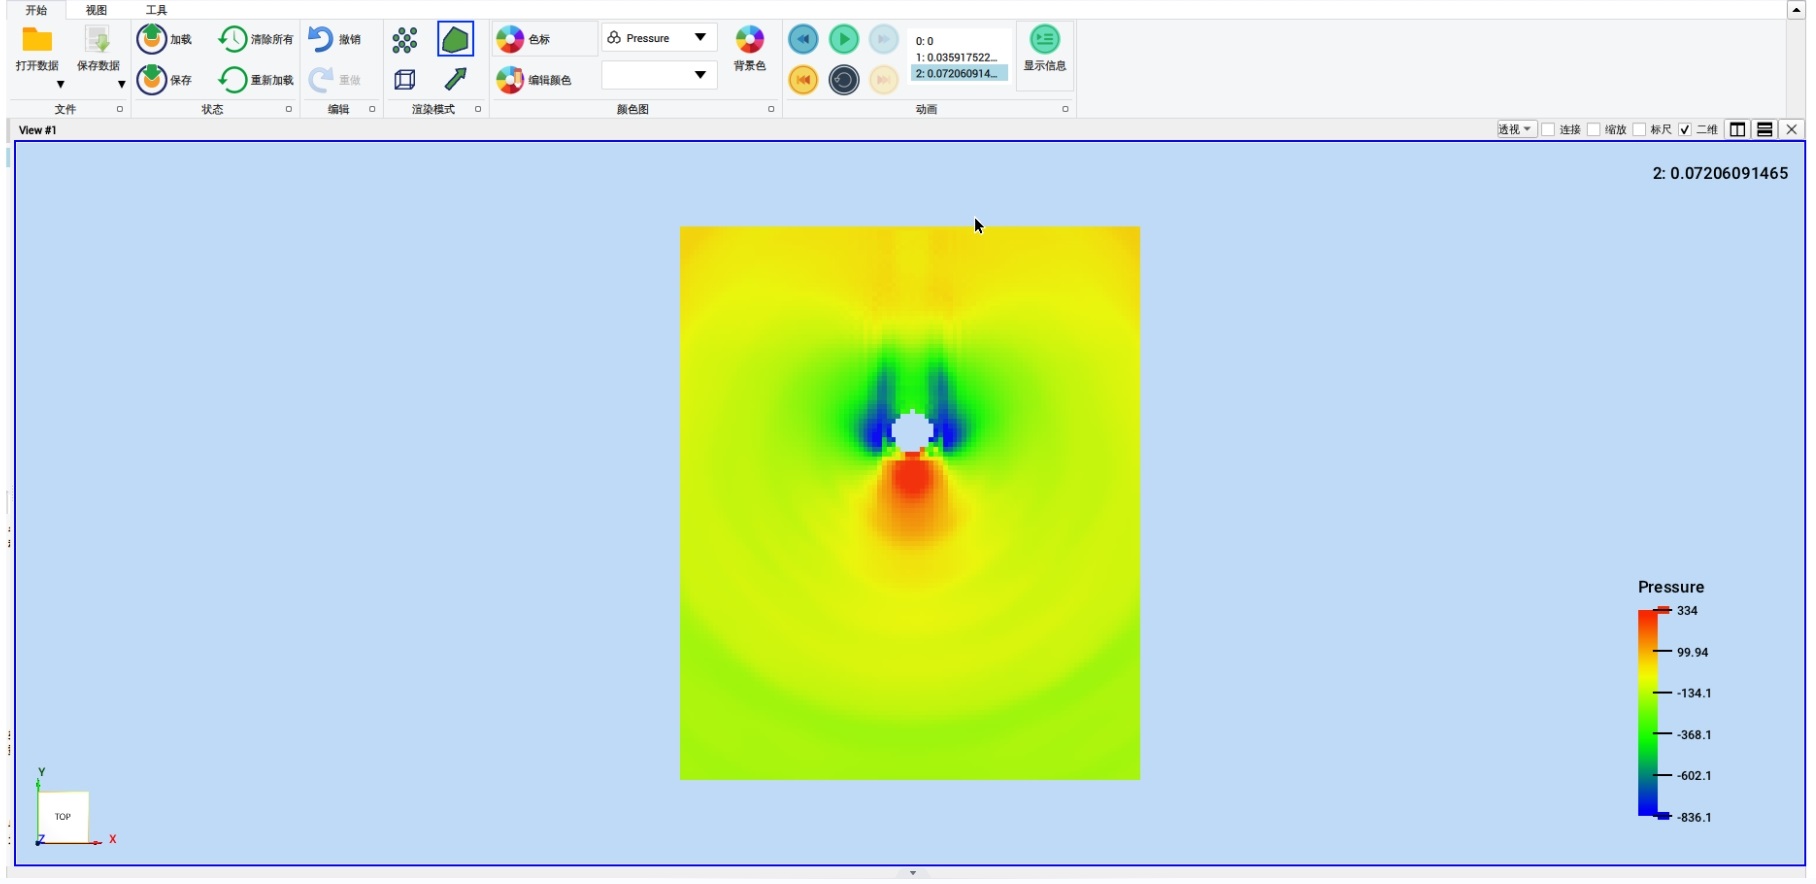
Suochen's post-processing software has the following function points, which can import result data in multiple formats and output images, as shown in the following figure: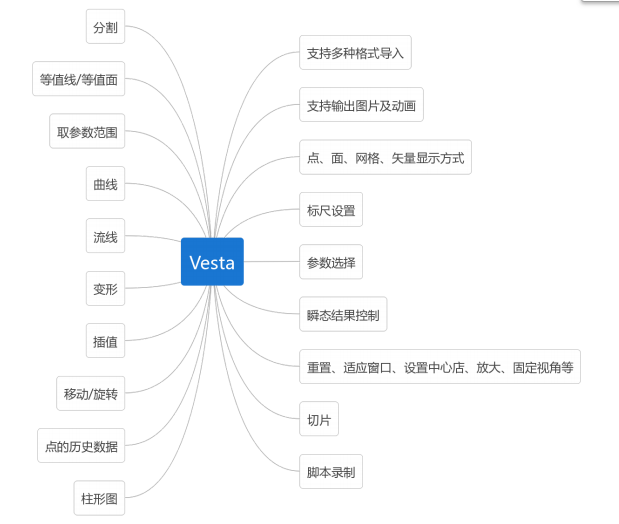
2.6 Simulation collaboration
When a project is more complex and requires collaboration from multiple people, the simulation cloud system provides simulation collaboration function. Simulation collaboration can be seen as a group of users jointly operating a certain project, and the personnel in the project collaboration list have the same operation permissions for the files in the project. As shown in the following figure: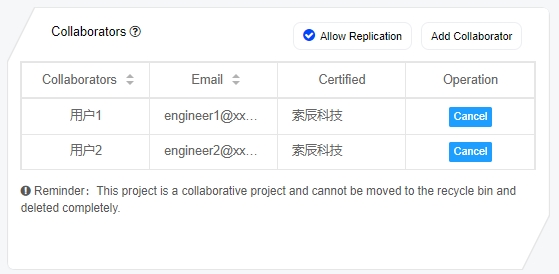
The prerequisite for conducting simulation collaboration is to add the corresponding personnel as friends. After successful addition, click the "Add Collaborator" button in your project to filter your friend list. Click the button to set the selected friends as collaborators for this project, as shown in the following figure: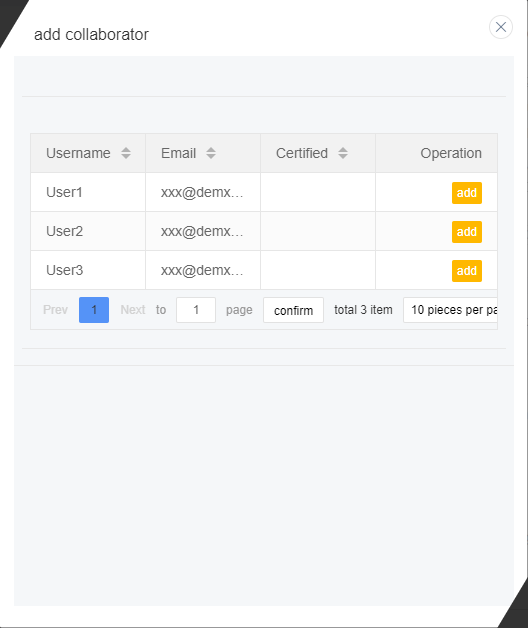
2.7 Find
The discovery panel is mainly used to share project information. After the project is completed, click the "Share" button on the project details page to share the project to the discovery panel for other personnel to learn. The project list in the discovery panel can view information such as the author, description, number, number of copies, number of views, recommendation, and creation time of the project. Only administrators can recommend this project to the homepage, as shown in the following figure: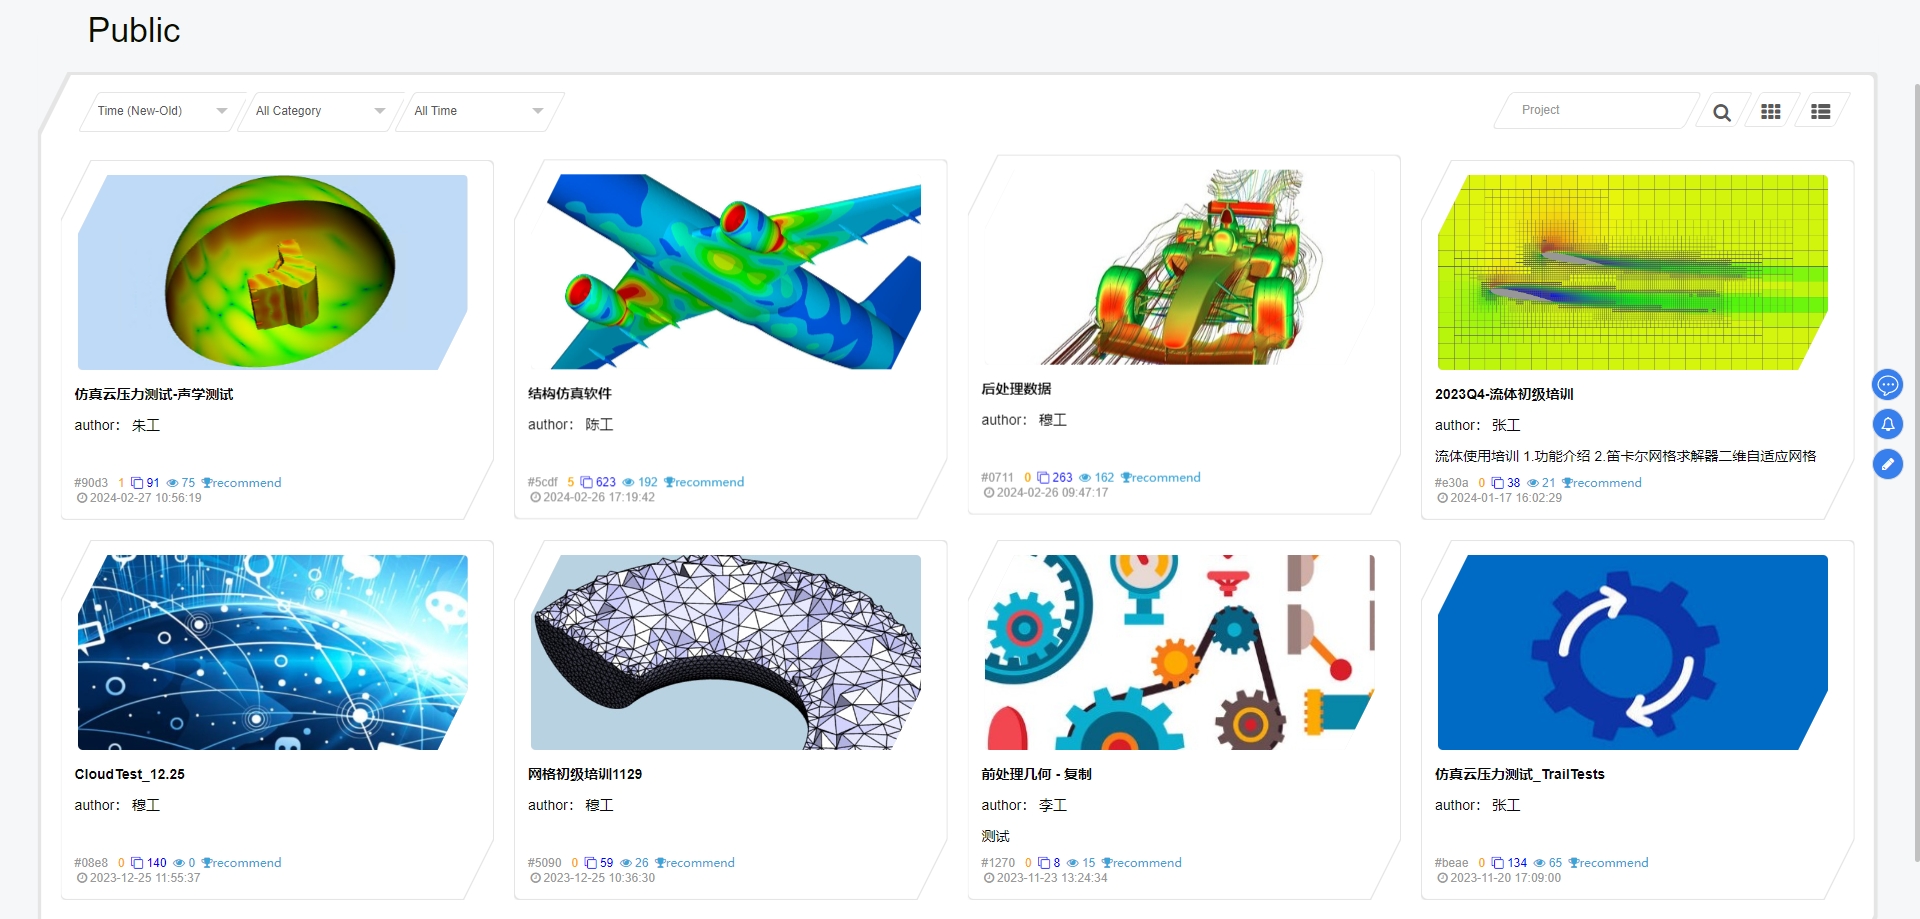
Open the project in the discovery panel and enter the project management workspace, which mainly includes the following main contents: simulation list, comments, project properties, and resource view, as shown in the following figure: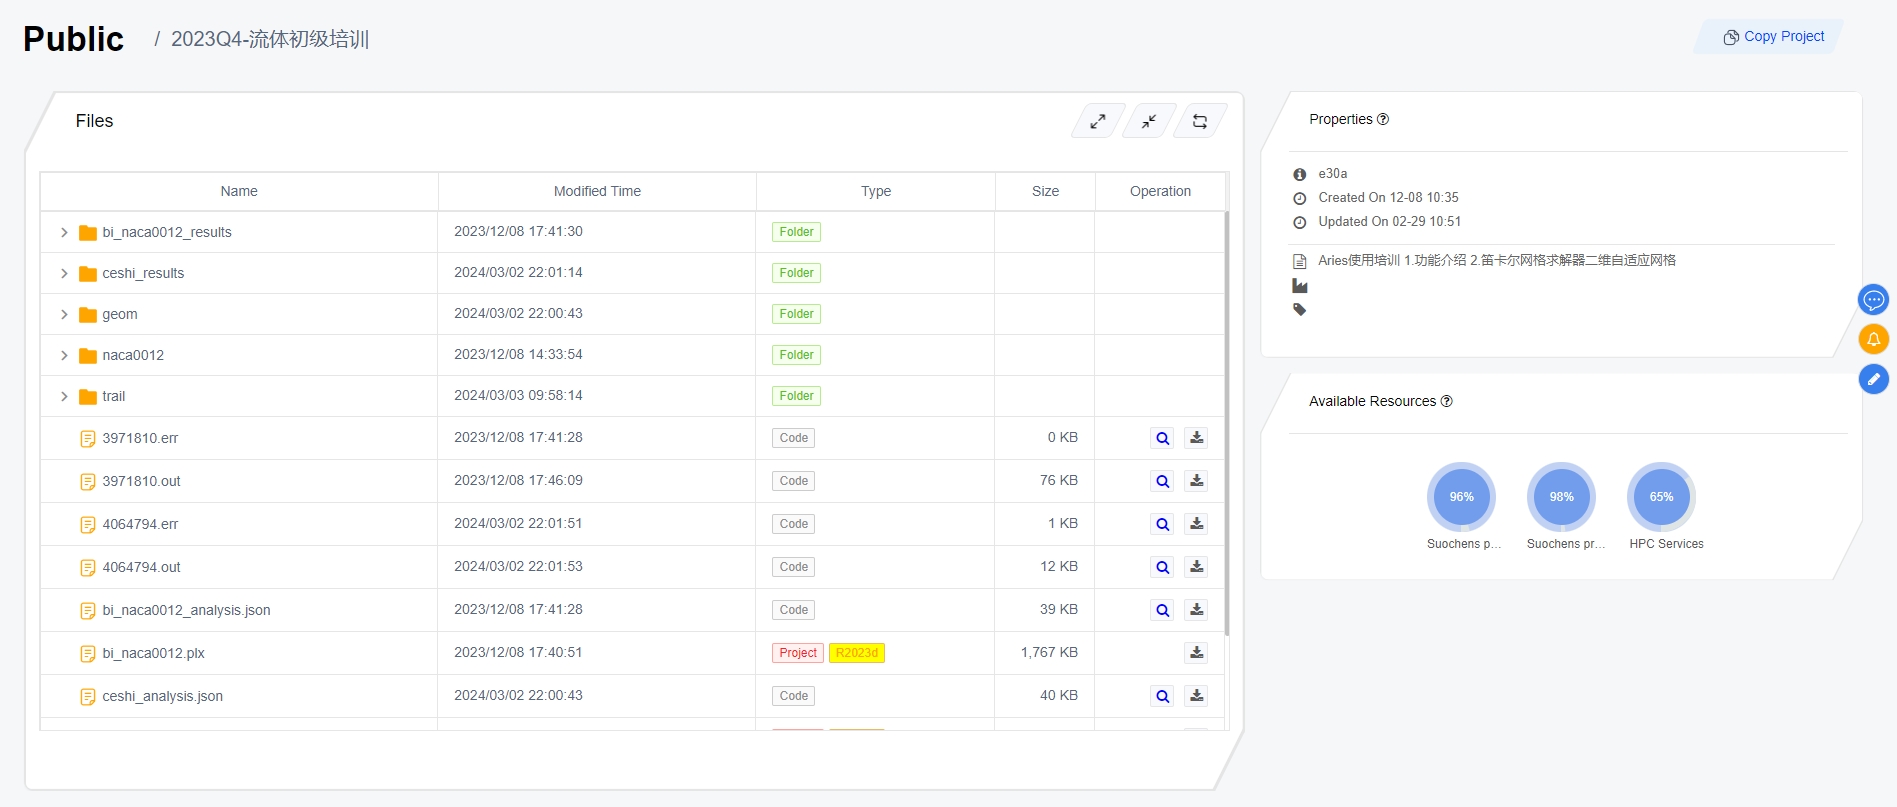
2.7.1 File list
The file list displays all the files of the project in a table format. In the operation table column, you can view (only support images, PDF files, txt) and download files. It should be noted that files with icons only support online viewing.2.7.2 Copy
If you find an excellent item in the discovery panel, you can go to the item below as shown in the figure above, click the "Copy Item" button, and copy the item to your own work panel for modification and use. There is no difference in file operation between copying a local project and creating a new one.2.8 Simulation Community
The simulation community currently provides a simulation forum function, and will continue to improve the simulation community in the future. The forum page is divided into two functional areas: forum section and section content. The purpose of establishing a forum is to enable users to better communicate and exchange ideas. Users can post help posts, technology sharing posts, project sharing posts, and some suggestions for simulation cloud systems on the forum.
The project section is added by the administrator, and the forum is divided into different sections to make the operation efficiency of the forum more efficient. Users can freely express themselves in their field, and administrators can set up top posts. Boutique posts can be automatically set based on the user's likes and views, or administrators can manually set the Boutique, as shown in the following figure: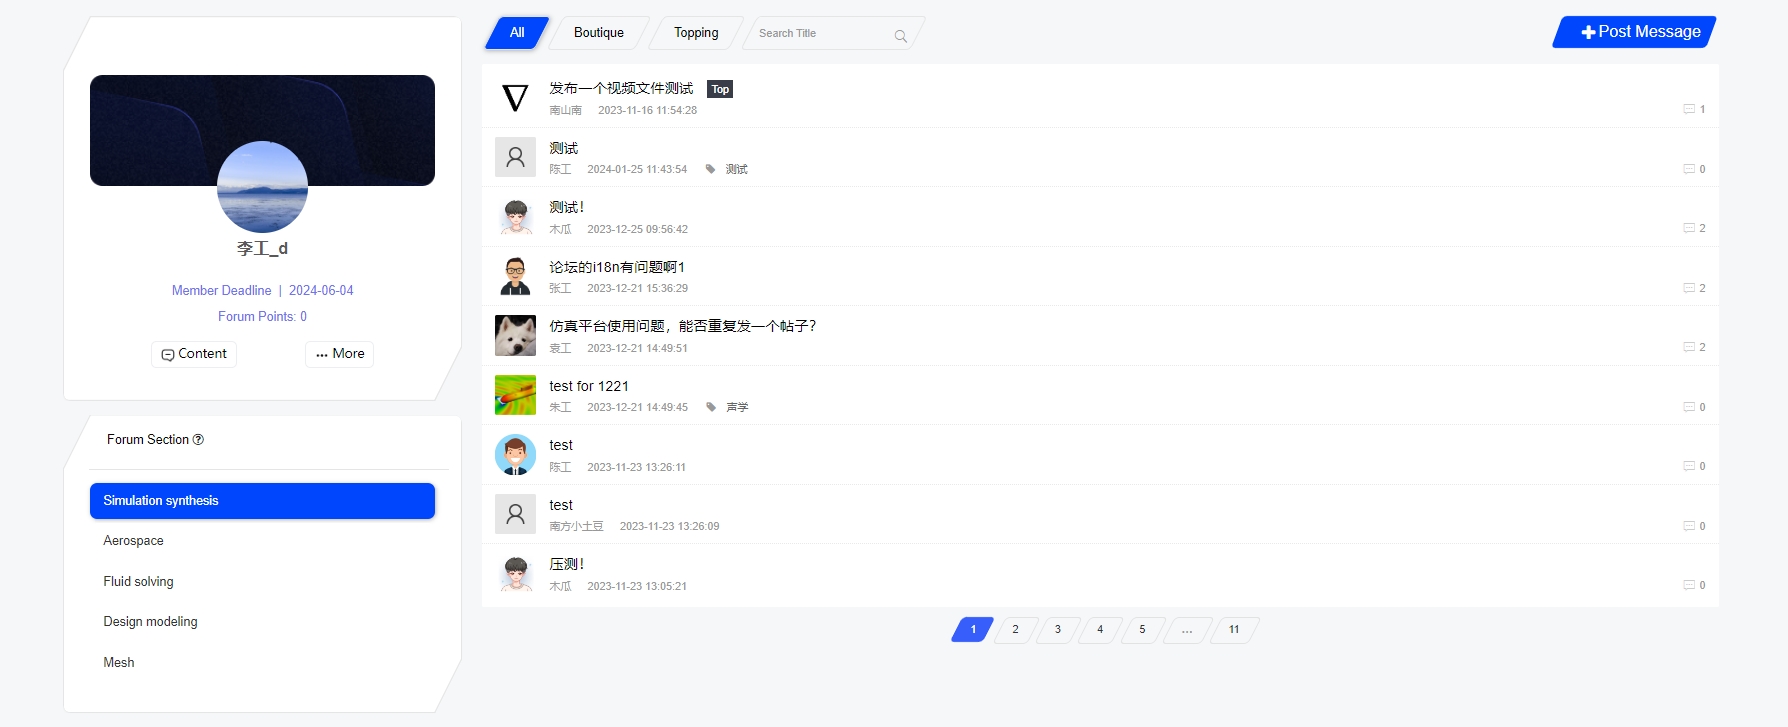
2.8.1 Post
We can click the "Post" button on the forum page to jump to the post page. Enter the title, description, label, select the uploaded attachment, and click the "Publish Now" button to publish the post. It should be noted that when entering labels, the next label can be entered again after each label is entered with the Enter key key. The description supports inserting pictures, as shown below: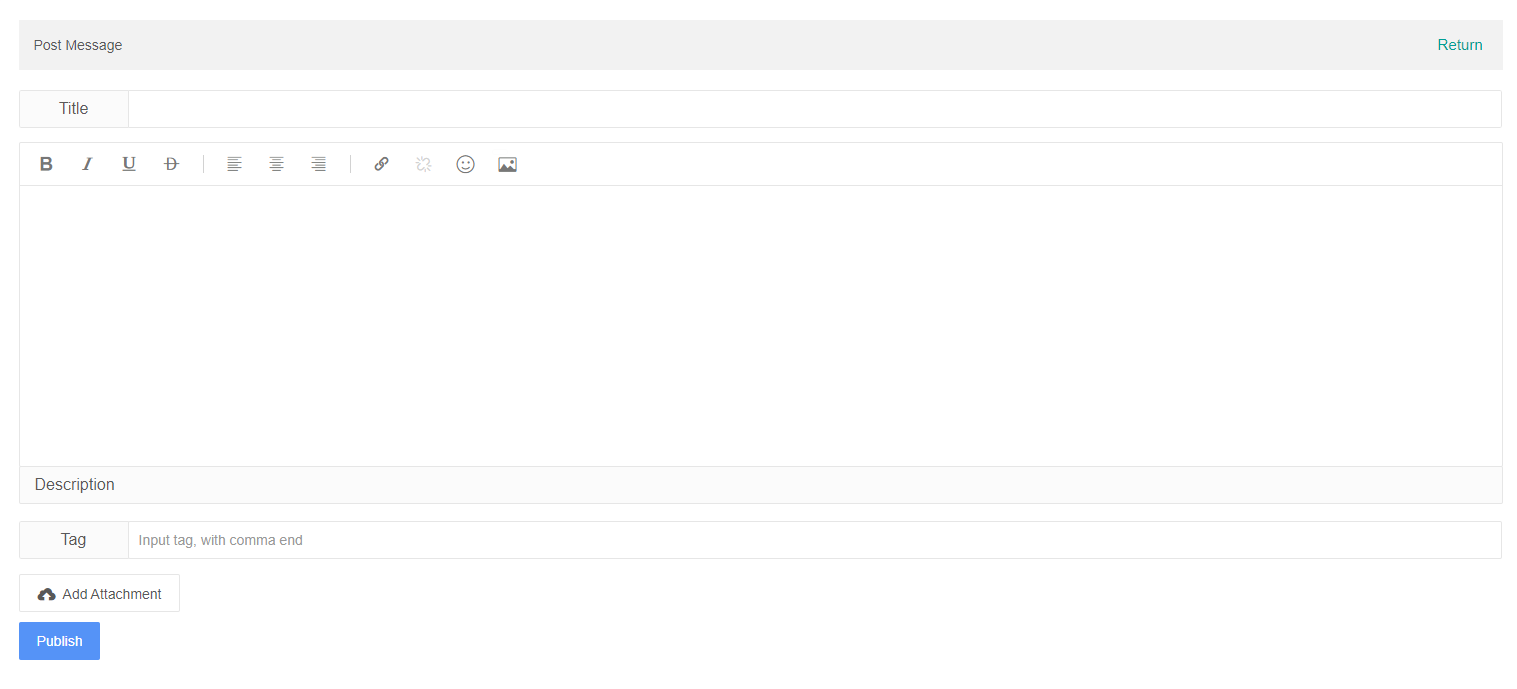
2.8.2 View post details
Click on the title of the post you want to view in the forum list to enter the forum details page. On this page, we can view the detailed content of the post, as well as the reply content and attachment information under the post. It should be noted that users can only delete their own posts, as shown in the following figure: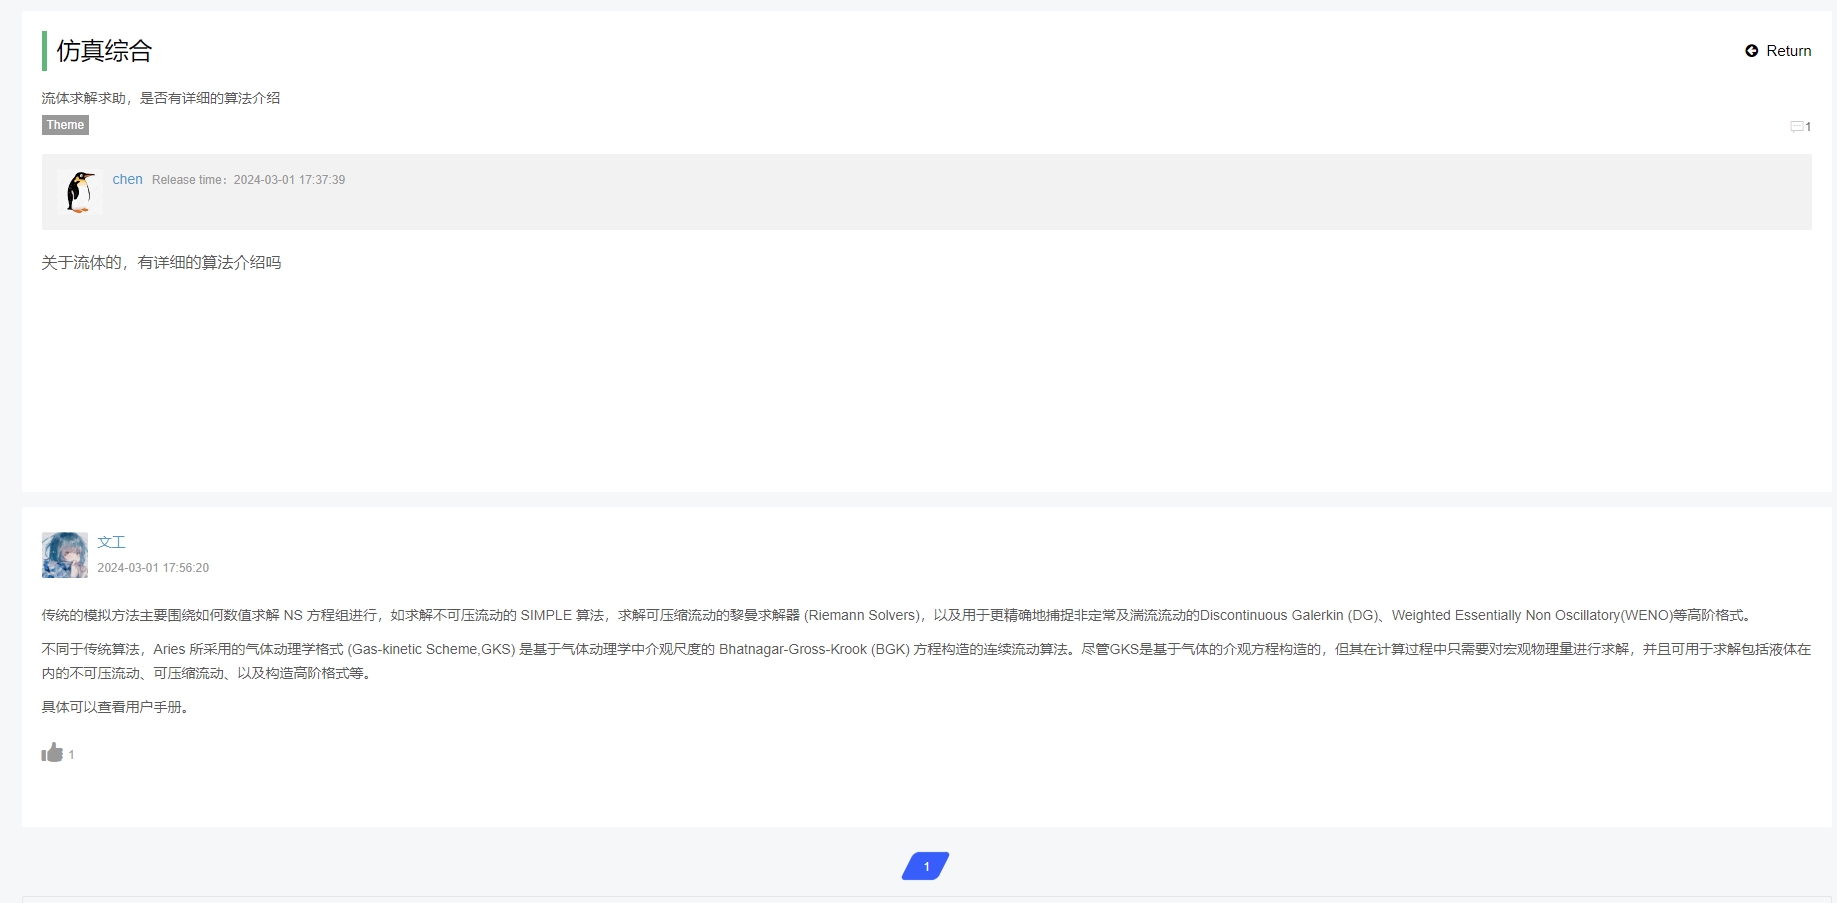
2.8.3 Reply post
Enter the reply content in the rich text box at the bottom of the post details page, select the attachment that needs to be uploaded, and click submit reply after the reply is completed to complete the post reply. The reply content supports inserting images, and users can delete their reply content, as shown in the following figure: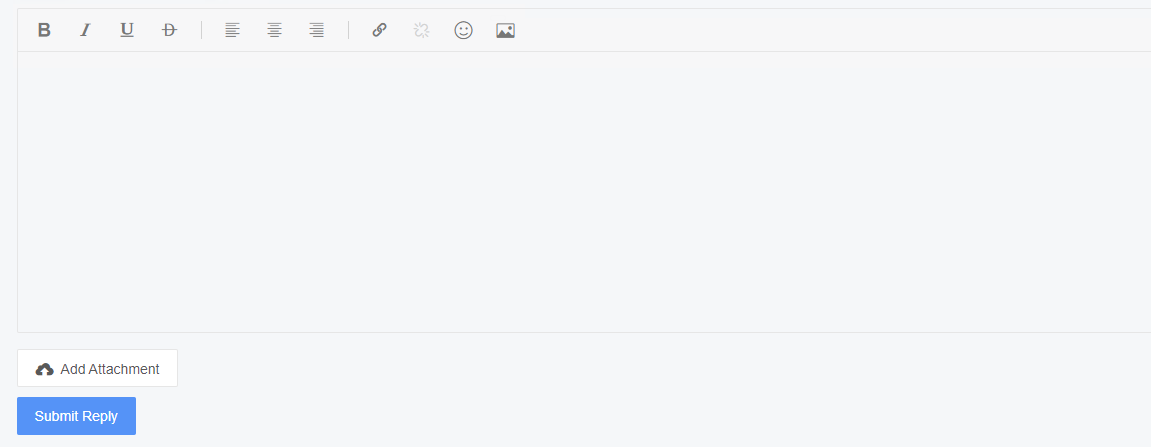
2.9 High Performance Platform(Some functions are currently not open)
The high-performance platform consists of four modules: online job list, computing node resource information, storage resources, and quick access. The online list module can view the computing tasks of the current login user in real time, which is convenient for users to manage High-performance computing resources. The computing node resource module can view the current computing node queue, as well as the number of nodes and cores in the queue. The storage resource module can view the current public directory and the usage of storage resources. The quick entry provides functions such as binding accounts, resource managers, job submission, Simulation Workbench, VNC desktop, file exchange, remote access, and global settings. As shown in the following figure: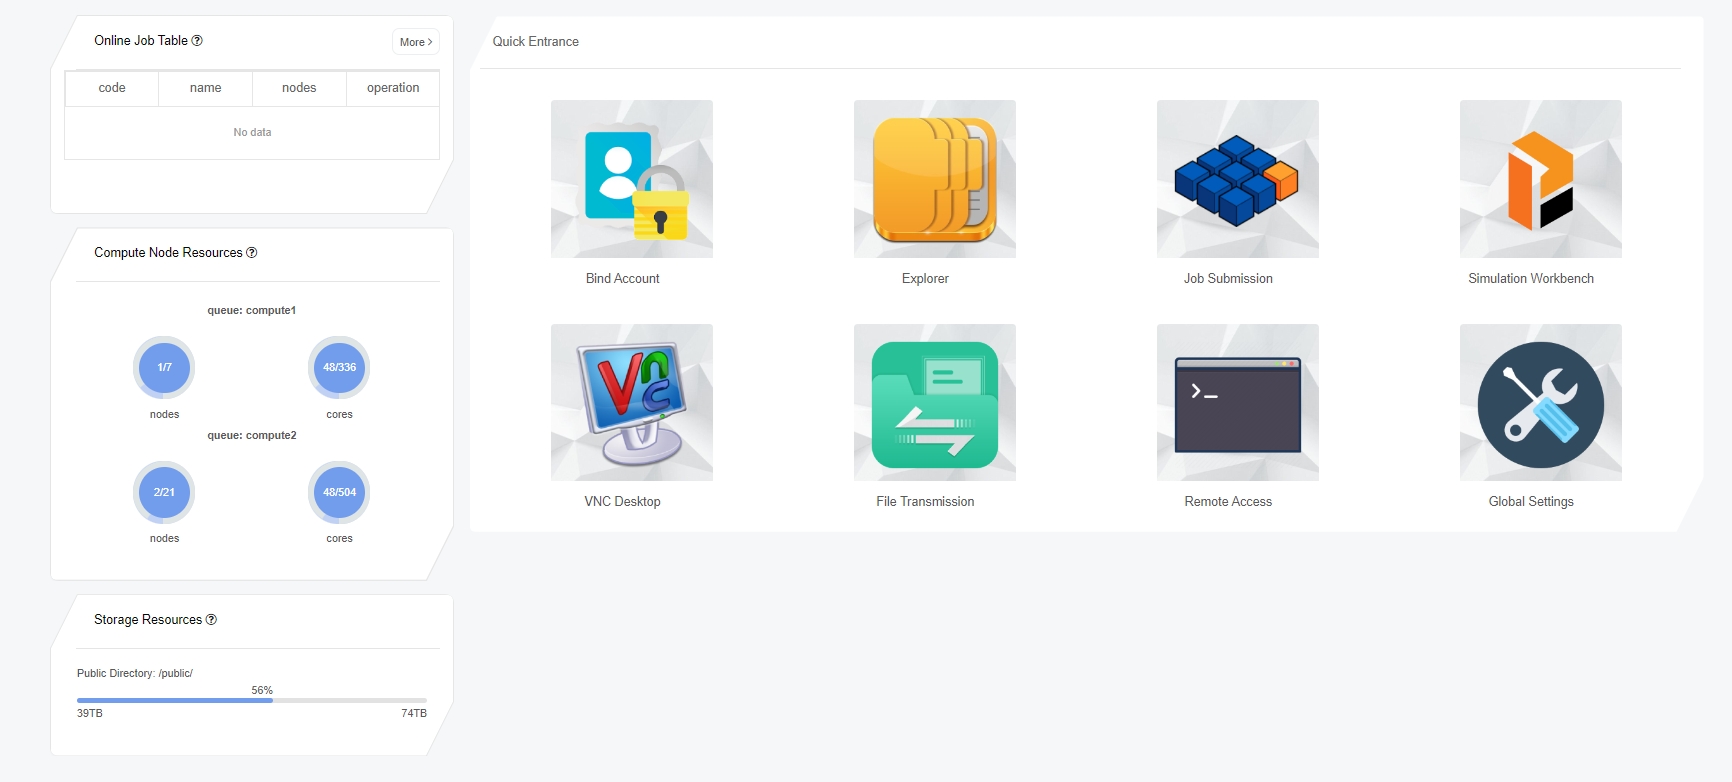
2.9.1 Online homework list
The online list module displays the High-performance computing task list of the current login user, and can view the job ID, job name, and number of nodes to facilitate users to manage High-performance computing tasks, as shown in the following figure: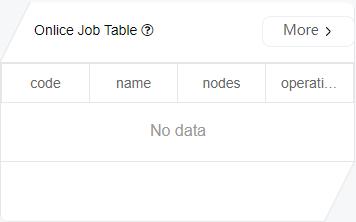
2.9.2 Computing Node Resources
The computing node resource management module displays the current queue information, where you can view the queue name, number of nodes, and number of cores, as shown in the following figure: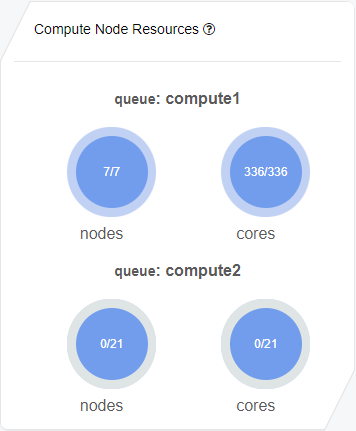
2.9.3 Storage resources
The storage resource module can view public directories and storage resource usage, as shown in the following figure: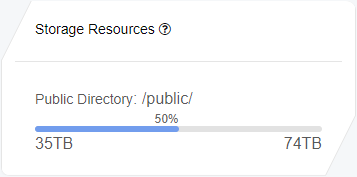
2.9.4 Quick Entry
The Quick Entry module integrates commonly used functions for users, such as account binding, resource manager, job submission, PAM platform, VNC desktop, file exchange, remote access, and global settings. Through the Quick Entry module, relevant functions can be quickly used, as shown in the following figure: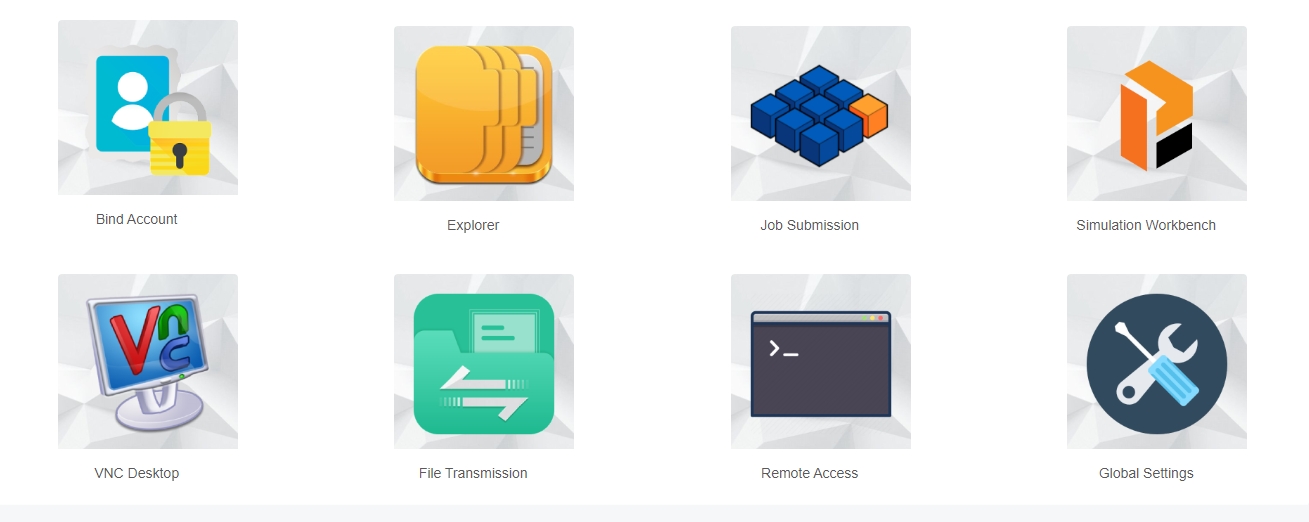
2.9.4.1 Bind account
Click on Bind Account to pop up the Bind High Performance Account pop-up window. Enter the high-performance account and password, and then click the "OK" button to complete the account binding operation (if the account password is incorrect, a prompt will automatically pop up), as shown in the following figure: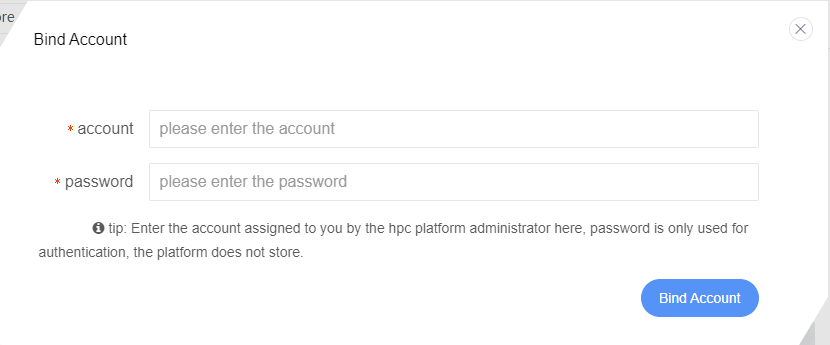
After successfully binding a high-performance account, click the bind account button again to pop up the bind high-performance account pop-up window. The already bound account and the "unbind" button will be displayed. Click the "unbind button" to unbind the high-performance account, as shown in the following figure:
2.9.4.2 Resource manager
After clicking on the "Resource Manager" card, enter the high-performance resource manager module. You can view a list of high-performance resource files. The file list displays high-performance resource files in a table format, allowing you to view file names, modification times, and file types. It supports operations such as moving, copying, deleting, renaming, creating new folders, compressing, and decompressing files, as shown in the following figure:
(1).File List Menu Bar
The file list menu bar integrates most of the functions of file operations, including expanding, folding, refreshing, adding directories, uploading files, file movement, file deletion, file copying, and file compression. It supports batch operations on files. The following is a detailed introduction, as shown in the following figure: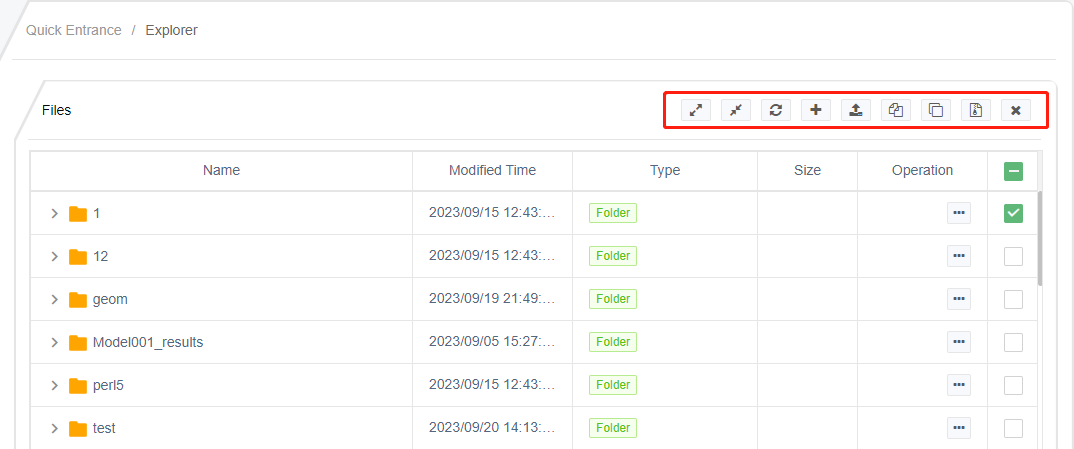
- File List Expansion Operation
Click the file expansion button, and all file directories will be expanded, as shown in the following figure: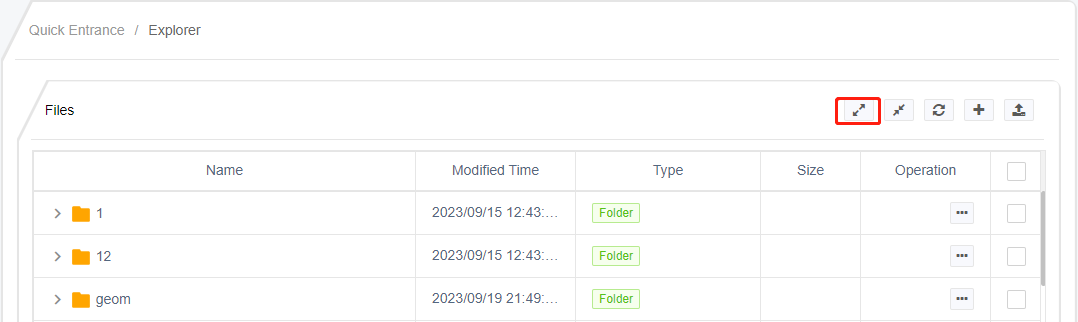
- File List Collapse Folder
Click the collapse button to collapse the file list and display only the top-level file directory, as shown in the following figure: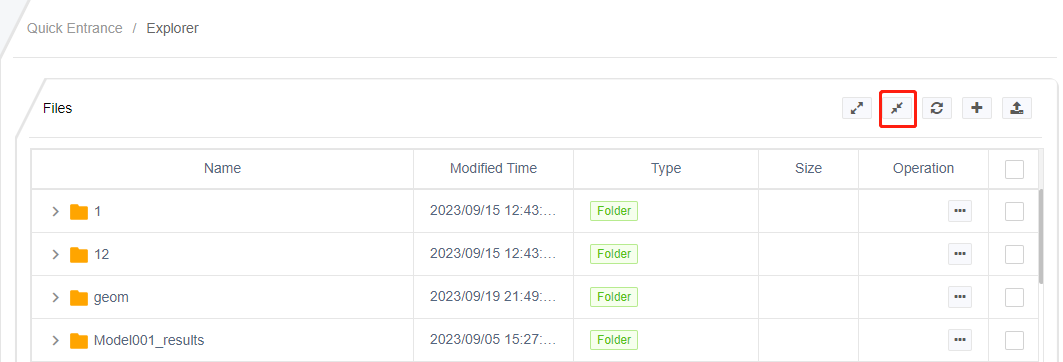
- Refresh List View
Clicking the refresh button will refresh the file list and pull the latest project file, as shown in the following figure: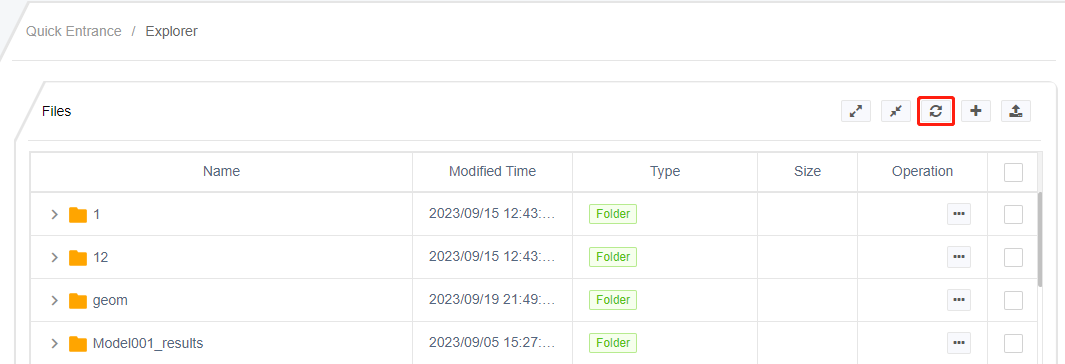
- Add Catalog
The directory added here is the top-level directory. To add a subset directory, click on the operation function in the file list and perform the operation inside, as shown in the following figure: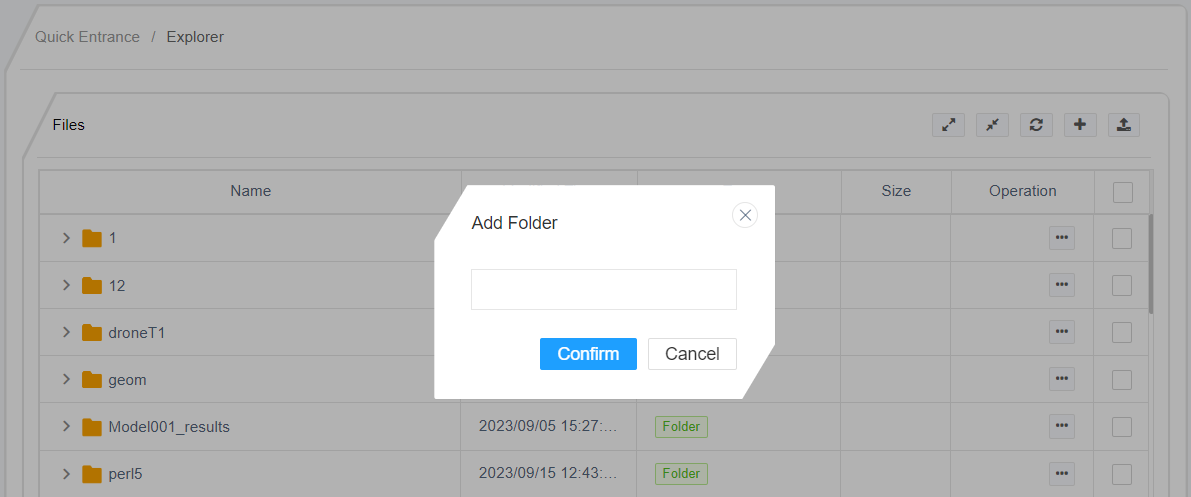
- Upload files
Click the upload function to upload local files to the project. The upload location here is the top-level directory of the file list. If you want to upload files in a subset directory, you need to implement it in the file list operation column, as shown in the following figure: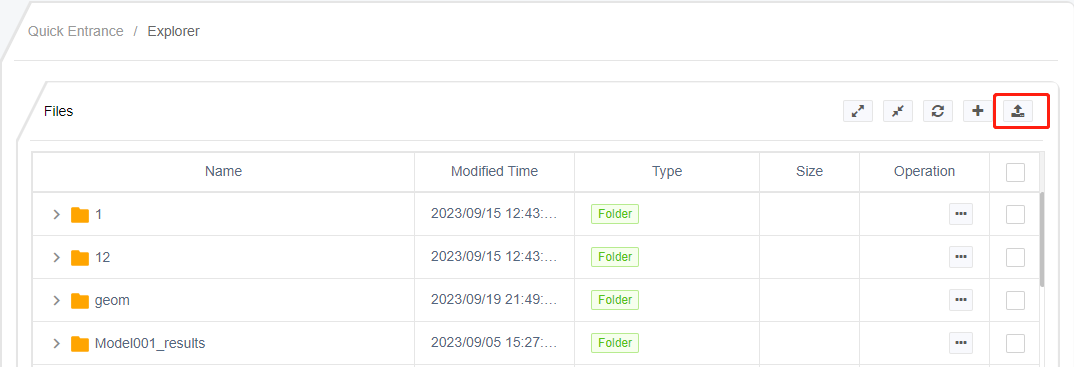
- Batch file movement
Select the files that need to be moved in bulk, select them in the checkbox after the corresponding files, and then click the File Move button in the menu bar of the file list to pop up the Move File dialog box. Select the location where the files will be moved, click the "Move Here" button, and complete the file move operation, as shown in the following figure: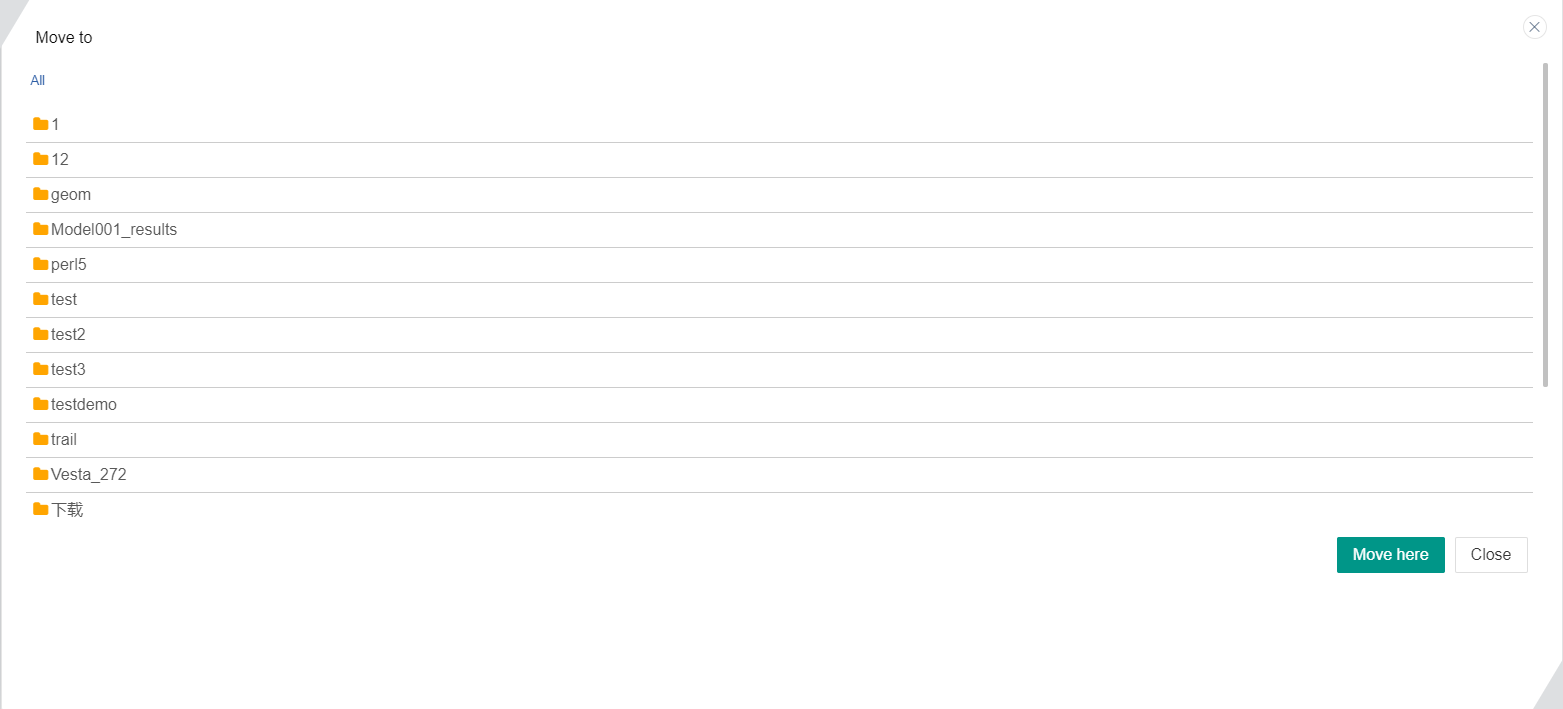
- Batch copying of files
Select the files that need to be copied in bulk, select them in the checkbox after the corresponding files, and then click the File Copy button in the menu bar of the file list to pop up the Copy File dialog box. Select the location where the files will be copied, click the "Copy Here" button, and complete the file copy operation, as shown in the following figure: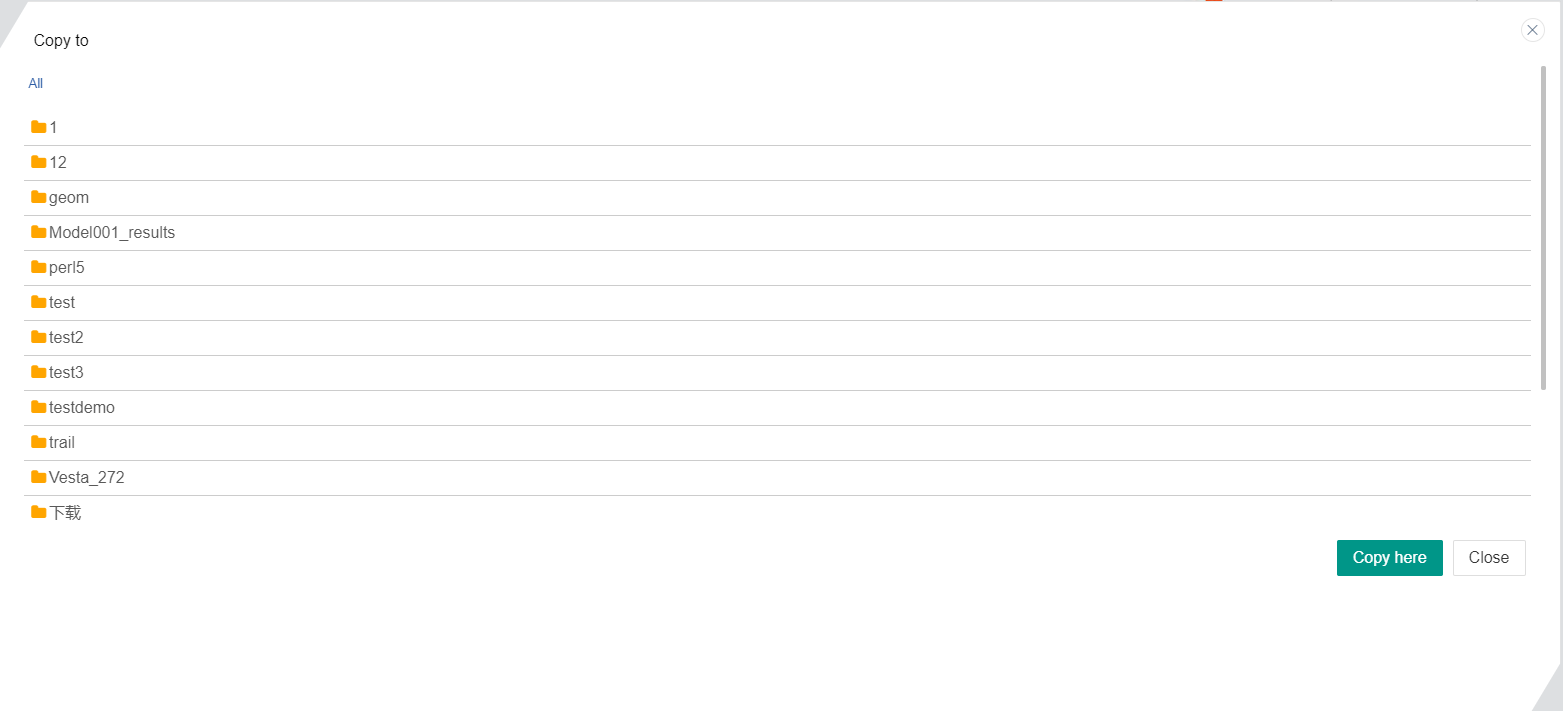
- Batch compression of files
Select the files that need to be compressed in bulk, select them in the checkbox after the corresponding files, and then click the File Compression button in the menu bar of the file list to pop up the compressed file dialog box. Enter the compressed file name, click the "OK" button, and complete the file compression operation, as shown in the following figure: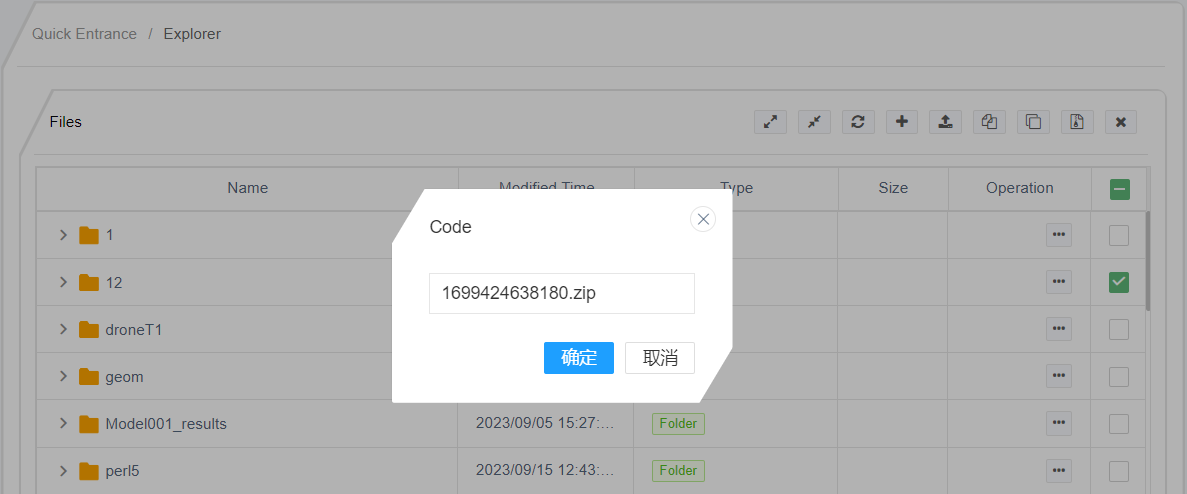
- Batch deletion of files
Select the files that need to be deleted in bulk, select them in the checkbox after the corresponding files, and then click the File Delete button in the menu bar of the file list to pop up a confirmation box for deleting files. Click the "OK" button to complete the batch deletion operation of files, as shown in the following figure: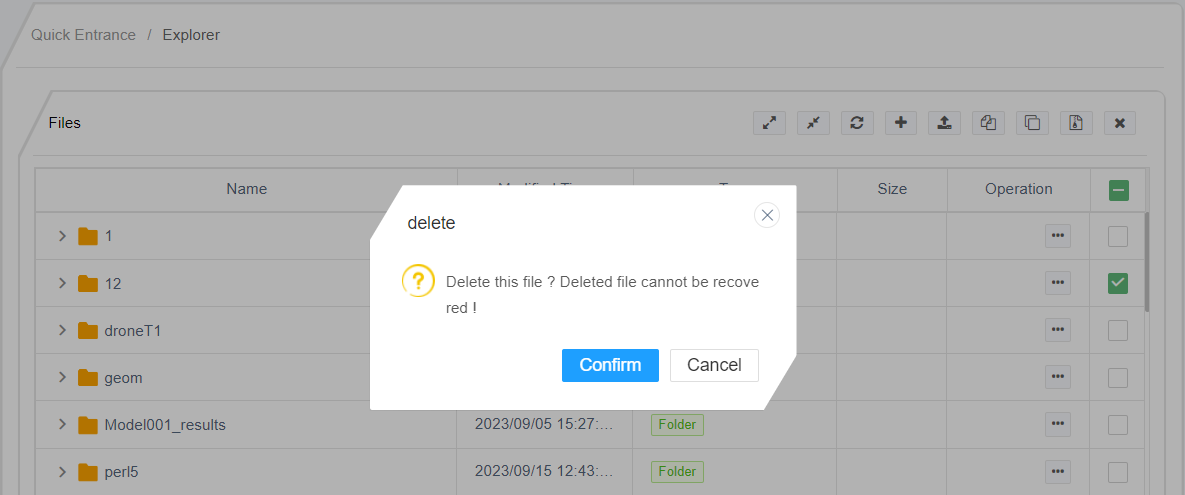
(2).Column operations for files
Click the "···" button in the table operation column to display/hide the operation menu for the selected file, including functions such as uploading files, adding directories, renaming, compressing, deleting, moving, and copying, as shown in the following figure: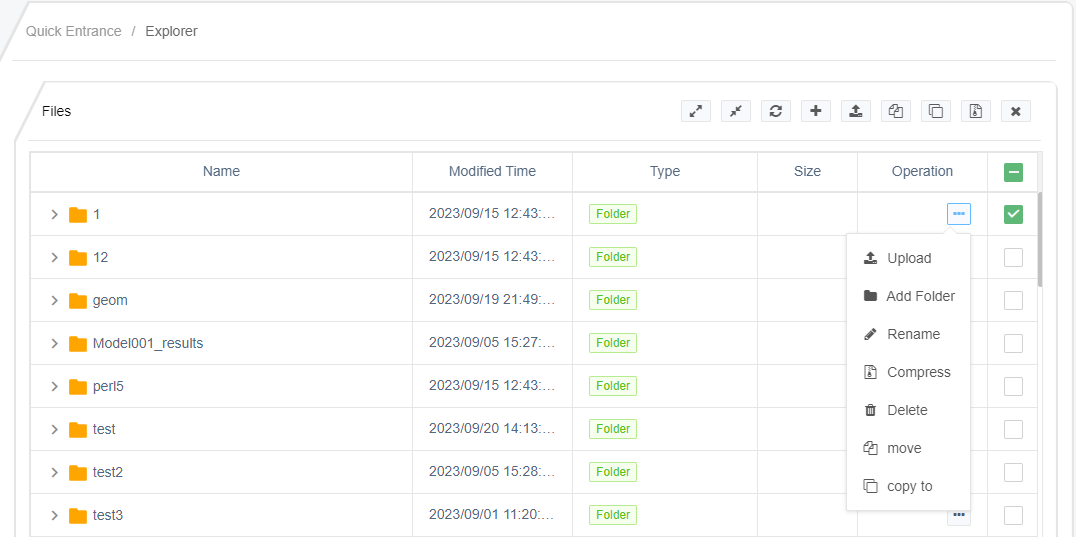
- Upload files
Clicking on Upload File can upload local files to this directory. It should be noted that only the directory type file operation list will display the upload file, add directory, and compress menu. - Add Catalog
Click the Add Directory menu to add a subset of directories under the selected directory. Click the OK button to complete the folder addition, as shown in the following figure:
- Rename file
Click the rename menu to rename files or directories.
- Compressed file
The compressed file function will compress the selected directory and generate a. zip compressed file with the same name in the same level directory. - Delete
After selecting a file and clicking Delete, the directory or file will be deleted. - Move file
After clicking the move file function, a new file list window will pop up. In this window, select the location where the file will be moved. After selecting, click move here to move the folder to the selected move folder. As shown in the following figure: - Copy file
After clicking the copy file function, a new file list window will pop up. In this window, select the location where the file will be copied. After selecting, click Copy Here to copy the folder to the selected folder. As shown in the following figure: 2.9.4.3 Job submission
Click the job submission card to enter the job submission page, where you can configure the calculation partition of the job, the number of processor cores of all nodes, the memory of each node, Waltime, task name, Working directory, project file, and selection of simulation software version. Slurm script template can also be configured. Note that the calculation partition, task name, Working directory and project file cannot be empty, as shown in the following figure: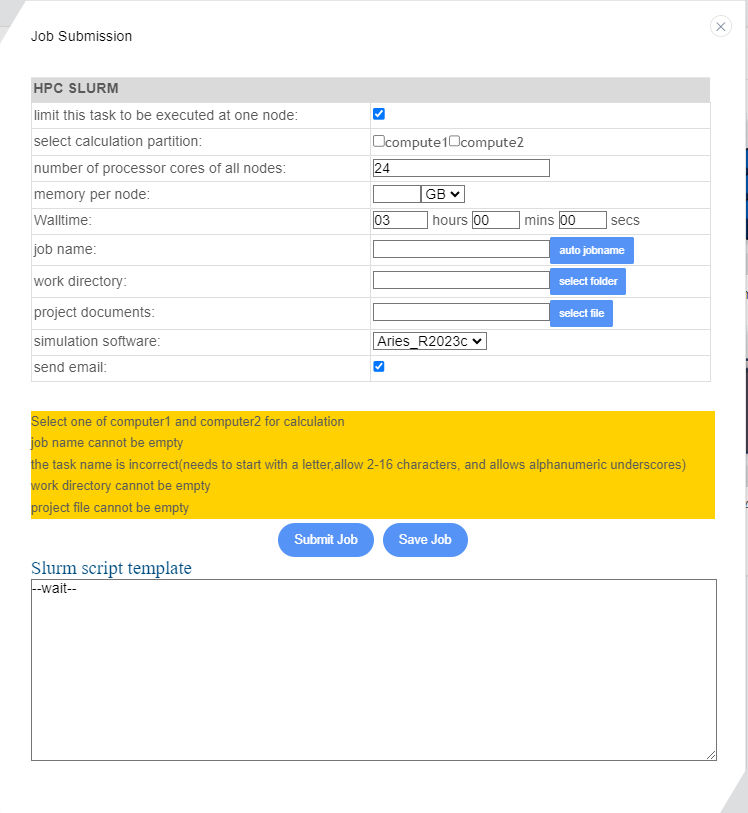
2.9.4.4 Simulation Workbench
Click on the Simulation Workbench to enter the Suochen's pre-processing software workspace. In the upper right corner of this page, you can view the version numbers of Suochen's pre-processing software, Suochen's structure simulation software, and Suochen's general purpose fluid simulation software. Screenshots, Chinese and English switching, and help document functions are also provided in the upper right corner of the version. It can better help users learn how to use plexia (refer to platform 2.4 for details), as shown in the following figure:2.9.4.5 VNC desktop
Click on the VNC desktop card and the page will jump to the VNC desktop, where you can view the analysis and calculation results ". pvd" file generated in the workspace. Click the corresponding view button to enter the Suochen's post-processing software. For example, selecting to view test1_ Fluid.pvd, you can then call Suochen's post-processing software to perform post-processing operations such as slicing and drawing line diagrams on the 3D flow field results, as shown in the following figure: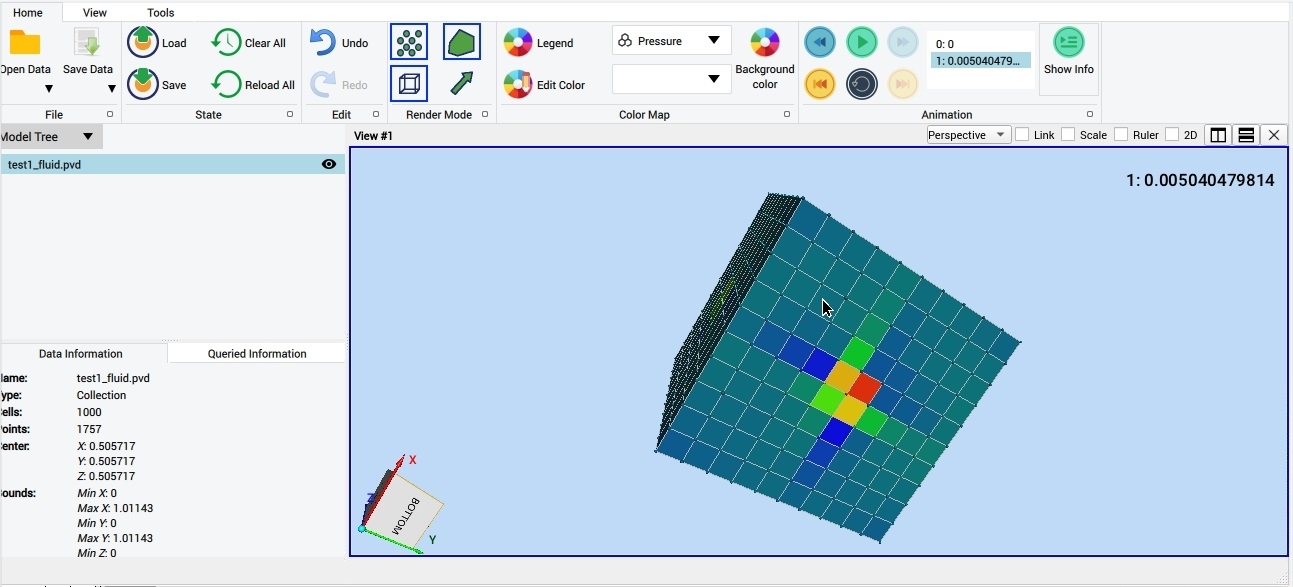
2.9.4.6 File exchange
The file transfer function supports the transfer of project files and high-performance resource files. First, click the "Please Select Project" button, select the target project, and then select the project file. Click the transfer button to achieve the file copy function between the project file and the high-performance file list. Conversely, the transfer function between the high-performance resource list and the project file is achieved, as shown in the following figure: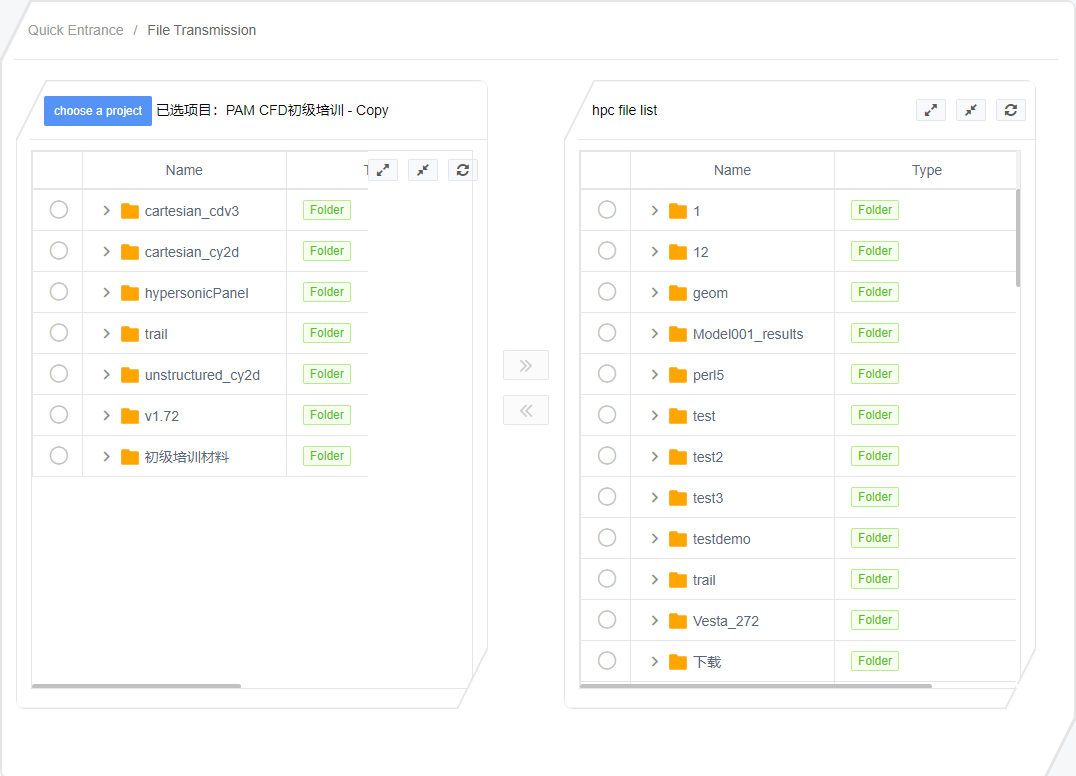
2.9.4.7 Remote access
Click on the remote access card, and the page will jump to the remote shell page. You can view and operate resources through command mode, as shown in the following figure: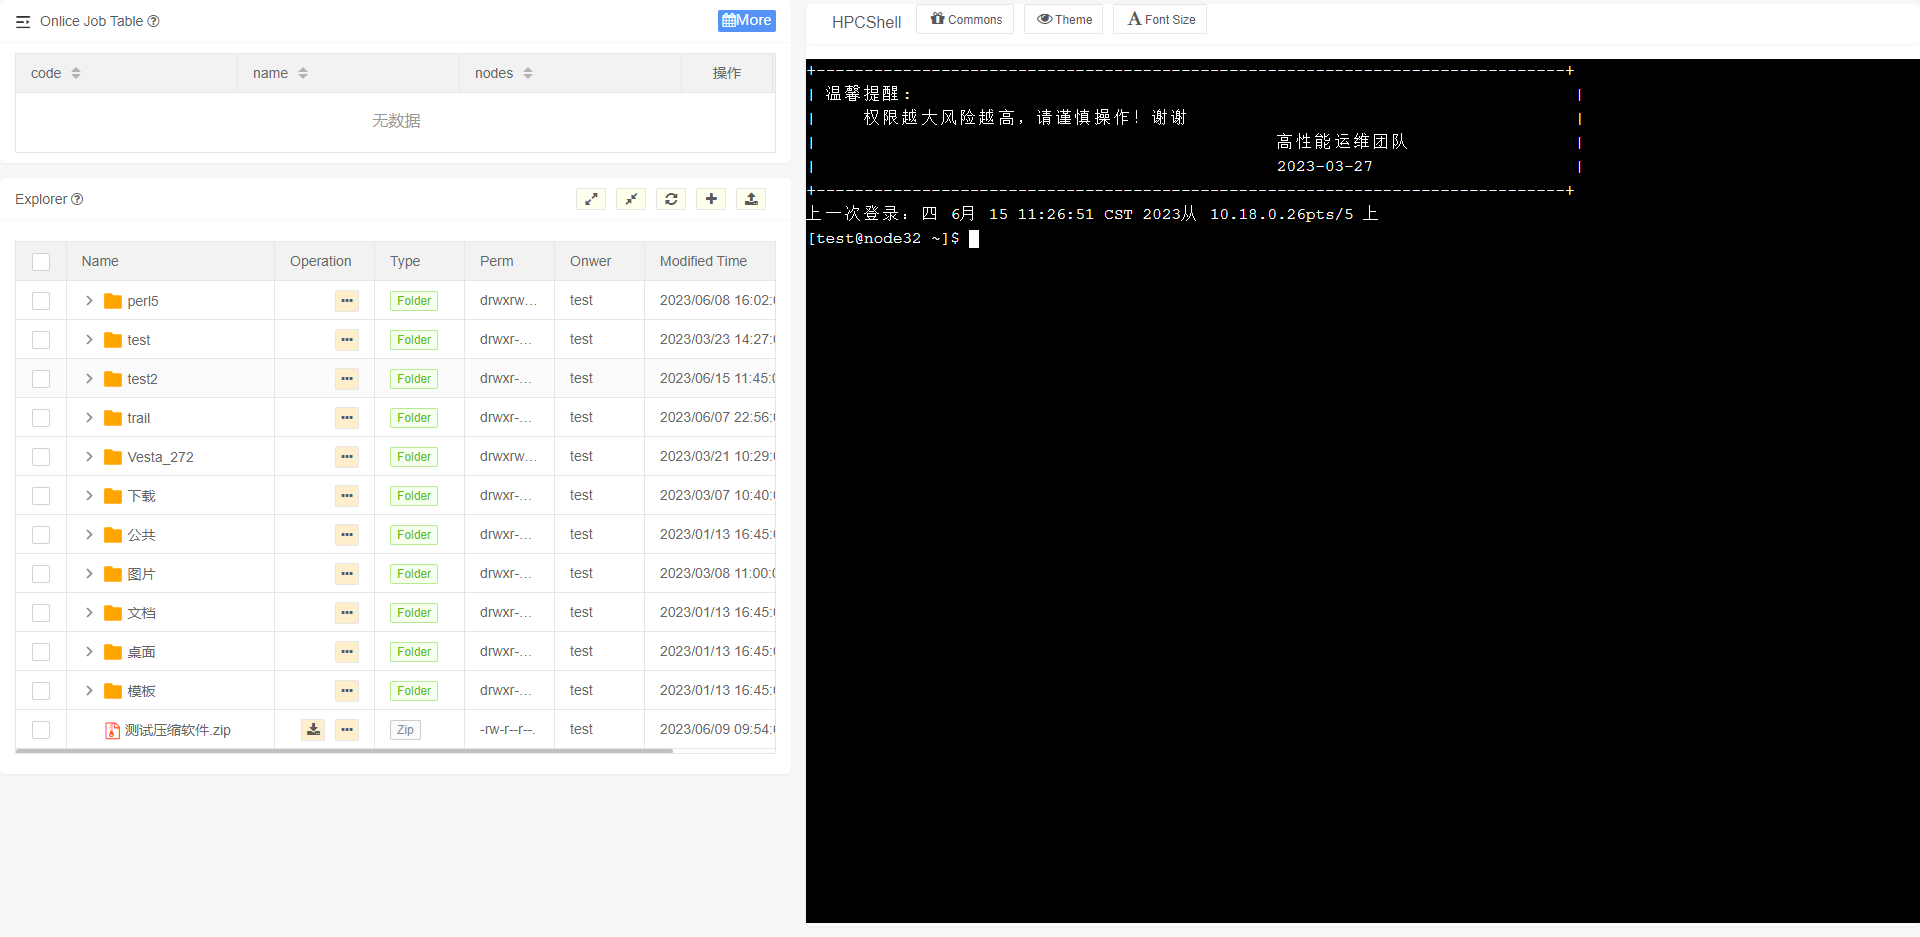
2.9.4.8 Global Settings
Click on the remote access card, and the page will jump to the remote shell page. You can view and operate resources through command mode, as shown in the following figure: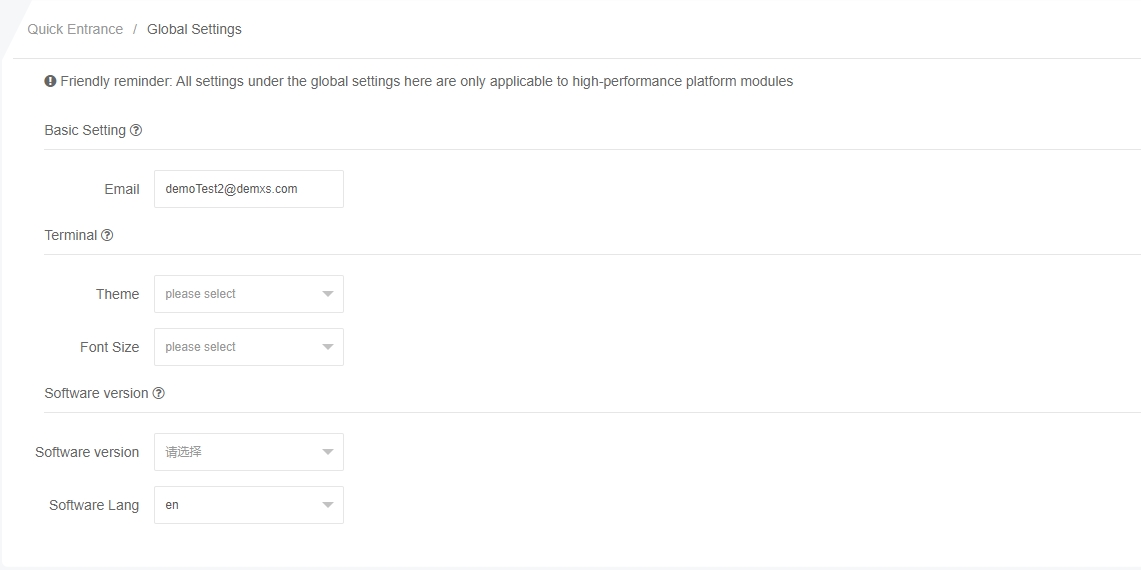
3. Technical Support Services
On the middle right side of the simulation cloud page, we can see the service consultation icon. Website visitors only need to click on the "Service Consultation" button on the webpage, as shown in the following figure: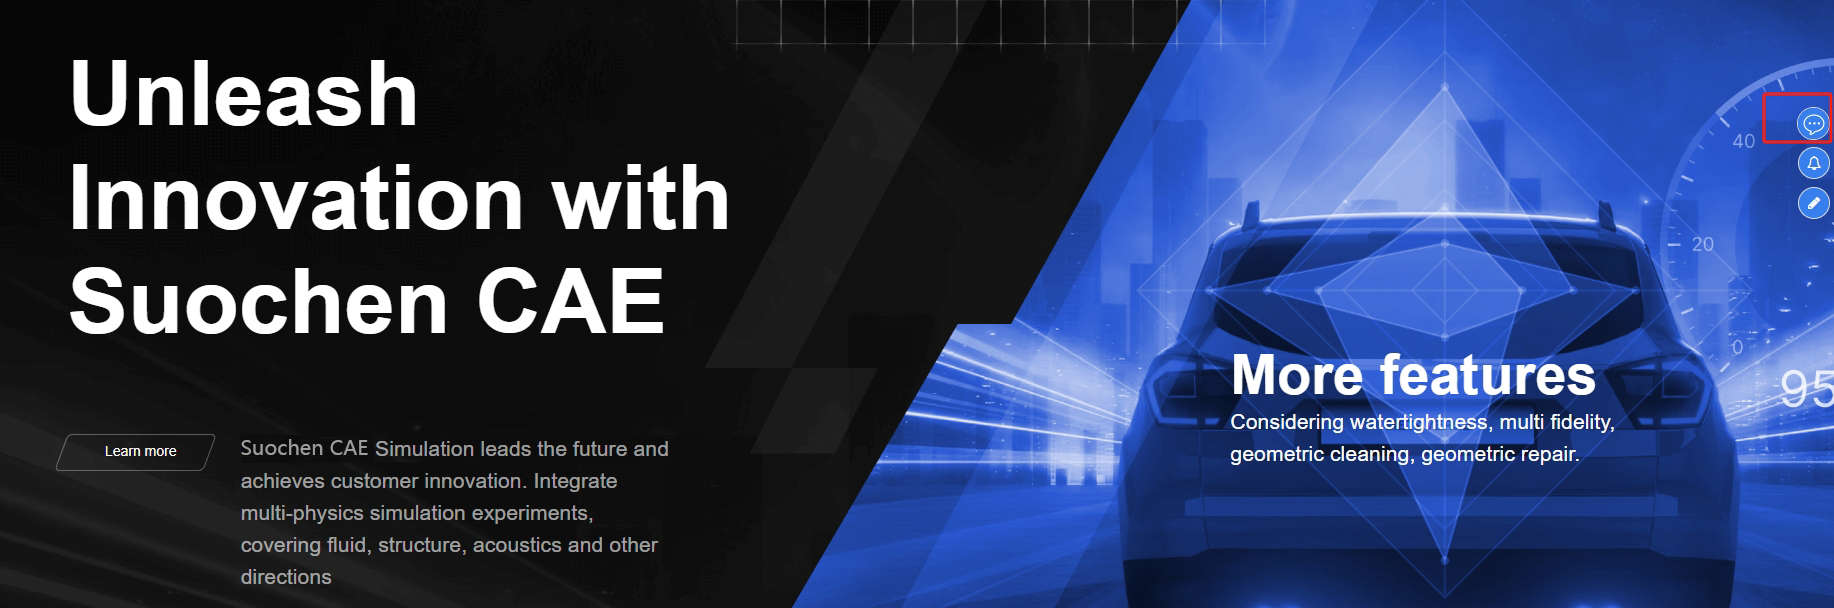 Click on the "Service Consultation" button to have real-time online communication with customer service personnel in the website backend. In the information prompt section, you can see the company's name, address, phone number, and email, as shown in the following figure:
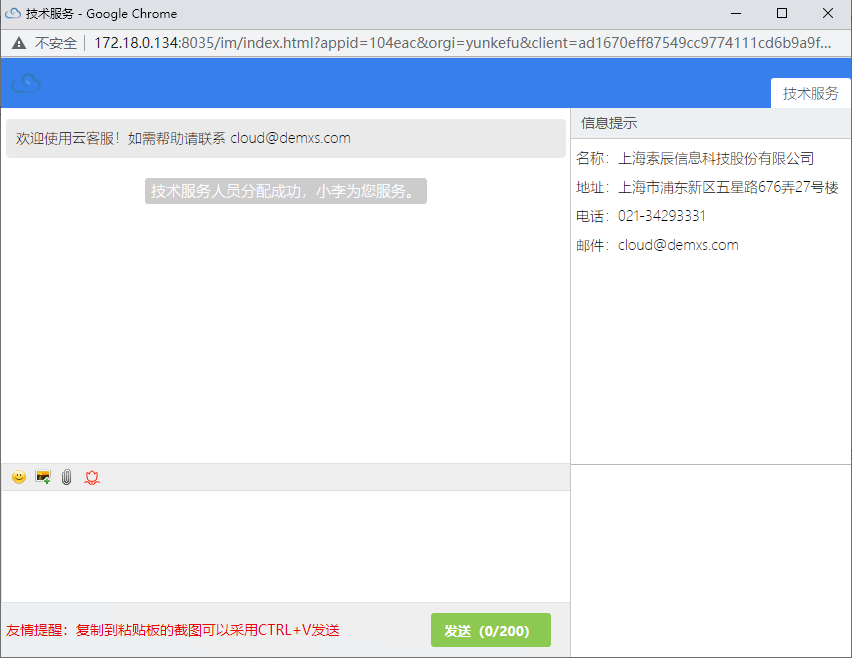
The welcome information is displayed at the top of the service dialog page, and a prompt message will appear when customer service is busy, displaying the current number of people waiting. :Visitors can click to select an emoticon and send it to the customer service eye.
 :Visitors can click this button to send pictures.
 :To send files, visitors can click this button to send files to customer service personnel.
 :The evaluation button allows visitors to click on this button to evaluate the response of customer service personnel after communicating with technical personnel, as shown in the following figure:
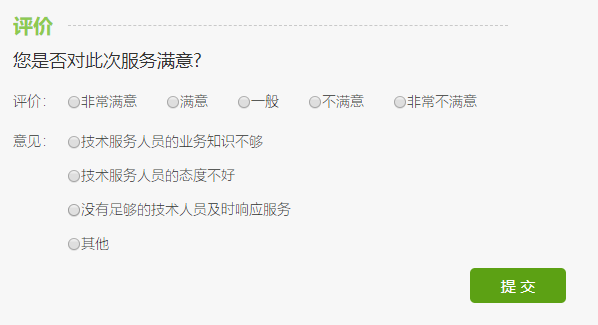
Users can take a screenshot and paste the image in the dialog box, click to send it to customer service, as shown in the following figure: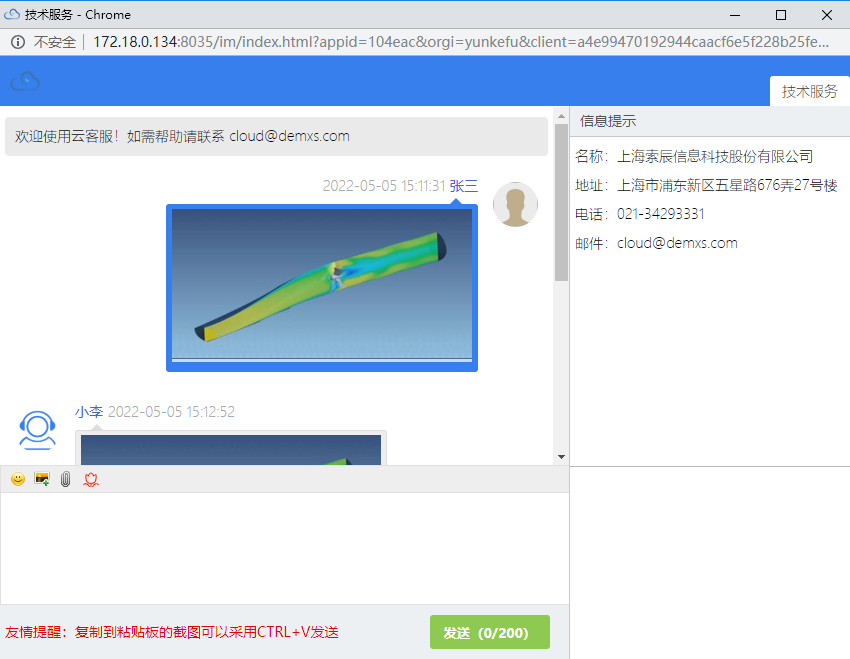
4. High performance computing
Currently, only Suochen's general purpose fluid simulation software solvers can call High-performance computing.4.1 Call High Performance
When executing computational tasks, the system will automatically call high-performance when the number of Processes exceeds 8. (Note: Do not repeatedly click on Run Solver, otherwise the server will continue to add new calculation tasks in the background, causing others' calculations to queue up all the time), as shown in the following figure:
4.2 Output Log
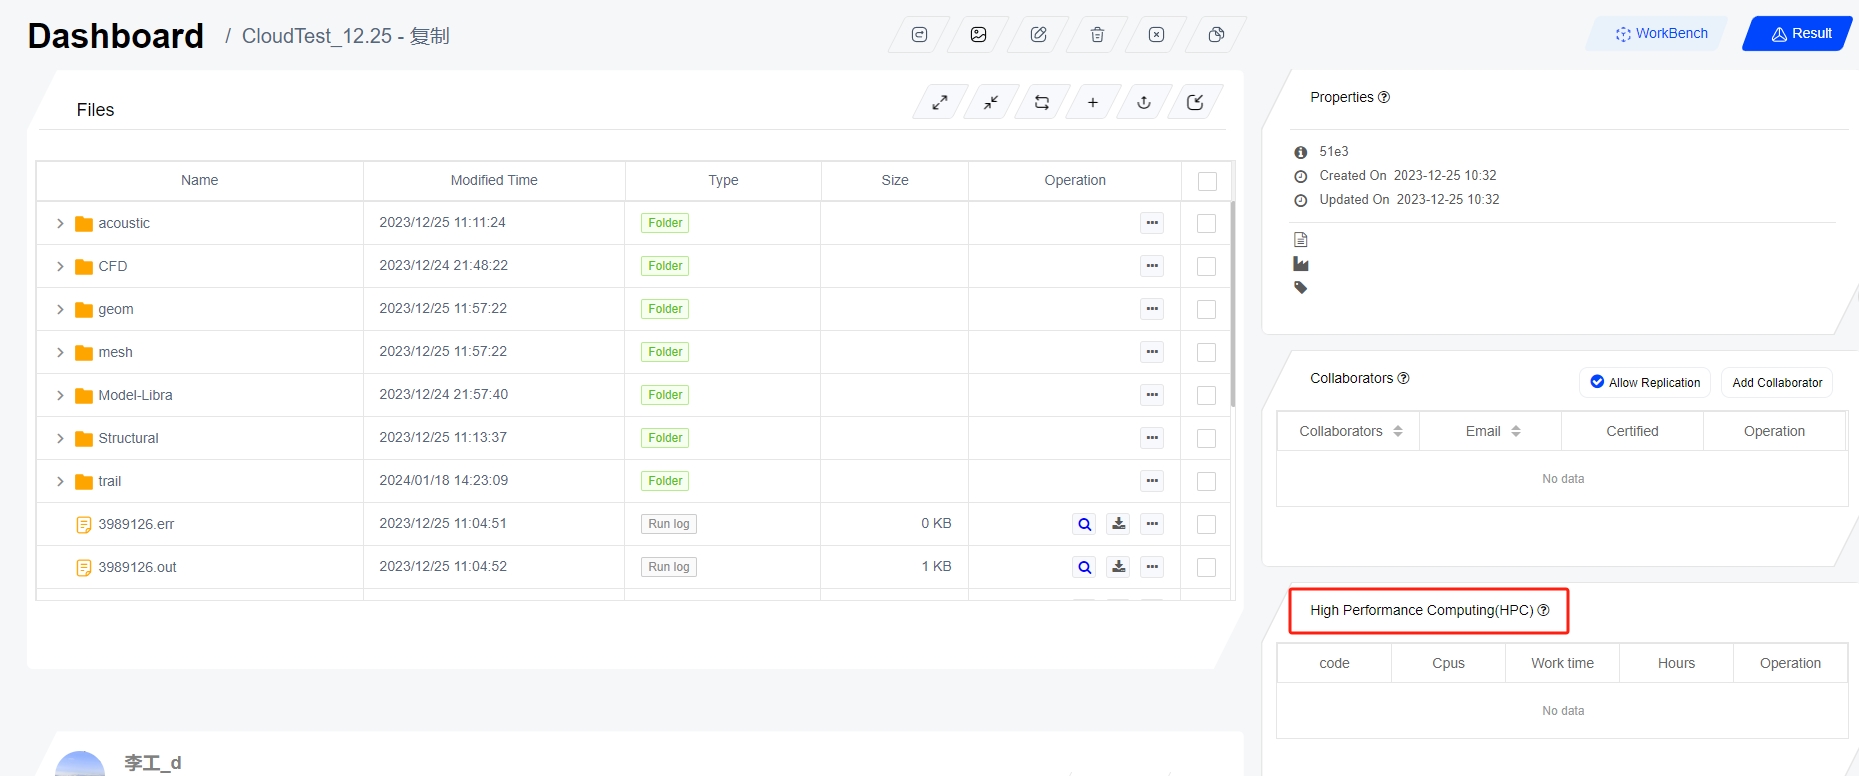
In the log file, you can see a prompt to view the. err (error log) and. out (output log) files in the "file list" (when calculated as a single core, there is no such file, and all outputs are in the Suochen's pre-processing software log), as shown in the following figure: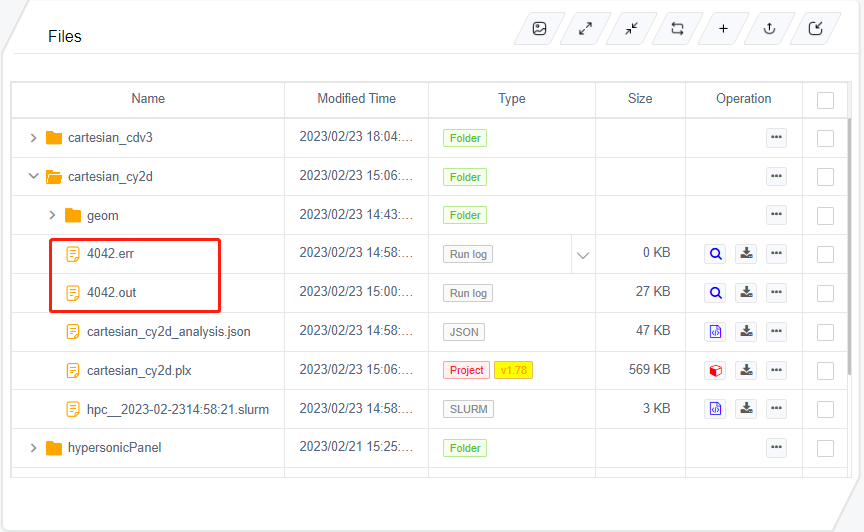
4.3 Turn off High-performance computing
When we need to turn off High-performance computing during the calculation process, we can enter the project details from the work panel, and click the icon in the operation bar in the High-performance computing (HPC) list on the right to stop the high-performance task, as shown below: